8 Fun and Easy DIY Camping Projects to Upgrade Your Gear on a Budget
Picture this: you’re planning your next outdoor adventure, but your wallet feels lighter than your backpack should be. Quality camping gear can cost a fortune, leaving many outdoor enthusiasts wondering if they can afford their next wilderness escape. The good news? You don’t need to break the bank to enjoy premium camping experiences. These 8 fun and easy DIY camping projects to upgrade your gear on a budget will transform your outdoor adventures without emptying your savings account.

Key Takeaways
- DIY camping projects can save 50-80% compared to buying commercial gear while providing custom solutions
- Most projects require basic materials like duct tape, paracord, and repurposed household items
- Simple modifications to existing gear often work better than expensive store-bought alternatives
- Budget-friendly upgrades can significantly improve comfort, organization, and functionality during camping trips
- Hands-on projects create personalized gear that perfectly matches individual camping needs and preferences
Why DIY Camping Gear Makes Perfect Sense
Before diving into these 8 fun and easy DIY camping projects to upgrade your gear on a budget, it’s important to understand why making your own equipment is such a smart choice. Commercial camping gear often comes with hefty price tags that reflect brand marketing costs rather than actual material value. Meanwhile, DIY alternatives use readily available materials to create solutions that are often more durable and better suited to specific needs.
Cost savings represent just one advantage. DIY projects also offer complete customization, allowing campers to create gear that perfectly matches their unique requirements. Plus, there’s something deeply satisfying about using equipment you’ve built with your own hands during outdoor adventures.
“The best camping gear is the gear that works for your specific needs, not what marketing departments think you should buy.” – Outdoor Industry Expert
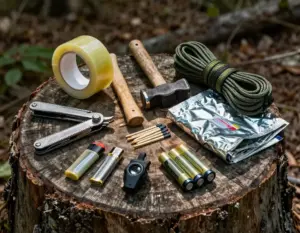
Essential Materials for Budget DIY Projects
Most DIY camping gear upgrades require surprisingly simple materials that cost a fraction of commercial alternatives. Here’s what to keep in your DIY camping toolkit:
Basic Materials:
- Duct tape (various colors and strengths)
- Paracord (550 paracord works for most projects)
- Velcro strips (adhesive-backed)
- Carabiners (lightweight aluminum)
- Zip ties (various sizes)
- Fabric scraps (ripstop nylon preferred)
Tools Needed:
- Sharp scissors or utility knife
- Needle and thread (heavy-duty)
- Measuring tape
- Permanent markers
- Lighter (for sealing rope ends)
Project Categories: From Simple to Advanced
These 8 fun and easy DIY camping projects to upgrade your gear on a budget range from 15-minute quick fixes to weekend builds. Each project includes difficulty ratings, time estimates, and material costs to help you choose the right upgrades for your skill level and schedule.
Difficulty Levels:
- 🟢 Beginner: No special skills required
- 🟡 Intermediate: Basic crafting experience helpful
- 🔴 Advanced: Some technical knowledge needed
4 Quick and Simple DIY Camping Upgrades
1. Paracord Lantern Hanger System 🟢
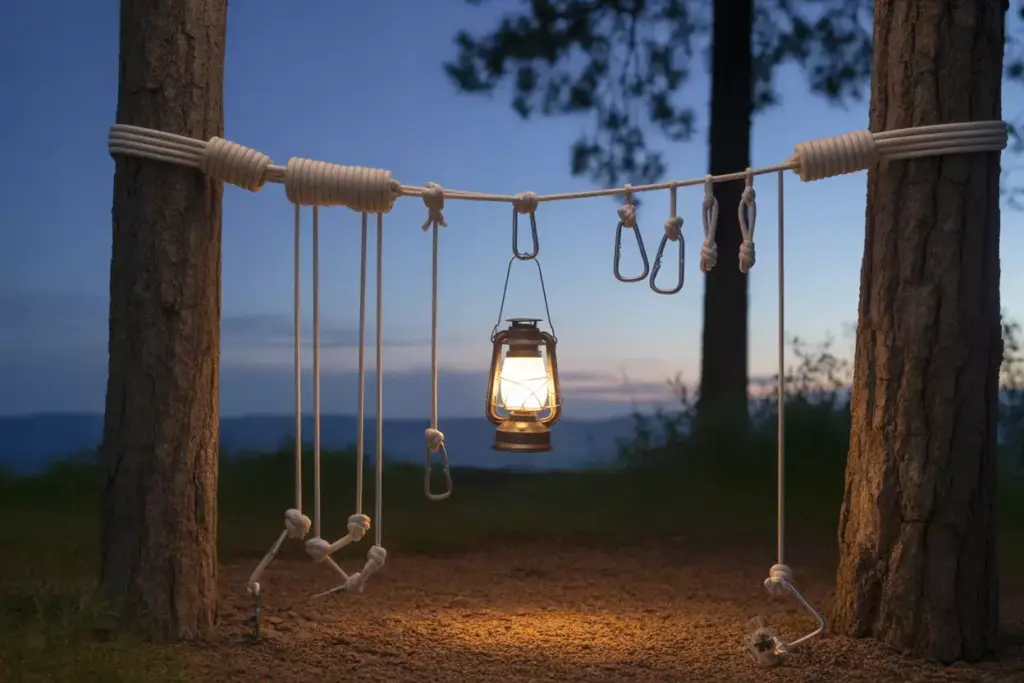
Time Required: 20 minutes
Cost: Under $10
Materials: 15 feet paracord, 2 carabiners
Transform any campsite into a well-lit outdoor living space with this versatile lighting solution. This project creates an adjustable system for hanging lanterns, phones, or other lightweight items exactly where you need them.
Step-by-Step Instructions:
- Cut paracord into two 7-foot sections, saving 1 foot for adjustments
- Create loops at both ends of each section using bowline knots
- Attach carabiners to one end of each rope section
- String between trees or tent anchor points at desired height
- Adjust tension by moving carabiner positions
Pro Tips:
- Use reflective paracord for better nighttime visibility
- Add small carabiners every 2 feet for multiple hanging points
- Practice knots at home before your camping trip
This simple upgrade eliminates the frustration of inadequate campsite lighting while keeping essential items within easy reach.
2. Duct Tape Gear Repair Kit 🟢
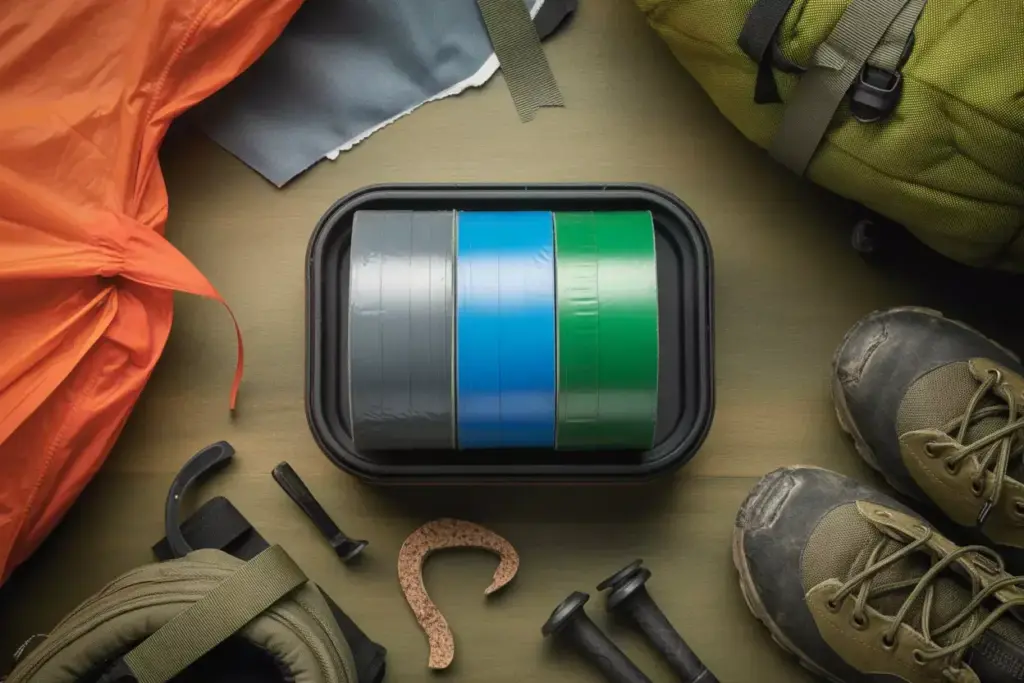
Time Required: 15 minutes
Cost: Under $8
Materials: Duct tape (3 colors), small container
Every camper needs a comprehensive repair kit, but commercial versions cost $20-30 for basic supplies. This DIY version provides more versatility at a fraction of the cost.
Assembly Process:
- Wind different colored duct tape around a small container or trekking pole
- Include standard silver for general repairs
- Add colored tape that matches your tent and gear
- Wrap 10-15 feet of each type for comprehensive coverage
- Store in waterproof container with repair instructions
Common Repair Applications:
- Tent tears and zipper reinforcement
- Sleeping pad punctures (temporary fix)
- Backpack strap reinforcement
- Boot sole emergency attachment
- Tarp corner reinforcement
3. Custom Camp Kitchen Organizer 🟡
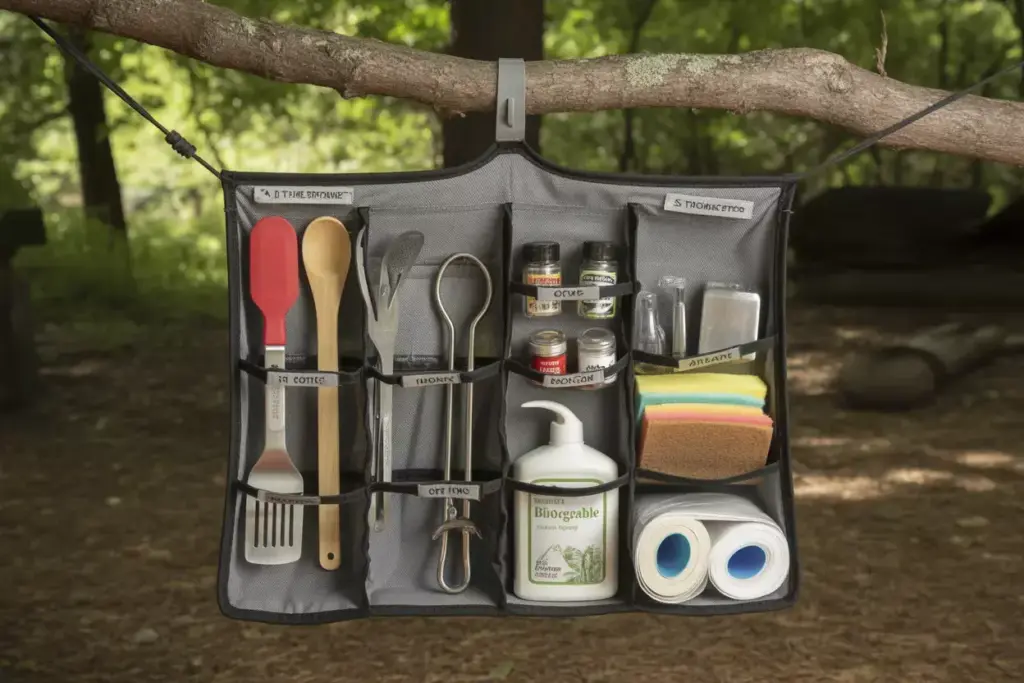
Time Required: 45 minutes
Cost: Under $15
Materials: Mesh laundry bag, elastic cord, fabric markers
Camp kitchen organization often becomes chaotic without proper storage solutions. This project creates a hanging organizer that keeps cooking supplies accessible and organized.
Construction Steps:
- Identify mesh bag sections for different item categories
- Add elastic cord horizontally across bag interior
- Create utensil loops using additional elastic
- Label sections with permanent fabric markers
- Add carabiner attachment points for easy hanging
Organization Categories:
- Cooking utensils (spatulas, spoons, tongs)
- Spices and seasonings (in small containers)
- Can opener and bottle opener
- Cleaning supplies (biodegradable soap, sponges)
- Trash bags and recycling containers
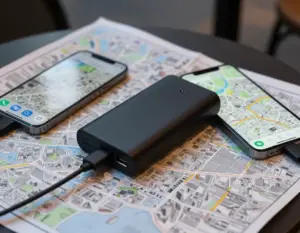
4. Waterproof Phone Protection System 🟢
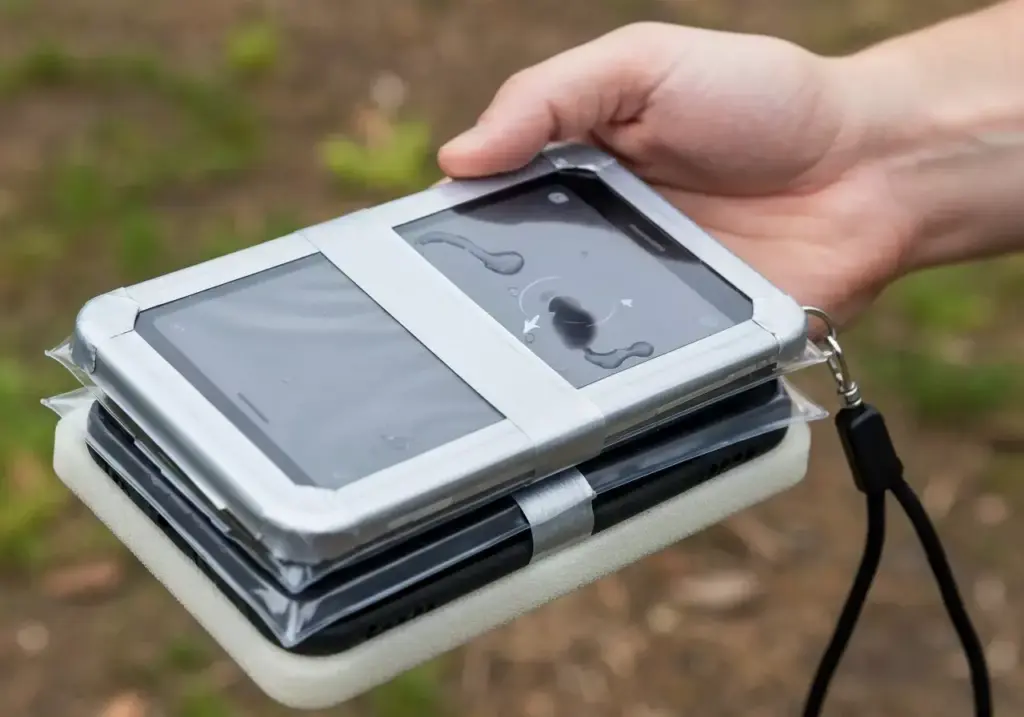
Time Required: 10 minutes
Cost: Under $5
Materials: Heavy-duty ziplock bags, duct tape, lanyard
Smartphone protection is crucial for modern camping, but waterproof cases cost $30-50. This DIY solution provides excellent protection while maintaining touchscreen functionality.
Assembly Instructions:
- Double-bag phone in heavy-duty ziplock bags
- Seal edges with duct tape for extra security
- Attach lanyard through tape reinforcement
- Test touchscreen responsiveness through plastic
- Create backup system with additional bags
Advanced Features:
- Add foam padding for impact protection
- Include backup battery in same waterproof system
- Attach to gear using carabiner and lanyard
- Test underwater before relying on protection
4 Advanced DIY Camping Project Ideas
5. Portable Camp Shower System 🟡
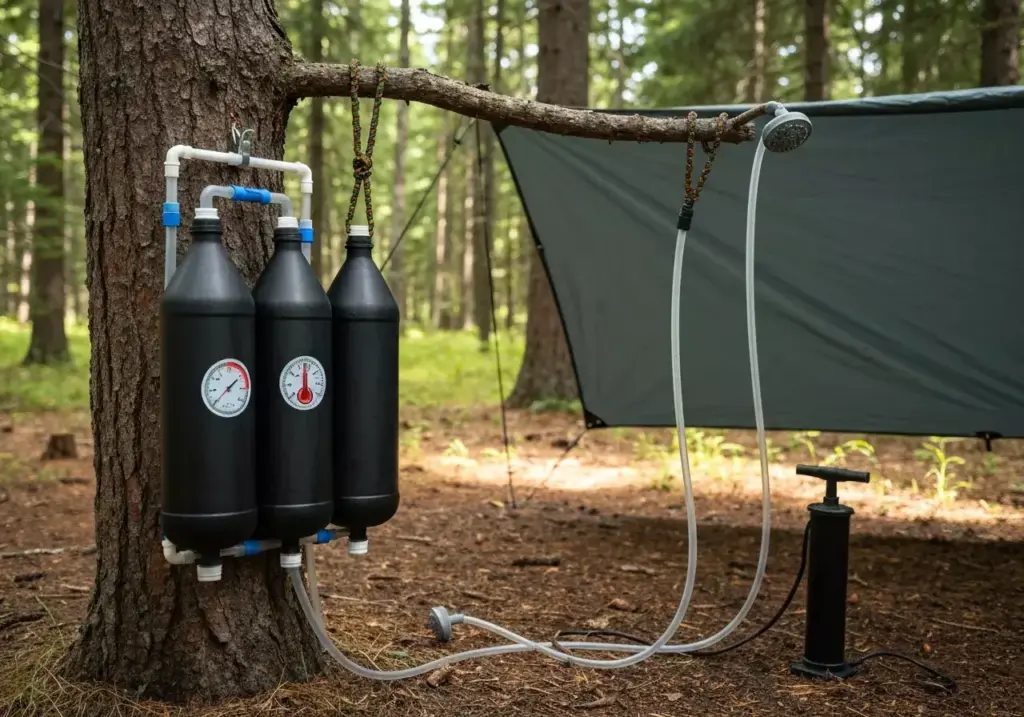
Time Required: 90 minutes
Cost: Under $25
Materials: 2-liter bottles (3), tubing, shower head, pump
Personal hygiene becomes challenging during extended camping trips. This gravity-fed shower system provides hot water capability and adjustable pressure for comfortable outdoor bathing.
System Components:
Water Reservoir:
- Connect 2-liter bottles using waterproof fittings
- Paint bottles black for solar heating capability
- Add temperature gauge sticker for safety monitoring
- Include filling funnel for easy water addition
Delivery System:
- Install adjustable shower head with on/off control
- Add 6 feet of flexible tubing for maneuverability
- Create hanging system using paracord and carabiners
- Include foot pump for pressurization option
Usage Tips:
- Fill in morning for afternoon heated water
- Add biodegradable soap directly to reservoir
- Position 6 feet above shower area for adequate pressure
- Use privacy tarp for complete outdoor bathroom setup
6. Multi-Pocket Camp Chair Upgrade 🟡

Time Required: 2 hours
Cost: Under $20
Materials: Fabric, velcro, thread, measuring tape
Standard camp chairs lack adequate storage, forcing campers to keep essentials on the ground or in distant bags. This upgrade adds multiple organized pockets without compromising chair functionality.
Pocket Configuration:
Side Pockets (2):
- Beverage holder with insulation layer
- Phone/GPS storage with easy access opening
- Snack compartment with secure closure
- Headlamp holder for evening use
Back Panel Storage:
- Magazine/book pocket for entertainment
- First aid supplies in labeled compartment
- Sunscreen and insect repellent storage
- Trash collection pocket with removable liner
Construction Process:
- Measure chair dimensions carefully for proper fit
- Cut fabric pieces with 1-inch seam allowances
- Sew pockets individually before attaching to main panel
- Add velcro strips for removable attachment system
- Reinforce stress points with additional stitching
- Test fit and adjust before final assembly
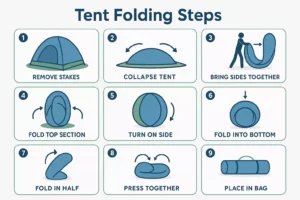
7. Custom Tent Footprint and Vestibule 🔴
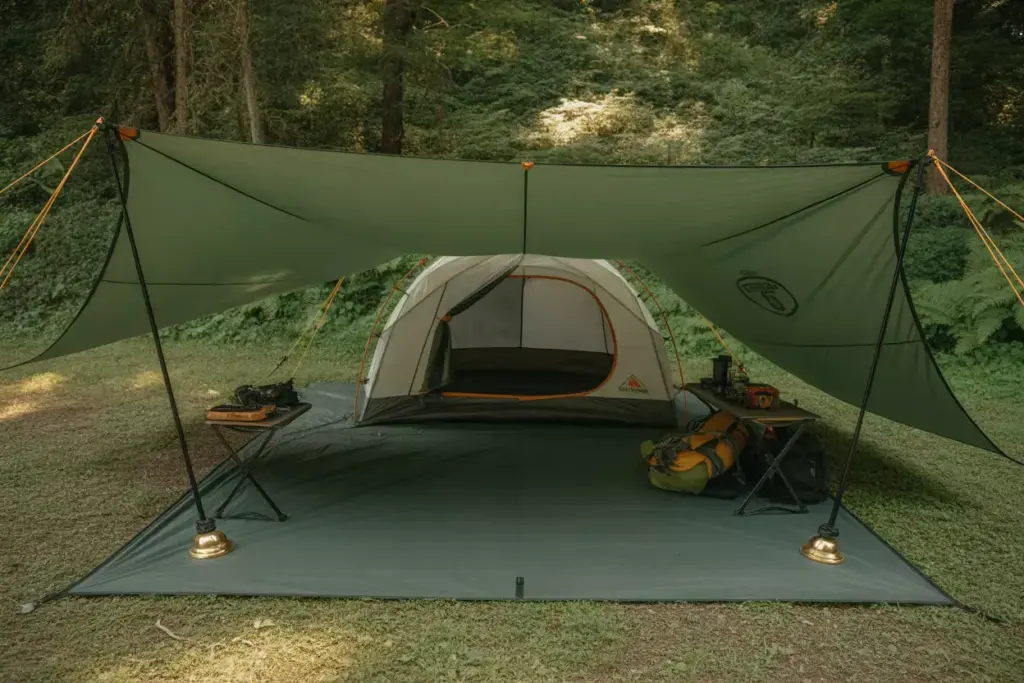
Time Required: 3 hours
Cost: Under $35
Materials: Tarp material, grommets, seam sealer, measuring tools
Tent protection and additional covered space significantly improve camping comfort. This project creates a custom-fitted ground cover and extended vestibule area for gear storage and weather protection.
Design Considerations:
Footprint Specifications:
- Size 2 inches smaller than tent floor on all sides
- Waterproof rating of at least 3000mm
- Reinforced corners with additional material layers
- Grommet placement matching tent anchor points
Vestibule Extension:
- Additional 4 feet of covered space beyond tent door
- Adjustable height using trekking poles or dedicated poles
- Side panels for wind and rain protection
- Guy-line attachment points for stability
Construction Steps:
- Create paper template using tent as guide
- Cut tarp material following template precisely
- Install grommets at measured anchor points
- Apply seam sealer to all cut edges
- Test setup with actual tent before camping trip
- Add guy-lines and adjustment hardware
Performance Benefits:
- Extended tent life through ground protection
- Dry gear storage in covered vestibule area
- Easier setup on rough or wet ground
- Improved weather resistance during storms
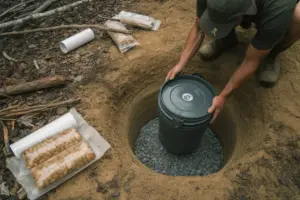
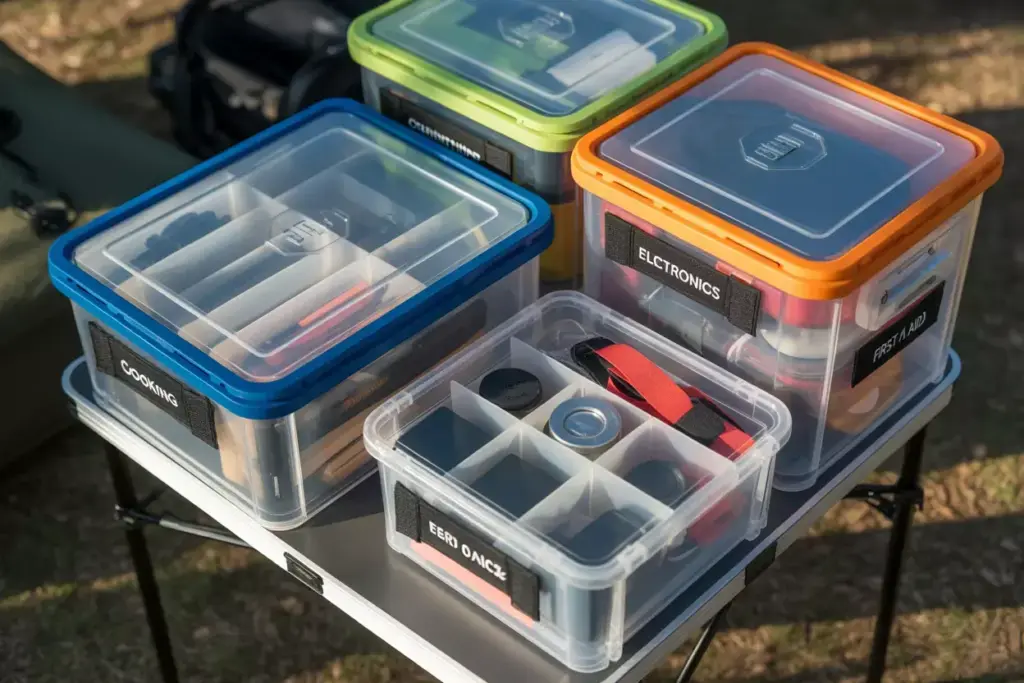
8. Modular Gear Organization System 🔴
Time Required: 4 hours
Cost: Under $40
Materials: Various containers, labels, dividers, mounting hardware
Gear organization can make or break a camping experience. This modular system creates interchangeable storage solutions that adapt to different trip lengths and activities.
System Components:
Base Containers:
- Clear storage boxes in 3 different sizes
- Waterproof seals on all containers
- Stackable design for efficient packing
- Color-coded lids for quick identification
Internal Organization:
- Adjustable dividers for custom compartments
- Foam inserts for fragile items
- Elastic retention systems for secure storage
- Quick-access panels for frequently used items
Mounting Solutions:
- Velcro strips for tent wall attachment
- Carabiner loops for hanging storage
- Magnetic bases for metal surface mounting
- Strap systems for external pack attachment
Category Examples:
Cooking Module:
- Stove and fuel in dedicated compartments
- Utensils and tools with foam protection
- Spices and condiments in leak-proof containers
- Cleaning supplies separated from food items
Electronics Module:
- Charging cables organized by device type
- Backup batteries with charge level indicators
- Memory cards and adapters in labeled slots
- Waterproof protection for sensitive components
First Aid Module:
- Medications with expiration date tracking
- Bandages and tape in easy-access compartments
- Emergency supplies clearly marked and accessible
- Instruction cards laminated for durability
Safety Considerations for DIY Projects
While these 8 fun and easy DIY camping projects to upgrade your gear on a budget offer excellent value and customization, safety must remain the top priority. Always test DIY gear thoroughly before depending on it in wilderness situations.
Testing Protocol:
- Home testing under controlled conditions
- Gradual implementation during day trips before overnight use
- Backup plans for critical safety equipment
- Regular inspection for wear and degradation
Critical Safety Items:
Never DIY items that directly impact life safety, such as:
- Climbing equipment (ropes, harnesses, anchors)
- Emergency communication devices
- Water purification systems (supplement, don’t replace)
- Shelter in extreme conditions (backup commercial gear)
Maintenance and Longevity Tips
DIY camping gear requires regular maintenance to ensure continued performance and safety. Establish a post-trip inspection routine to identify issues before they become problems.
Maintenance Schedule:
After Each Trip:
- Clean all components thoroughly
- Check for wear or damage
- Dry completely before storage
- Repair minor issues immediately
Monthly Inspections:
- Test all moving parts and closures
- Verify waterproofing effectiveness
- Replace worn components proactively
- Update repair kits with fresh supplies
Seasonal Overhauls:
- Complete disassembly and deep cleaning
- Upgrade components based on field experience
- Refresh consumable materials (tape, cord, etc.)
- Document improvements for future projects
Cost Analysis: DIY vs. Commercial Gear
Understanding the financial benefits of these 8 fun and easy DIY camping projects to upgrade your gear on a budget helps justify the time investment and demonstrates long-term value.
| Project | DIY Cost | Commercial Equivalent | Savings | Time Investment |
|---|---|---|---|---|
| Lantern Hanger | $10 | $35 | $25 (71%) | 20 minutes |
| Repair Kit | $8 | $25 | $17 (68%) | 15 minutes |
| Kitchen Organizer | $15 | $45 | $30 (67%) | 45 minutes |
| Phone Protection | $5 | $40 | $35 (88%) | 10 minutes |
| Camp Shower | $25 | $85 | $60 (71%) | 90 minutes |
| Chair Upgrade | $20 | $60 | $40 (67%) | 2 hours |
| Tent Footprint | $35 | $120 | $85 (71%) | 3 hours |
| Organization System | $40 | $150 | $110 (73%) | 4 hours |
Total Project Savings: $402 (71% average savings)
These numbers demonstrate that DIY camping projects typically save 65-75% compared to commercial alternatives while providing superior customization and personal satisfaction.
Troubleshooting Common DIY Issues
Even the best-planned DIY camping projects sometimes encounter problems. Here are solutions to the most common issues:
Material Failures:
- Duct tape adhesion problems: Clean surfaces with alcohol before application
- Fabric tearing: Reinforce stress points with additional layers
- Hardware corrosion: Use marine-grade materials in humid conditions
Design Issues:
- Poor fit: Create templates and test thoroughly before final assembly
- Inadequate capacity: Overestimate storage needs by 25%
- Stability problems: Add guy-lines and anchor points for wind resistance
Performance Problems:
- Water intrusion: Apply seam sealer generously and test underwater
- Wear patterns: Identify high-stress areas and reinforce proactively
- User interface: Simplify operation for use in dark or cold conditions
Expanding Your DIY Skills
Success with these 8 fun and easy DIY camping projects to upgrade your gear on a budget often inspires campers to tackle more ambitious builds. Consider these skill development paths:
Beginner to Intermediate:
- Learn basic sewing techniques for fabric projects
- Practice knot tying for rope and cord applications
- Understand waterproofing materials and techniques
Intermediate to Advanced:
- Electronics integration for lighting and charging systems
- Advanced fabric work including seam sealing and reinforcement
- Custom metalwork for specialized hardware solutions
Community Resources:
- Online forums for project sharing and troubleshooting
- Local maker spaces with tools and expertise
- Camping clubs with experienced DIY enthusiasts
Seasonal Adaptations
These DIY camping projects can be modified for different seasons and conditions:
Summer Modifications:
- Increased ventilation in storage systems
- UV protection for exposed materials
- Insect screening additions
- Heat reflection features
Winter Adaptations:
- Insulation layers for warmth retention
- Snow load considerations for structural projects
- Cold weather materials that remain flexible
- Condensation management features
Rainy Season Upgrades:
- Enhanced waterproofing on all projects
- Drainage features for water management
- Quick-dry materials for faster setup/breakdown
- Mold resistance treatments
Conclusion
These 8 fun and easy DIY camping projects to upgrade your gear on a budget prove that exceptional outdoor experiences don’t require expensive equipment. By investing modest amounts of time and money, campers can create personalized solutions that often outperform commercial alternatives while saving hundreds of dollars.
Start with simple projects like the paracord lantern hanger or duct tape repair kit to build confidence and skills. As comfort with DIY techniques grows, tackle more advanced builds like the modular organization system or custom tent footprint.
Remember that safety comes first – always test new gear thoroughly and maintain backup options for critical equipment. With proper planning and execution, these DIY projects will enhance camping adventures for years to come while keeping more money in your pocket for additional outdoor experiences.
Take action today by choosing one project that addresses your most pressing camping gear need. Gather the materials, set aside the required time, and start building gear that’s perfectly suited to your outdoor adventures. Your future camping self will thank you for the improved comfort, organization, and functionality these budget-friendly upgrades provide.