Ozark 8 Person Tent And First Time Camp Setup: Your Complete Guide to Outdoor Adventure
Picture this: you’re standing in the great outdoors, surrounded by towering trees and fresh mountain air, but your tent looks like it’s been through a tornado. Your family is watching expectantly as you wrestle with poles, stakes, and a seemingly endless amount of fabric. Sound familiar? Don’t worry – setting up your first Ozark 8 person tent doesn’t have to be a comedy of errors.

The Ozark Trail 8 person tent has become one of the most popular choices for families and groups seeking affordable, spacious camping accommodations. With its generous interior space and budget-friendly price point, it’s an excellent entry point for newcomers to the camping world. However, like any large tent, proper setup requires knowledge, preparation, and the right techniques.
Key Takeaways
- Pre-trip preparation is crucial – practice setting up your Ozark 8 person tent at home before your camping trip
- Choose the right campsite with level ground, proper drainage, and protection from wind and hazards
- Follow a systematic setup process including site preparation, tent assembly, and weatherproofing
- Pack essential camping gear beyond just the tent, including first aid supplies and proper clothing
- Plan for comfort and safety with proper ventilation, secure staking, and organized interior space
Understanding Your Ozark 8 Person Tent
Tent Specifications and Features
The Ozark Trail 8 person tent typically measures 14 x 10 feet with a center height of approximately 6 feet. This spacious design provides enough room for multiple sleeping areas or a combination of sleeping and living space. Most models feature:
- Two rooms separated by a removable divider
- Multiple windows with mesh screens for ventilation
- Two doors for easy access and emergency exits
- Weather-resistant materials including polyester fabric and sealed seams
- Color-coded poles for easier assembly
- Electrical cord access port for powered campsites
What’s Included in the Package
When you purchase an Ozark 8 person tent, you’ll typically receive:
- Main tent body with attached rainfly
- Tent poles (usually color-coded)
- Stakes and guy lines
- Carry bag
- Setup instructions
Important Note: Always inventory all components before leaving for your trip. Missing stakes or poles can turn your camping adventure into a frustrating experience.
Pre-Camping Preparation
Practice Setup at Home
The most crucial step for first-time campers is practicing tent setup in your backyard or a local park. This practice session allows you to:
- Familiarize yourself with the pole system
- Identify any missing components
- Time your setup process
- Understand the tent’s orientation and features
- Practice in daylight before attempting setup at dusk
Pro Tip: Take photos during your practice setup to reference later when you’re at the campsite.
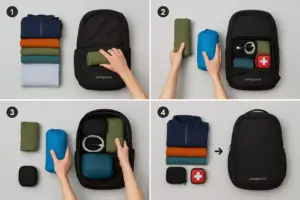
Essential Gear Checklist
Beyond your tent, successful camping requires proper equipment. Here’s what you’ll need:
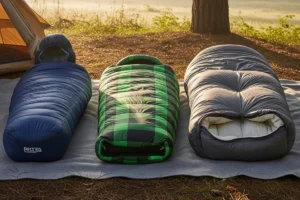
Shelter and Sleep System:
- Ozark 8 person tent
- Ground tarp or footprint
- Sleeping bags for all campers
- Sleeping pads or air mattresses
- Pillows or inflatable pillows
Cooking and Food:
- Camping stove and fuel
- Cookware and utensils
- Cooler with ice
- Water purification supplies
- Non-perishable food items
Safety and Navigation:
- First aid kit
- Flashlights and headlamps
- Extra batteries
- Maps and compass/GPS
- Emergency whistle
Personal Items:
- Weather-appropriate clothing
- Personal hygiene items
- Sunscreen and insect repellent
- Medications
For a comprehensive packing guide, check out our detailed article on how to pack your backpack for camping.
Choosing the Perfect Campsite

Site Selection Criteria
Selecting the right campsite location significantly impacts your camping experience and tent setup success. Look for these characteristics:
Level Ground:
- Avoid slopes that will cause you to roll during sleep
- Check for rocks, roots, or debris that could damage your tent floor
- Use a small shovel to clear minor obstacles
Drainage Considerations:
- Avoid low-lying areas where water might collect
- Look for slight elevation to encourage water runoff
- Check for natural drainage patterns around your site
Wind Protection:
- Position your tent to minimize wind exposure
- Use natural windbreaks like trees or rock formations
- Consider prevailing wind direction in your area
Safety Factors:
- Avoid camping under dead tree branches (“widow makers”)
- Stay away from cliff edges or unstable terrain
- Ensure adequate distance from water sources (usually 200 feet minimum)
- Check local regulations for campfire restrictions
Site Preparation Steps
Once you’ve selected your ideal spot, prepare the area properly:
- Clear the ground of rocks, sticks, and debris
- Level any minor irregularities using available materials
- Lay down a ground tarp slightly smaller than your tent footprint
- Mark your tent corners to ensure proper orientation
Step-by-Step Tent Setup Process
🏕️ Ozark 8 Person Tent Setup Guide
Follow these steps for a successful tent setup
Step 1: Site Preparation
- Clear the ground of rocks, sticks, and debris
- Lay down ground tarp or footprint
- Ensure level surface for comfortable sleeping
- Check wind direction and position tent accordingly
Step 2: Tent Layout
- Remove tent from carry bag and unfold completely
- Identify the tent floor and orient doors properly
- Spread tent flat on ground tarp
- Locate all pole sleeves and attachment points
Step 3: Pole Assembly
- Connect pole sections following color-coding system
- Ensure all pole connections are fully seated
- Check for any bent or damaged pole sections
- Organize poles by length and purpose
Step 4: Tent Assembly
- Thread main poles through designated sleeves
- Insert pole ends into corner grommets
- Raise tent structure gradually and evenly
- Attach rainfly and secure all clips
Step 5: Securing the Tent
- Stake out all corner attachment points
- Adjust guy lines for proper tension
- Ensure rainfly is taut and properly positioned
- Test all zippers and door functions
Step 6: Final Check
- Walk around tent checking all stakes and guy lines
- Test ventilation windows and mesh screens
- Organize interior space and set up sleeping areas
- Store gear properly and secure loose items
Detailed Setup Instructions
Step 1: Unpack and Inventory
Begin by removing your tent from its carry bag and laying out all components. Count poles, stakes, and guy lines to ensure nothing is missing. This is also an excellent time to check for any damage that might have occurred during transport.
Step 2: Position the Tent Body
Spread your tent flat on the prepared ground tarp. Orient the tent so doors face away from prevailing winds and toward your desired view or camp kitchen area. The Ozark 8 person tent typically has two doors, so consider traffic flow and convenience.
Step 3: Assemble the Pole System
Most Ozark tents use a color-coded pole system:
- Main structural poles (usually the longest)
- Secondary support poles
- Rainfly poles (if separate)
Connect pole sections firmly, ensuring each joint is fully seated. Bent or partially connected poles can fail under stress.
Step 4: Insert Poles and Raise Structure
Thread poles through the designated sleeves or attach to clips, depending on your tent model. Work systematically:
- Insert main structural poles first
- Secure pole ends in corner grommets
- Gradually raise the tent structure
- Add secondary poles for additional support
Step 5: Attach and Adjust Rainfly
The rainfly provides crucial weather protection. Ensure it’s properly oriented and covers all mesh areas. Attach all clips and adjust tension for optimal water runoff.
Step 6: Stake and Secure
Proper staking is essential for tent stability:
- Drive stakes at a 45-degree angle away from the tent
- Maintain even tension on all guy lines
- Check that the tent floor is taut but not overstretched
Interior Organization and Comfort
Maximizing Space Efficiency
The Ozark 8 person tent offers substantial interior space, but organization is key to comfort:
Sleeping Area Setup:
- Use the removable divider to create separate sleeping and living areas
- Position sleeping bags away from doors to minimize disturbance
- Place sleeping pads or air mattresses for insulation and comfort
Gear Storage Solutions:
- Utilize corner areas for backpacks and larger items
- Hang small items from interior loops
- Keep frequently used items near doors for easy access
- Store food in sealed containers to prevent wildlife encounters
Ventilation Management:
- Open mesh windows during mild weather for airflow
- Adjust rainfly vents to prevent condensation
- Create cross-ventilation when possible
Creating Comfort for Families
If you’re camping with kids, additional considerations include:
- Designating specific areas for children’s gear
- Creating a safe play space during inclement weather
- Organizing activities and entertainment for rainy days
- Ensuring easy nighttime bathroom access
Weather Considerations and Protection

Preparing for Rain
Weather can change quickly in outdoor environments. Prepare your Ozark tent for wet conditions:
Before the Storm:
- Double-check all rainfly attachments
- Ensure guy lines are properly tensioned
- Clear drainage areas around your tent
- Secure or store loose items that could blow away
During Rain:
- Avoid touching tent walls from inside (causes leaking)
- Maintain ventilation to prevent condensation
- Keep wet gear in designated areas
- Monitor for water pooling around the tent
Wind Protection Strategies
Large tents like the Ozark 8 person model can catch significant wind. Protect your setup by:
- Using all provided guy lines and stakes
- Adding extra stakes if conditions warrant
- Positioning the tent’s narrow end toward prevailing winds
- Creating windbreaks with natural features or camp furniture
Cold Weather Adaptations
When temperatures drop, consider these modifications:
- Add extra insulation under sleeping areas
- Use appropriate cold weather clothing
- Minimize ventilation to retain heat (while preventing condensation)
- Keep batteries and electronics warm to maintain function
Common Setup Mistakes and Solutions
Mistake #1: Inadequate Site Preparation
Problem: Rushing through site selection and preparation
Solution: Take time to properly clear and level your campsite. A few extra minutes of preparation saves hours of discomfort later.
Mistake #2: Improper Pole Assembly
Problem: Forcing bent or misaligned poles
Solution: If poles don’t fit easily, stop and reassess. Check for proper orientation and full connection of pole sections.
Mistake #3: Poor Staking Technique
Problem: Stakes driven straight down or inadequate tension
Solution: Drive stakes at 45-degree angles and maintain consistent tension on all guy lines.
Mistake #4: Ignoring Weather Conditions
Problem: Not adjusting setup for current or predicted weather
Solution: Monitor weather forecasts and adapt your setup accordingly. Prevention is easier than correction.
Safety Considerations for First-Time Campers
Essential Safety Equipment
Beyond your tent setup, prioritize safety with proper equipment:
- Comprehensive first aid kit with bandages, antiseptic, and medications
- Multiple light sources including flashlights, headlamps, and lanterns
- Emergency communication device (cell phone, satellite communicator, or radio)
- Water purification supplies for safe drinking water
Emergency Preparedness
Prepare for unexpected situations:
- Know the location of nearest medical facilities
- Inform others of your camping plans and expected return
- Understand local wildlife precautions
- Have evacuation plans for severe weather
Fire Safety
If your campsite allows fires:
- Use only designated fire rings
- Keep water or sand nearby for extinguishing
- Never leave fires unattended
- Fully extinguish before sleeping or leaving camp
For safe cooking practices, explore our guide on campfire cooking for morning meals.
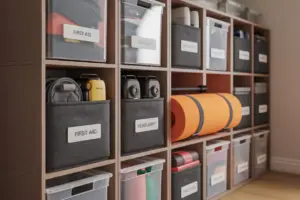
Maintenance and Care Tips

During Your Trip
Proper tent care extends its lifespan significantly:
Daily Maintenance:
- Shake out debris from tent floor
- Check guy lines and stakes for loosening
- Wipe down wet surfaces when possible
- Keep zippers clean and functional
Weather Response:
- Adjust ventilation based on conditions
- Re-tension guy lines after wind or rain
- Clear snow or debris from rainfly
- Monitor for wear or damage
Post-Trip Care
After your camping adventure:
- Clean thoroughly before packing
- Dry completely to prevent mold and mildew
- Inspect for damage and make necessary repairs
- Store properly in a cool, dry location
- Organize components for easy next-time setup
Advanced Tips for Experienced Campers
Customization Options
As you gain experience, consider these enhancements:
Footprint Upgrades:
- Custom-cut ground tarps for better fit
- Reflective insulation for cold weather
- Breathable materials for improved comfort
Ventilation Improvements:
- Additional guy lines for better rainfly management
- Portable fans for hot weather camping
- Strategic tarp placement for extended coverage
Organization Systems:
- Interior organizers and pockets
- Gear lofts for maximum floor space
- Modular storage solutions
Site Selection Mastery
Advanced campers develop skills in:
- Reading topographical features for drainage
- Understanding microclimate effects
- Identifying optimal sun and shade patterns
- Recognizing potential hazards before they become problems
Troubleshooting Common Issues
Condensation Problems
Symptoms: Water droplets forming inside tent
Solutions:
- Increase ventilation
- Avoid breathing directly on tent walls
- Use moisture-absorbing materials
- Ensure proper rainfly setup
Leaking Issues
Symptoms: Water entering tent during rain
Solutions:
- Check seam sealing and reapply if necessary
- Ensure rainfly covers all mesh areas
- Verify guy line tension and stake security
- Avoid touching tent walls during rain
Stability Problems
Symptoms: Tent moving or collapsing in wind
Solutions:
- Add additional stakes and guy lines
- Reposition tent orientation
- Use heavier objects to weight down stakes
- Consider relocating to more protected site
Building Your Camping Skills
Progressive Skill Development
Start with basic car camping and gradually build skills:
- Weekend trips to nearby campgrounds
- Extended stays to practice routine development
- Varied weather conditions to test equipment and skills
- Remote locations as confidence grows
Learning Resources
Continue developing camping expertise through:
- Local outdoor clubs and organizations
- Online communities and forums
- Outdoor skills workshops
- Mentorship from experienced campers
Consider expanding your outdoor knowledge with our comprehensive guides on bushcraft and survival skills.
Conclusion
Setting up your Ozark 8 person tent successfully requires preparation, patience, and practice. By following the systematic approach outlined in this guide, first-time campers can avoid common pitfalls and create a comfortable, safe outdoor experience.
Remember that camping skills develop over time. Each trip provides opportunities to refine your techniques and discover what works best for your specific needs and preferences. The key is to start with proper preparation, maintain safety as your top priority, and remain flexible as conditions change.
Your Next Steps:
- Practice setup at home before your first trip
- Create a comprehensive gear checklist tailored to your needs
- Start with nearby campgrounds to build confidence
- Join local camping communities for tips and companionship
- Document your experiences to improve future trips
The great outdoors awaits, and with your Ozark 8 person tent properly set up, you’re ready to create lasting memories under the stars. Whether you’re planning a family adventure or a group getaway, the skills you’ve learned here will serve as the foundation for countless successful camping experiences.
For additional camping resources and detailed guides on specific outdoor skills, explore our comprehensive collection of camping and outdoor articles to enhance your outdoor adventures.