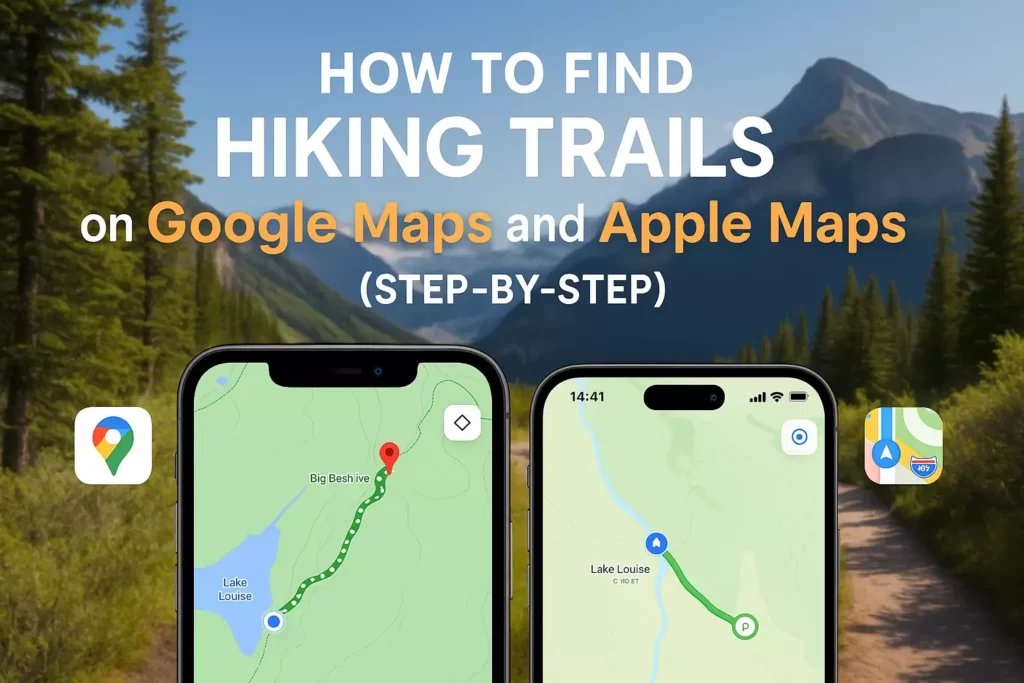
How to Find Hiking Trails on Google Maps and Apple Maps (Step-by-Step)
Finding the perfect hiking trail for your next outdoor adventure doesn’t have to involve hours of research or expensive guidebooks. Your smartphone holds the key to discovering thousands of trails right at your fingertips. With Google Maps and Apple Maps becoming increasingly sophisticated, these everyday navigation tools have evolved into powerful hiking companions that can help you locate, evaluate, and navigate trails anywhere in the world.
Whether you’re a seasoned hiker looking for your next challenge or a beginner seeking family-friendly paths, learning to effectively use these mapping platforms will transform how you plan your outdoor adventures. From hidden local gems to well-known national park trails, the right search techniques can unlock a world of hiking possibilities you never knew existed.
Key Takeaways
- Google Maps offers more comprehensive trail data with detailed reviews, photos, and elevation profiles for most hiking locations
- Apple Maps excels in user experience with cleaner interfaces and better integration with iOS devices for seamless navigation
- Both platforms allow offline map downloads for hiking in areas with poor cell service
- Advanced search filters and keywords can help you find trails that match your specific difficulty level and preferences
- Cross-referencing both apps provides the most complete picture of trail conditions, reviews, and navigation options
Why Use Google Maps and Apple Maps for Hiking?
Modern mapping applications have revolutionized how outdoor enthusiasts discover and navigate hiking trails. Unlike traditional paper maps or specialized hiking apps that often require subscriptions, Google Maps and Apple Maps are free, constantly updated, and already installed on most smartphones.
These platforms offer several key advantages:
Real-time Information: Trail conditions, closures, and user reviews are updated regularly by the hiking community, giving you current information before you head out.
Comprehensive Coverage: From popular national park trails to lesser-known local paths, both platforms maintain extensive databases of hiking locations worldwide.
Multi-modal Planning: You can plan your entire trip, from driving directions to the trailhead to the hiking route itself, all within a single application.
Community Insights: User-generated photos, reviews, and ratings provide valuable insights into trail difficulty, scenic highlights, and current conditions.
Before heading out on any hiking adventure, it’s essential to be properly prepared. Make sure you have the right gear, including items from a well-stocked first aid kit and know how to purify water for drinking in case of emergencies.
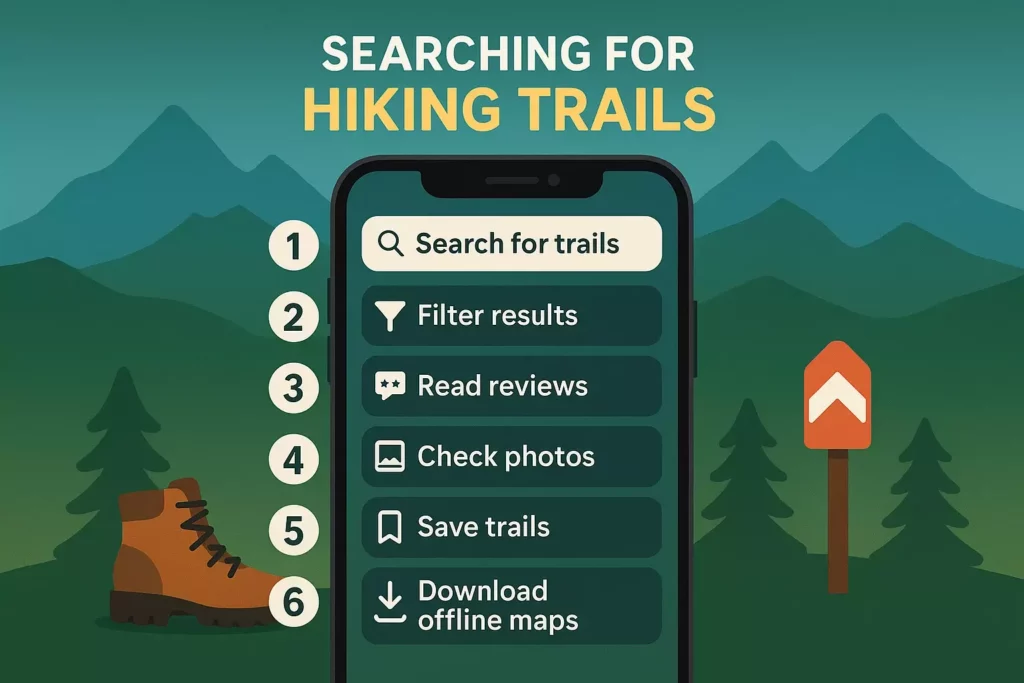
Finding Hiking Trails on Google Maps
Google Maps has become one of the most reliable tools for discovering hiking trails, thanks to its extensive database and user-generated content. Here’s how to maximize your trail-finding success:
Basic Search Techniques
Start with Simple Keywords: Begin your search with terms like “hiking trails near me,” “nature trails,” or “walking paths.” Google Maps will display nearby options with trail markers and green pathway indicators.
Use Location-Specific Searches: Combine your destination with hiking terms, such as “Yellowstone hiking trails” or “trails near Denver, Colorado” for more targeted results.
Leverage the “Explore” Feature: Tap the “Explore” button at the bottom of the Google Maps interface to see curated lists of outdoor activities, including hiking trails in your area.
Advanced Search Strategies
Filter by Trail Type: Use specific keywords to find the type of hiking experience you want:
- “Easy hiking trails” for beginner-friendly options
- “Mountain trails” for challenging terrain
- “Loop trails” for circular routes
- “Waterfall hikes” for scenic destinations
Search by Distance: Include distance parameters like “5-mile hiking trails” or “short hikes under 3 miles” to match your fitness level and available time.
Use the Terrain View: Switch to terrain view to see elevation changes, which helps identify the difficulty level of potential trails before you commit to hiking them.
Reading Trail Information
When you select a trail on Google Maps, pay attention to these key details:
User Reviews and Ratings: Read recent reviews for current trail conditions, difficulty assessments, and seasonal considerations. Look for reviews from the past few months for the most relevant information.
Photo Galleries: Browse user-uploaded photos to get a visual sense of the trail’s scenery, terrain, and current conditions. Photos often reveal details not mentioned in text reviews.
Hours and Accessibility: Check if the trail or park has specific operating hours, entrance fees, or seasonal closures that might affect your plans.
Saving and Organizing Trails
Create Custom Lists: Save interesting trails to custom lists like “Weekend Hikes,” “Family-Friendly Trails,” or “Challenging Adventures” for easy future reference.
Download Offline Maps: Before heading to areas with poor cell service, download offline maps of the trail area to ensure you can navigate even without internet connectivity.
Finding Hiking Trails on Apple Maps

Apple Maps has significantly improved its hiking trail coverage and offers several unique features that make it an excellent choice for trail discovery, especially for iOS users.
Basic Navigation and Search
Voice Search Integration: Use Siri to search for trails hands-free by saying “Hey Siri, find hiking trails near me” or “Show me trails in [location name].”
Look Around Feature: In supported areas, use the Look Around feature to get a street-level preview of trailheads and parking areas before you arrive.
Integration with Other Apps: Apple Maps seamlessly connects with other iOS apps, allowing you to easily share trail information or add hiking plans to your calendar.
Apple Maps Unique Features
Curated Guides: Apple Maps often features curated hiking guides for popular destinations, created by local experts and outdoor organizations. These guides highlight the best trails in specific regions.
Detailed Trail Markers: Apple Maps displays clear trail markers and pathway indicators, often with different colors to distinguish between hiking trails, bike paths, and walking routes.
Weather Integration: The app integrates with iOS weather services to show current conditions at trail locations, helping you plan appropriate gear and timing.
Using Apple Maps for Trail Planning
Flyover Mode: For supported locations, use Flyover mode to get a 3D aerial view of the trail area, helping you understand the terrain and surrounding landscape.
Favorites and Collections: Organize your trail discoveries using the Favorites feature or create Collections to group trails by region, difficulty, or type.
Share Trail Information: Easily share trail locations with hiking partners through Messages, email, or other communication apps directly from Apple Maps.
Step-by-Step Guide: Google Maps Trail Search
Follow this detailed process to find the perfect hiking trail using Google Maps:
Step 1: Open Google Maps and Set Your Location
- Launch the Google Maps app on your device
- Ensure location services are enabled for accurate nearby results
- Tap the search bar at the top of the screen
Step 2: Enter Your Search Terms
- Type “hiking trails” followed by your desired location
- For nearby trails, use “hiking trails near me”
- For specific areas, try “hiking trails in [park name]” or “[city name] hiking”
Step 3: Review the Results
- Examine the map for green trail indicators and hiking symbols
- Tap on individual trail markers to see basic information
- Look for trails with good ratings (4+ stars) and recent reviews
Step 4: Analyze Trail Details
- Select a promising trail to open its detail page
- Read the description and check the difficulty level
- Scroll through recent photos to assess current conditions
- Review user comments for insider tips and warnings
Step 5: Check Practical Information
- Verify parking availability and any entrance fees
- Note the trail’s operating hours and seasonal restrictions
- Check the distance from your current location to the trailhead
Step 6: Save and Plan
- Save interesting trails to a custom list for future reference
- Get directions to the trailhead when you’re ready to go
- Download offline maps if you’ll be hiking in areas with poor cell coverage
For longer hiking adventures, consider your gear carefully. Learn how to pack your backpack for camping if you’re planning overnight trips, and research appropriate sleeping gear for multi-day adventures.
Step-by-Step Guide: Apple Maps Trail Search
Here’s how to effectively find hiking trails using Apple Maps:
Step 1: Launch Apple Maps
- Open the Apple Maps app on your iOS device
- Ensure location permissions are granted for accurate results
- Tap the search field at the bottom of the screen
Step 2: Search for Trails
- Enter “hiking trails” or use Siri voice search
- Add location specifics like “hiking trails in Yosemite”
- Browse the suggested results that appear
Step 3: Explore Trail Options
- Tap on trail markers that appear on the map
- Use the “Guides” section to find curated trail collections
- Check the “Nature & Parks” category for additional options
Step 4: Evaluate Trail Information
- Review the trail’s basic information and user ratings
- Look at available photos and read user reviews
- Check for any alerts about closures or conditions
Step 5: Use Advanced Features
- Switch to satellite view to see the terrain and surroundings
- Use Look Around (if available) to preview the trailhead area
- Check integrated weather information for current conditions
Step 6: Save and Navigate
- Add promising trails to your Favorites or create a Collection
- Share trail information with hiking partners if needed
- Get turn-by-turn directions to the trailhead when ready to go
🥾 Trail Finder: Google Maps vs Apple Maps
Easy Waterfall Hikes Family Friendly Mountain Views Dog Friendly Loop Trails
App Comparison Results
Select your preferences above and click “Compare Trail Finding Options” to see how Google Maps and Apple Maps perform for your specific trail search needs.
Advanced Search Tips and Tricks
Mastering advanced search techniques can help you discover hidden gems and find exactly the type of hiking experience you’re seeking.
Google Maps Advanced Techniques
Use Quotation Marks: Search for exact phrases like “easy family hike” to find trails specifically described with those terms.
Combine Multiple Keywords: Try searches like “waterfall trail dog friendly” to find trails that meet multiple criteria simultaneously.
Search by Trail Names: If you’ve heard about specific trails, search for the exact name plus “trail” or “hike” to find detailed information and user experiences.
Use the “Near” Operator: Search for “hiking trails near [landmark]” to find trails close to specific points of interest or accommodations.
Apple Maps Advanced Features
Use Collections Strategically: Create themed collections like “Winter Hikes,” “Sunrise Viewpoints,” or “Photography Trails” to organize your discoveries by specific interests.
Leverage Siri Shortcuts: Set up custom Siri shortcuts for frequently used searches like “Find dog-friendly trails” or “Show me easy hikes.”
Integration with Health App: Apple Maps can integrate with the Health app to track your hiking activities and suggest trails based on your fitness level.
Cross-Platform Strategies
Compare Information: Use both apps to cross-reference trail information, as different users may provide varying perspectives and details on each platform.
Check Multiple Sources: Supplement your map research with dedicated hiking apps like AllTrails or local park websites for the most comprehensive information.
Verify Current Conditions: Always check recent reviews and official park websites for trail closures, seasonal restrictions, or permit requirements.
For families planning hiking adventures, consider reading about camping with kids and explore family camping activities to make your outdoor experiences more enjoyable for everyone.
Safety Considerations and Offline Usage
Planning for safety should be a top priority when using digital maps for hiking, especially in remote areas where cell service may be unreliable.
Downloading Offline Maps
Google Maps Offline Process:
- Open Google Maps and search for your hiking area
- Tap on the location name or address at the bottom
- Select “Download” and choose your map area
- Name your offline map for easy identification
- The map will be available for 30 days without internet
Apple Maps Offline Process:
- Search for your hiking destination in Apple Maps
- Tap “Download” when viewing the location details
- Select the area size you want to download
- The offline map will be stored locally on your device
Essential Safety Features
Share Your Location: Both apps allow you to share your real-time location with emergency contacts, which is crucial for solo hiking or remote adventures.
Emergency Information: Before hiking, research emergency contact numbers for the area and save them in your phone, as emergency services may vary by location.
Battery Conservation: Download offline maps to reduce battery drain from constantly searching for cell signals in remote areas.
Backup Navigation Methods
Physical Maps: Always carry a physical map and compass as backup navigation tools, especially for challenging or remote trails.
GPS Coordinates: Note key GPS coordinates for your trailhead, important waypoints, and your vehicle location in case digital maps fail.
Emergency Supplies: Ensure you have essential safety items including those found in a bushcraft survival kit for unexpected situations.
Comparing Google Maps vs Apple Maps for Hiking
Understanding the strengths and limitations of each platform helps you choose the right tool for different hiking scenarios.
Google Maps Advantages
Comprehensive User Data: Google Maps typically has more user reviews, photos, and detailed trail information due to its larger user base and longer history of crowd-sourced data.
Better Search Functionality: Google’s search algorithms excel at understanding natural language queries and returning relevant results for complex trail searches.
Street View Integration: Street View can help you preview trailheads, parking areas, and access roads before you arrive.
Cross-Platform Availability: Google Maps works seamlessly across Android and iOS devices, making it ideal for mixed-device hiking groups.
Apple Maps Advantages
iOS Integration: Deep integration with iOS features like Siri, Health app, and seamless sharing makes Apple Maps particularly powerful for iPhone users.
Privacy Focus: Apple Maps doesn’t track user location data as extensively as Google, offering better privacy protection for location-sensitive users.
Clean Interface: The streamlined design makes it easy to quickly find and evaluate trail options without information overload.
Look Around Feature: Where available, Look Around provides high-quality 360-degree views of trailheads and surrounding areas.
When to Use Each Platform
Choose Google Maps When:
- You need detailed user reviews and trail conditions
- You’re researching unfamiliar hiking areas
- You want comprehensive photo galleries of trails
- You’re planning complex multi-day hiking trips
Choose Apple Maps When:
- You prefer a clean, simple interface
- You’re an iOS user who values ecosystem integration
- You want quick access to nearby trails
- Privacy is a primary concern
For extended hiking trips that may involve camping, make sure you’re prepared with appropriate gear. Learn about cool weather clothing for camping and consider your shelter needs, such as setting up an 8-person tent for group camping.
Troubleshooting Common Issues

Even the best mapping apps can encounter problems. Here’s how to address common issues you might face while searching for hiking trails.
GPS and Location Problems
Inaccurate Location: If your GPS shows the wrong location, try moving to an open area away from tall buildings or dense tree cover. Restart your location services if the problem persists.
Slow GPS Lock: Cold starts can take several minutes to acquire accurate GPS signals. Turn on your GPS before leaving home to allow time for satellite acquisition.
Battery Drain: GPS usage can quickly drain your battery. Use airplane mode with GPS enabled, carry portable chargers, and close unnecessary apps to conserve power.
Map Loading and Data Issues
Slow Loading: If maps load slowly, check your internet connection and consider switching between WiFi and cellular data to find the best signal.
Outdated Information: Trail conditions change seasonally. Always check the date of reviews and photos, and look for recent user comments about current conditions.
Missing Trails: Some newer or less popular trails may not appear in mapping apps. Cross-reference with local park websites or dedicated hiking apps for comprehensive coverage.
Search Result Problems
Too Many Results: If your search returns too many options, add specific keywords like difficulty level, trail length, or desired features to narrow your results.
Irrelevant Results: Make sure your search terms are specific to hiking. Terms like “trail” can return bike paths or running routes instead of hiking trails.
No Results Found: Try broader search terms or expand your search radius. Some areas may have limited trail data in mainstream mapping apps.
Tips for Planning Multi-Day Hiking Adventures
When planning extended hiking trips, both Google Maps and Apple Maps can serve as valuable planning tools beyond simple trail discovery.
Research and Route Planning
Identify Overnight Options: Use the maps to locate campgrounds, backcountry camping areas, or nearby accommodations for multi-day adventures.
Plan Resupply Points: For long-distance hikes, identify towns, stores, or facilities where you can resupply food and equipment along your route.
Check Access Points: Research multiple trailheads and access points in case your primary route is closed or inaccessible.
Logistics and Preparation
Transportation Planning: Use the apps to plan your transportation to and from trailheads, including shuttle services or car spotting for point-to-point hikes.
Emergency Access: Identify roads, facilities, and exit points along your route for emergency situations or early trip termination.
Weather Considerations: Research elevation changes and exposed areas that might be affected by weather conditions during your planned hiking dates.
For multi-day adventures, proper meal planning is essential. Learn about campfire cooking techniques to enhance your outdoor dining experience.
Conclusion
Mastering the art of finding hiking trails through Google Maps and Apple Maps opens up a world of outdoor adventures right at your fingertips. Both platforms offer unique strengths that, when used strategically, can help you discover everything from hidden local gems to world-renowned hiking destinations.
Google Maps excels in providing comprehensive user-generated content, detailed reviews, and extensive photo galleries that give you deep insights into trail conditions and experiences. Its powerful search capabilities and cross-platform compatibility make it an excellent research tool for planning your hiking adventures.
Apple Maps shines with its clean interface, seamless iOS integration, and privacy-focused approach, making it particularly valuable for iPhone users who want quick access to nearby trails and effortless navigation.
The key to success lies in understanding that these tools work best when used together. Start your research with Google Maps to gather detailed information and user insights, then use your preferred platform for actual navigation and real-time guidance.
Next Steps for Your Hiking Adventures:
- Download both apps and practice using their search features in your local area
- Create offline maps for your next hiking destination before you leave home
- Build custom trail lists to organize your hiking bucket list and track completed adventures
- Share your own experiences by leaving reviews and photos to help fellow hikers
- Always carry backup navigation methods and essential safety gear for any hiking adventure
Remember that technology is a powerful tool, but it should complement, not replace, traditional outdoor skills and safety practices. With proper preparation, the right gear, and smart use of these mapping platforms, you’ll be well-equipped to explore the incredible hiking opportunities waiting just beyond your doorstep.
Start exploring today, and let these digital tools guide you to your next unforgettable outdoor adventure! 🥾