The Ultimate Guide to Making Your Own Dehydrated Camping Food
Picture this: you’re miles deep into the wilderness, surrounded by towering pines and pristine mountain air, when hunger strikes. Instead of reaching for another bland energy bar, you pull out a perfectly seasoned beef stew that you crafted in your own kitchen weeks ago. This is the magic of learning how to make your own dehydrated camping meals – transforming ordinary ingredients into lightweight, nutritious, and delicious trail food that rivals any expensive freeze-dried option.

Key Takeaways
- Dehydrating your own camping food saves 60-80% compared to commercial options while offering superior taste and nutrition control
- Most foods can be successfully dehydrated at home using either electric dehydrators, ovens, or even air-drying methods
- Proper storage techniques can extend shelf life of homemade dehydrated meals up to 12 months
- Meal planning and batch preparation streamline the process and ensure variety on extended camping trips
- Safety protocols are essential to prevent foodborne illness when dehydrating proteins and dairy products
Why Make Your Own Dehydrated Camping Meals? 🏕️
Creating homemade dehydrated camping food offers compelling advantages over store-bought alternatives. Cost savings represent the most immediate benefit – commercial freeze-dried meals often cost $8-15 per serving, while homemade versions typically cost $2-4 per equivalent portion.
Nutritional control becomes paramount when spending extended time outdoors. Commercial options frequently contain excessive sodium, preservatives, and artificial ingredients. When you dehydrate your own meals, you control every ingredient, ensuring optimal nutrition for sustained energy during outdoor activities.
Flavor customization allows you to create meals tailored to your exact preferences. Whether you prefer spicy Mexican flavors, hearty Italian dishes, or comfort food classics, homemade dehydration puts you in complete control of taste profiles.
Dietary accommodation becomes seamless when making your own food. Gluten-free, vegetarian, vegan, or keto requirements that often limit commercial options become non-issues with homemade preparation.
Essential Equipment for Dehydrating Food
Primary Dehydration Methods
Electric Food Dehydrators provide the most consistent and efficient results. Look for models with:
- Temperature control (95°F to 160°F range)
- Timer functionality
- Multiple stackable trays
- Even airflow distribution
Oven Dehydration works as an accessible alternative using equipment most people already own. Set your oven to its lowest temperature (typically 170°F) and prop the door slightly open for moisture escape.
Air Drying suits specific foods like herbs, fruits, and vegetables in dry climates with low humidity.
Supporting Equipment
| Equipment | Purpose | Essential Level |
|---|---|---|
| Sharp knives | Uniform slicing | Critical |
| Cutting boards | Food preparation | Critical |
| Vacuum sealer | Long-term storage | Highly recommended |
| Airtight containers | Short-term storage | Essential |
| Kitchen scale | Portion control | Recommended |
| Parchment paper | Prevent sticking | Essential |
How to Make Your Own Dehydrated Camping Food Recipes
Protein-Based Meals
Dehydrated Beef Stew
Start with lean beef cut into ¼-inch pieces. Brown the meat thoroughly to eliminate surface bacteria, then combine with diced potatoes, carrots, onions, and celery. Season with salt, pepper, garlic powder, and herbs. Cook until vegetables are tender but still firm. Spread on dehydrator trays and process at 160°F for 6-8 hours until completely dry.
Turkey and Rice Medley
Combine cooked ground turkey (93% lean or higher) with cooked brown rice, dehydrated vegetables, and seasonings. The rice absorbs flavors while providing carbohydrates for sustained energy. Dehydrate at 145°F for 4-6 hours.
Vegetarian Options
Lentil Dal
Cook red lentils with curry spices, coconut milk powder, and diced tomatoes. This protein-rich option rehydrates quickly and provides complete nutrition for vegetarian campers. Process at 135°F for 5-7 hours.
Pasta Primavera
Use whole wheat pasta combined with dehydrated vegetables, olive oil powder, and Italian seasonings. Pre-cook pasta to al dente before dehydrating to ensure proper rehydration in the field.
Breakfast Solutions
Overnight Oats Mix
Combine rolled oats, dried fruits, nuts, and spices. Add powdered milk for protein and calcium. This no-cook option simply requires cold water and time to rehydrate.
Breakfast Hash
Dehydrate a mixture of diced potatoes, peppers, onions, and pre-cooked breakfast meat alternatives. Season with paprika, garlic powder, and herbs for a satisfying morning meal.
Step-by-Step Dehydration Process
Preparation Phase
Food Safety First 🛡️
Always start with fresh, high-quality ingredients. Wash all produce thoroughly and ensure proteins are cooked to safe internal temperatures before dehydrating. When preparing meals for extended camping trips, food safety becomes even more critical.
Uniform Cutting
Slice all ingredients to consistent thickness (typically ¼ inch) to ensure even drying. Inconsistent pieces lead to some items over-drying while others remain moist, creating spoilage risks.
Pre-Treatment
Some foods benefit from blanching or pre-cooking. Vegetables like carrots, broccoli, and green beans should be blanched for 2-3 minutes to preserve color and nutrition. Proteins must be fully cooked before dehydrating.
Dehydration Execution
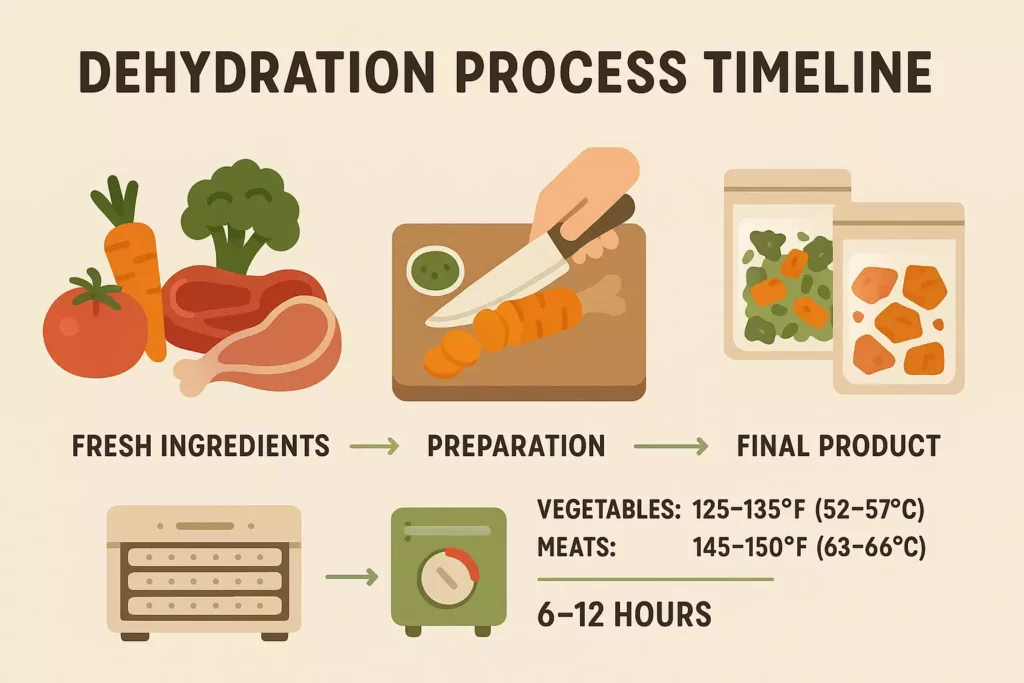
Temperature Guidelines
- Fruits: 135°F
- Vegetables: 125°F
- Cooked meals: 145°F
- Proteins: 160°F
Timing Considerations
Dehydration times vary based on food type, thickness, and humidity levels:
- Fruits: 6-12 hours
- Vegetables: 4-8 hours
- Complete meals: 6-10 hours
- Proteins: 4-8 hours
Testing for Doneness
Properly dehydrated food should be brittle or leathery with no moisture when squeezed. Fruits may retain slight flexibility, but vegetables and proteins should be completely crisp.
🥾 Dehydrated Food Calculator
Storage and Packaging Solutions
Immediate Storage
Cooling Period
Allow dehydrated food to cool completely before packaging. Warm food creates condensation inside containers, leading to mold growth and spoilage.
Airtight Containers
Use glass jars, vacuum-sealed bags, or food-grade plastic containers with tight-fitting lids. Remove as much air as possible to prevent oxidation and extend shelf life.
Long-Term Storage
Vacuum Sealing
Vacuum-sealed packages remove oxygen, significantly extending shelf life. Properly vacuum-sealed dehydrated meals can last 6-12 months when stored in cool, dark locations.
Oxygen Absorbers
Include oxygen absorber packets in storage containers for additional protection against rancidity and insect infestation.
Labeling System
Create detailed labels including:
- Food contents
- Dehydration date
- Rehydration instructions
- Serving size
- Expiration estimate
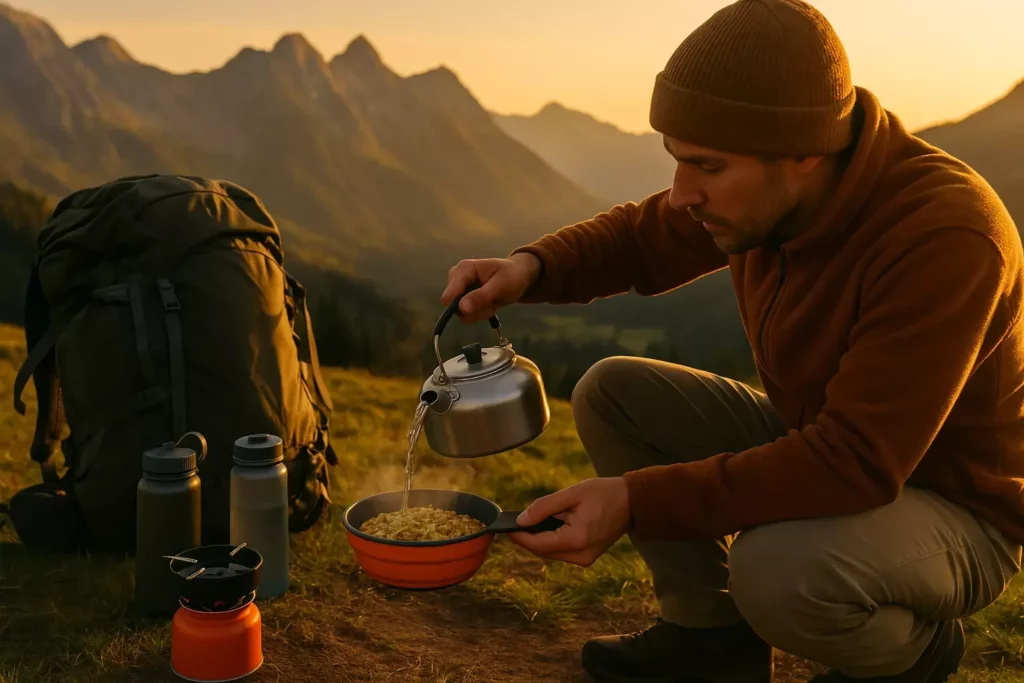
Rehydration Techniques in the Field
Hot Water Method
Most dehydrated meals rehydrate best with hot water. Use a 1:1 ratio of water to dehydrated food as a starting point, adjusting based on desired consistency. Pour boiling water over the food, stir thoroughly, and let sit covered for 10-15 minutes.
Cold Water Rehydration
Some foods, particularly fruits and certain vegetables, rehydrate adequately with cold water. This method takes longer (30-60 minutes) but conserves fuel – an important consideration during extended wilderness trips.
Steam Rehydration
Place dehydrated food in a steamer basket over boiling water. This gentle method works well for delicate items and prevents overcooking.
Advanced Dehydration Techniques
Leather Making (Fruit Roll-Ups)
Puree fresh or cooked fruits and spread thinly on dehydrator sheets. Process at 135°F for 6-8 hours until the surface is no longer sticky. These provide quick energy and natural sugars during demanding outdoor activities.
Vegetable Powders
Dehydrate vegetables completely, then grind into powder using a coffee grinder or food processor. These concentrated flavor enhancers add nutrition and taste to any meal while taking minimal space.
Herb and Spice Blends
Create custom seasoning blends by dehydrating fresh herbs and combining with dried spices. These lightweight flavor boosters transform simple meals into gourmet experiences.
Safety Considerations and Best Practices
Temperature Control
Maintain proper dehydration temperatures to ensure food safety. Proteins require higher temperatures (160°F) to eliminate harmful bacteria, while fruits and vegetables can be processed at lower temperatures.
Contamination Prevention
Use clean equipment and wash hands thoroughly throughout the process. Cross-contamination between raw and cooked foods can introduce harmful bacteria that survive the dehydration process.
Storage Environment
Store dehydrated foods in cool, dry locations away from direct sunlight. Basements, pantries, and climate-controlled areas provide ideal conditions for long-term storage.
Troubleshooting Common Issues
Uneven Drying
Problem: Some pieces dry faster than others
Solution: Ensure uniform cutting and rotate trays every 2-3 hours during dehydration
Case Hardening
Problem: Outside appears dry while inside remains moist
Solution: Lower temperature and extend drying time, or pre-treat foods with blanching
Off Flavors
Problem: Food tastes different after dehydration
Solution: Use fresher ingredients and avoid over-seasoning before dehydration
Cost Analysis: Homemade vs. Commercial
Creating your own dehydrated camping meals delivers substantial financial benefits. A typical homemade beef stew serving costs approximately $3.50 to prepare, while equivalent commercial freeze-dried options retail for $12-15. Over a week-long camping trip feeding four people, this difference amounts to savings of $200-300.
Cost Breakdown per Serving:
- Homemade beef stew: $3.50
- Commercial beef stew: $12.00
- Savings per serving: $8.50
Annual Savings for Active Campers:
Families taking 4-5 camping trips annually can save $800-1,500 by preparing their own dehydrated meals.
Meal Planning for Extended Trips
Variety and Nutrition Balance
Plan menus that provide adequate calories (2,500-3,500 per day for active adults) while maintaining nutritional balance. Include proteins, complex carbohydrates, healthy fats, and essential vitamins through diverse ingredient choices.
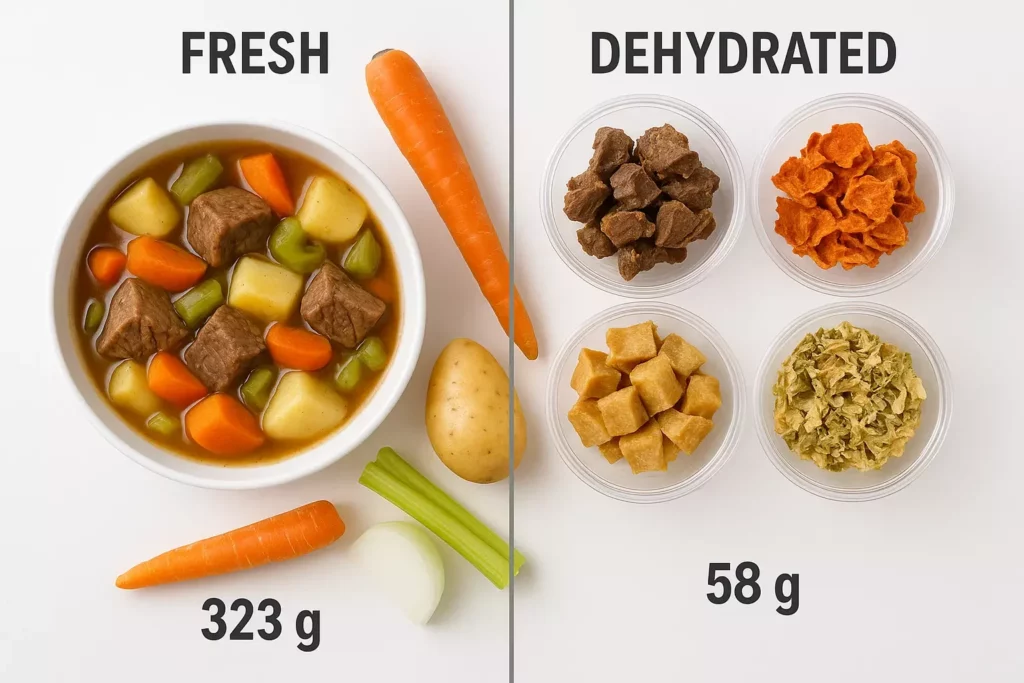
Weight Considerations
When packing your backpack for camping, every ounce matters. Dehydrated foods typically weigh 10-20% of their original weight, making them ideal for backpacking expeditions.
Menu Rotation
Create 7-10 different meal options to prevent food fatigue during extended trips. Variety maintains morale and ensures adequate nutrition intake when appetite becomes crucial for maintaining energy levels.
Special Dietary Accommodations
Gluten-Free Options
Replace wheat-based ingredients with rice, quinoa, or certified gluten-free grains. Many vegetables, fruits, and proteins naturally contain no gluten, making dehydrated meal creation straightforward for those with celiac disease or gluten sensitivity.
Vegetarian and Vegan Meals
Focus on legumes, nuts, seeds, and vegetables for protein sources. Nutritional yeast adds umami flavor while providing B-vitamins often lacking in plant-based diets.
Keto-Friendly Dehydration
Emphasize high-fat, low-carbohydrate ingredients. Dehydrated meats, cheese, and low-carb vegetables create satisfying meals that maintain ketosis during outdoor activities.
Seasonal Considerations
Summer Dehydration
Hot weather accelerates spoilage, making proper storage even more critical. Consider foods with natural antimicrobial properties like garlic, onions, and acidic ingredients.
Winter Camping Nutrition
Cold weather increases caloric needs significantly. Focus on high-calorie, warming foods that provide sustained energy for maintaining body temperature. When camping in cool weather, nutrition becomes even more important for maintaining warmth and energy.
Equipment Maintenance and Care
Dehydrator Maintenance
Clean dehydrator trays thoroughly after each use with warm, soapy water. Check heating elements and fans regularly for optimal performance. Replace worn components to maintain consistent results.
Storage Container Care
Inspect storage containers regularly for cracks or damaged seals that compromise airtight storage. Replace containers showing wear to prevent spoilage and contamination.
Building Your Dehydrated Food Library
Start with simple, familiar recipes before advancing to complex meals. Master basic techniques with fruits and vegetables before attempting complete meal dehydration. Document successful recipes with detailed notes for future reference.
Create seasonal preparation schedules that take advantage of fresh produce availability and lower prices. Summer abundance allows for extensive dehydration sessions that provide meals throughout the year.
Integration with Overall Camping Preparation
Dehydrated meal preparation integrates seamlessly with comprehensive camping planning. Coordinate food preparation with first aid kit building and water purification planning for complete trip readiness.
When camping with kids, involve them in the dehydration process. Children enjoy helping with food preparation and are more likely to eat meals they helped create.
Conclusion
Mastering how to make your own dehydrated camping meals transforms outdoor dining from a necessity into a pleasure. The combination of cost savings, nutritional control, and flavor customization creates compelling reasons to invest time in learning these valuable skills.
Start with simple recipes and basic equipment, gradually expanding your capabilities as confidence grows. The initial investment in a quality dehydrator pays for itself within a few camping trips, while the skills developed last a lifetime.
Next Steps:
- Choose your first recipe from the options provided above
- Acquire basic dehydration equipment suitable for your budget and space
- Practice with small batches to perfect techniques before preparing large quantities
- Document your results to build a personal recipe library
- Plan your next camping menu featuring homemade dehydrated meals
Whether you’re planning a weekend getaway with tent setup considerations or an extended wilderness expedition, homemade dehydrated foods provide the foundation for memorable outdoor dining experiences. The journey from kitchen preparation to trail consumption connects you more deeply with your food and enhances the overall camping experience.
Remember that perfect dehydration techniques develop through practice and experimentation. Each successful batch builds confidence and expands your repertoire of trail-ready meals. Soon, you’ll wonder why you ever relied on expensive commercial alternatives when creating superior homemade options requires only basic equipment and readily available ingredients.