How to Set Up a 6-Person Tent By Yourself in 10 Minutes
Picture this: you arrive at your campsite just as the sun begins to set, and dark clouds are gathering on the horizon. Your camping companions are delayed, but you need shelter fast. Setting up a large tent solo might seem impossible, but with the right technique and preparation, you can have a spacious 6-person tent ready in just 10 minutes – even when you’re flying solo.
Most campers assume that bigger tents require multiple people and extensive setup time. This misconception leaves many hesitant to invest in larger shelters or forces them into cramped quarters. The truth is, modern 6-person tents are designed with user-friendly features that make solo setup not just possible, but surprisingly quick and efficient.
Key Takeaways
- Pre-trip preparation is crucial – practice at home and organize all components before heading to your campsite
- Strategic positioning and using your body weight effectively can replace the need for multiple helpers
- Modern tent designs with color-coded poles and clips make solo setup significantly easier than older models
- The right sequence – laying out, assembling poles, raising structure, then securing – ensures maximum efficiency
- Weather awareness and proper site selection can make or break your 10-minute setup goal
Why Solo Tent Setup Matters
Setting up a large tent by yourself isn’t just about proving your camping prowess – it’s a practical skill that every outdoor enthusiast should master. Whether you’re the first to arrive at a group campsite, dealing with unexpected weather, or simply want the independence to camp on your own schedule, solo tent setup capabilities provide invaluable flexibility.
Benefits of mastering solo setup:
- 🏕️ Independence from group timing and coordination
- ⚡ Speed when weather conditions deteriorate quickly
- 🎯 Confidence in your camping abilities
- 💪 Self-reliance during solo adventures
- 🕐 Efficiency that impresses fellow campers
The key lies in understanding that modern tent engineering has evolved specifically to address the challenges of solo setup. Manufacturers recognize that not every camping trip involves a coordinated team effort, and they’ve responded with innovative design features that make large tents surprisingly manageable for one person.
Essential Pre-Setup Preparation
Practice Makes Perfect
The 10-minute setup goal is only achievable if you’re already familiar with your specific tent model. Never attempt your first setup at the campsite. Instead, practice in your backyard or a local park at least twice before your camping trip.
During practice sessions:
- Time yourself to establish realistic expectations
- Identify any challenging steps that need extra attention
- Familiarize yourself with all components and their functions
- Practice in different lighting conditions, including low light
Organize Your Gear
Create a tent setup kit that keeps everything organized and easily accessible:
| Component | Organization Tip |
|---|---|
| Tent body | Keep in original stuff sack, positioned for easy access |
| Poles | Bundle with elastic cords, color-code if not pre-marked |
| Stakes | Store in dedicated bag, count before each trip |
| Rainfly | Separate from tent body, check attachment points |
| Guy lines | Pre-attach to tent, adjust lengths at home |
Site Selection Strategy
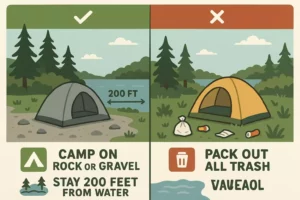
Choose your campsite location before unpacking any gear. Look for:
- Level ground with minimal slope
- Clear area at least 2 feet larger than tent footprint on all sides
- Protection from prevailing winds
- Drainage that directs water away from your tent area
- Overhead clearance free from dead branches or hazards
When camping with kids or family groups, site selection becomes even more critical as you’ll need additional space for activities and safety considerations.
The 10-Minute Setup Method
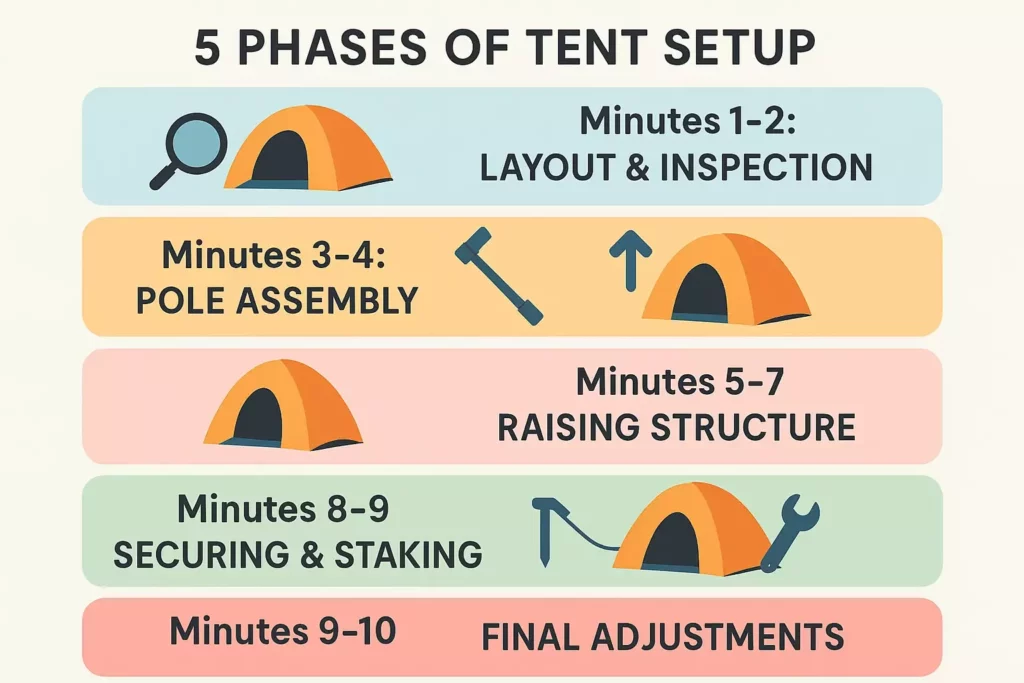
Minutes 1-2: Layout and Inspection
Step 1: Lay out your tent footprint or tarp if using one. This protects your tent floor and provides a clear boundary for positioning.
Step 2: Remove the tent body from its bag and spread it flat within the footprint area. Ensure the door(s) face your preferred direction – typically away from prevailing winds and toward your campsite center.
Step 3: Quickly inspect the tent body for any damage, paying special attention to:
- Zipper functionality
- Fabric tears or holes
- Attachment points for poles and guy lines
- Corner grommets and stake loops
Minutes 3-4: Pole Assembly
Modern 6-person tents typically use 2-4 main poles plus potentially shorter poles for vestibules or additional structure. Most quality tents feature color-coded systems that match poles to their corresponding attachment points.
Pro tip: Assemble poles completely before attempting to insert them into the tent. This prevents the frustration of trying to connect pole sections while managing tent fabric.
Assembly sequence:
- Lay out all pole sections
- Connect sections starting from one end
- Allow the internal shock cord to guide connections
- Avoid forcing connections – they should slide together smoothly
Minutes 5-7: Raising the Structure
This is where solo technique becomes crucial. Instead of having helpers hold poles while you work, use these strategies:
The Anchor Method:
- Insert one end of the first pole into its corresponding grommet
- Walk the pole to the opposite corner, keeping tension on the tent body
- Secure the second end while maintaining slight tension
- Repeat with remaining poles, working in opposing pairs
Body Weight Technique:
- Use your foot to hold pole ends in grommets while positioning the opposite end
- Lean into the tent structure to maintain tension while securing attachment points
- Work systematically around the tent rather than jumping between sides
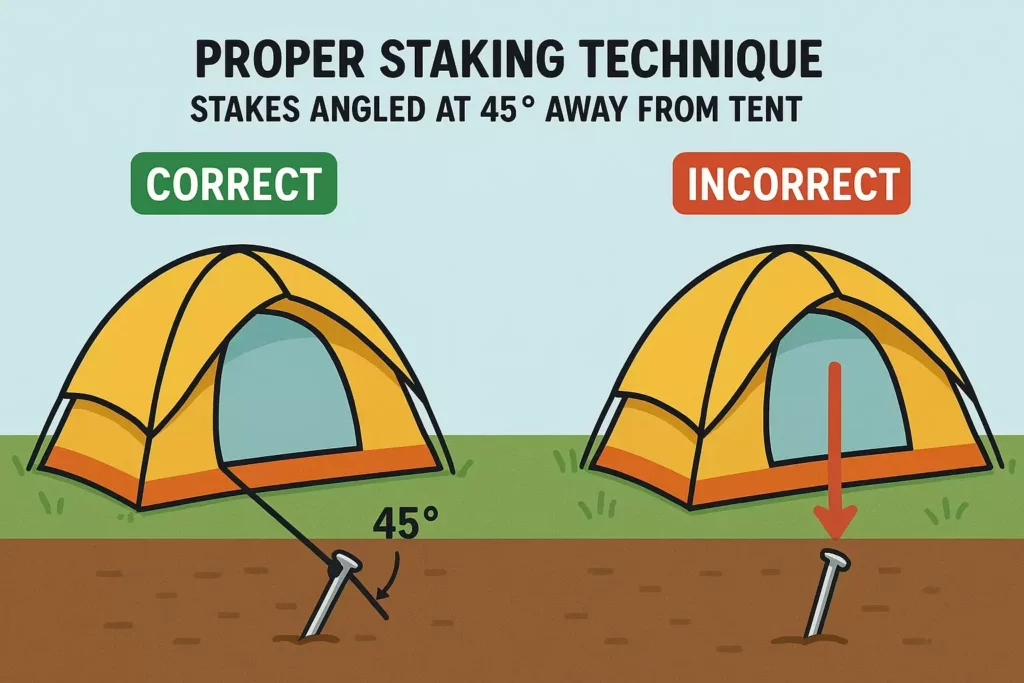
Minutes 8-9: Securing and Staking
With the basic structure raised, focus on creating a taut, stable shelter:
Staking priority:
- Corner stakes first – these bear the most structural load
- Door-side stakes – prevents sagging at entry points
- Remaining perimeter stakes – maintains overall tent shape
- Guy line stakes – provides wind resistance and stability
Angle stakes at 45 degrees away from the tent for maximum holding power. In soft soil, use longer stakes or consider bringing additional anchoring options.
Minutes 9-10: Final Adjustments and Rainfly
Rainfly attachment should be straightforward if you’ve practiced:
- Align the rainfly with tent orientation (usually marked)
- Attach at highest points first, then work toward corners
- Ensure adequate gap between rainfly and tent body for ventilation
- Secure guy lines with appropriate tension – taut but not over-tight
Final tension adjustments:
- Walk around the tent, checking for sagging areas
- Adjust stake positions if needed
- Verify all zippers operate smoothly
- Test guy line tension and adjust for wind conditions
🏕️ 10-Minute Tent Setup Timer & Checklist
Track your progress and stay organized during solo tent setup
Common Solo Setup Challenges and Solutions
Challenge: Wind Interference
Problem: Wind can make tent setup nearly impossible when working alone, as fabric whips around and poles become difficult to control.
Solutions:
- Position your body as a windbreak while working on the leeward side
- Stake down corners immediately as you position them, even before poles are fully inserted
- Use rocks or gear as temporary weights on tent corners
- Consider partial setup inside your vehicle if conditions are extreme
Challenge: Pole Management
Problem: Long poles are unwieldy for one person, especially in tight spaces or windy conditions.
Solutions:
- Pre-assemble poles completely before attempting insertion
- Work from the center outward when possible, using your body to control pole flex
- Use the “walk and stretch” method – secure one end, then walk the pole to its destination
- Practice pole handling at home to develop muscle memory
Challenge: Rainfly Attachment
Problem: Rainflies can be frustrating to align and attach solo, especially on larger tents.
Solutions:
- Start with the highest attachment point (usually the peak or center)
- Work systematically around the tent rather than jumping between sides
- Pre-position guy lines before your trip to avoid tangling
- Use tent manufacturer’s color-coding or create your own marking system
Weather-Specific Setup Considerations
Rainy Conditions
Setting up in rain requires modified techniques to keep your gear dry:
Setup sequence modifications:
- Rainfly first: Some tents allow rainfly-first setup, creating immediate shelter
- Speed over perfection: Get basic shelter up quickly, then fine-tune from inside
- Gear protection: Use a tarp or vehicle to protect other gear during setup
- Drainage priority: Pay extra attention to site selection and water runoff
Having a well-organized first aid kit becomes even more important in challenging weather conditions where injuries are more likely.
High Wind Setup
Wind-specific strategies:
- Lower profile approach: Keep tent as low as possible during initial setup
- Immediate anchoring: Stake each section as you complete it
- Guy line priority: Deploy guy lines early for additional stability
- Sheltered assembly: Use natural windbreaks or your vehicle for protection
Cold Weather Considerations
Cold-weather modifications:
- Warm up hands regularly to maintain dexterity
- Pre-warm tent components if they’ve been stored in freezing conditions
- Account for fabric stiffness – cold materials are less flexible
- Plan for longer setup time due to working with gloves
Understanding proper cool weather clothing helps ensure you stay comfortable and functional during cold-weather tent setup.
Essential Tools and Accessories
Must-Have Items
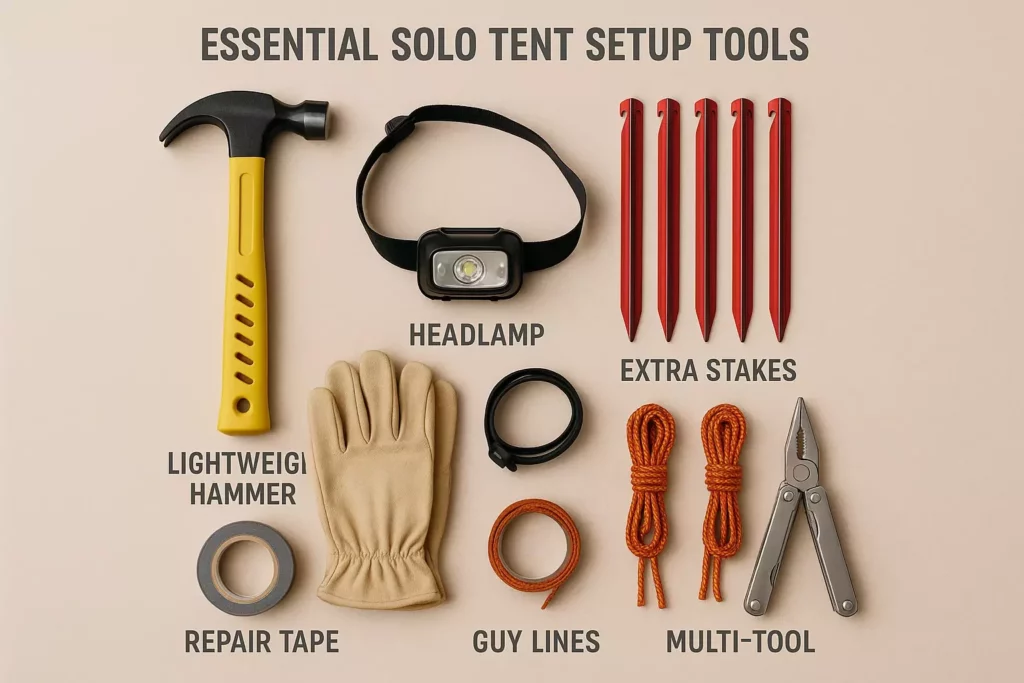
Basic setup toolkit:
- 🔨 Lightweight camping hammer or multi-tool with hammer function
- 📏 Extra stakes (at least 4 more than tent requires)
- 🧵 Repair tape for emergency fabric fixes
- 🔦 Headlamp for hands-free lighting
- 🧤 Work gloves for better grip and hand protection
Helpful Upgrades
Items that significantly improve solo setup:
- Footprint or tarp for ground protection and easier positioning
- Reflective guy lines for better visibility in low light
- Upgraded stakes appropriate for your typical camping terrain
- Pole repair sleeve for emergency pole fixes
- Bungee cords for temporary securing during setup
Organization Systems
Gear management solutions:
- Mesh bags for separating stakes, guy lines, and small parts
- Color-coded stuff sacks for different tent components
- Carabiner clips for attaching gear to tent during setup
- Compact tarp for creating a clean workspace
When planning your overall gear organization, consider how tent setup fits into your broader backpack packing strategy.
Tent Selection for Solo Setup
Features That Matter
Design elements that facilitate solo setup:
- Color-coded poles and attachments eliminate guesswork
- Clip-on attachments are faster than sleeve-style pole insertion
- Freestanding design reduces dependence on perfect staking
- Multiple doors provide easier access during setup
- Pre-attached guy lines save time and prevent loss
Recommended Tent Types
Best 6-person tent styles for solo setup:
| Tent Style | Solo Setup Difficulty | Key Advantages |
|---|---|---|
| Dome tents | Easy | Freestanding, intuitive structure |
| Cabin tents | Moderate | Spacious, but may require more stakes |
| Tunnel tents | Challenging | Great space efficiency, but needs perfect staking |
| Hybrid designs | Easy-Moderate | Combines best features of multiple styles |
For those interested in larger setups, understanding 8-person tent setup principles can provide additional insights into managing large shelters solo.
Quality Indicators
Signs of a solo-friendly tent:
- Clear, detailed setup instructions with visual diagrams
- Robust pole construction that won’t break under solo handling stress
- Logical attachment point layout that follows an intuitive sequence
- Adequate guy line attachment points for stability in various conditions
Advanced Solo Setup Techniques
The Progressive Setup Method
For challenging conditions or when you’re still building confidence:
Phase 1: Minimal Shelter
- Get basic structure up with minimal staking
- Provides immediate wind/rain protection
- Allows you to work from inside if needed
Phase 2: Optimization
- Add remaining stakes and guy lines
- Fine-tune tension and positioning
- Complete rainfly attachment and adjustment
Phase 3: Perfection
- Final walkthrough and adjustments
- Organize gear and establish camp layout
- Prepare for weather changes
Body Mechanics for Efficiency
Leverage techniques:
- Use your core strength rather than just arms when manipulating poles
- Work at optimal height – avoid excessive bending or reaching
- Maintain good posture to prevent fatigue and injury
- Take micro-breaks to avoid rushing and making mistakes
Efficiency Shortcuts
Time-saving strategies:
- Pre-position all components before starting assembly
- Work in consistent patterns (clockwise around tent, for example)
- Combine tasks where possible (stake while adjusting tension)
- Develop personal rhythm through practice and repetition
Troubleshooting Common Issues
Pole Problems
Bent or broken poles:
- Field repair: Use pole repair sleeves or tape for temporary fixes
- Prevention: Avoid forcing connections, check for debris in pole ends
- Backup plan: Carry spare pole sections for critical structural elements
Pole won’t fit in grommet:
- Check alignment: Ensure pole is fully assembled and straight
- Debris removal: Clear any dirt or debris from grommet
- Gentle persuasion: Slight twisting motion often helps seating
Fabric Issues
Zipper problems:
- Lubrication: Use zipper lubricant or soap for sticky zippers
- Alignment: Ensure fabric isn’t caught in zipper track
- Force prevention: Never force a stuck zipper – work it gently
Sagging fabric:
- Tension adjustment: Check all stake positions and guy line tension
- Stake repositioning: Move stakes further from tent if fabric is too tight
- Weather factors: Account for fabric stretch in humid conditions
Stability Concerns
Tent feels unstable:
- Guy line deployment: Add or adjust guy lines for additional support
- Stake inspection: Ensure all stakes are properly seated and angled
- Site evaluation: Consider relocating if ground conditions are inadequate
Safety Considerations
Personal Safety
Physical safety during setup:
- Proper lifting technique when handling heavy tent components
- Awareness of surroundings – watch for rocks, holes, or other hazards
- Weather monitoring – don’t ignore deteriorating conditions
- Emergency planning – have a backup shelter plan if setup fails
Gear Safety
Protecting your investment:
- Gentle handling of all components, especially in cold weather
- Proper storage after setup to prevent damage from wind or animals
- Regular inspection for wear and tear that could lead to failure
- Appropriate use – don’t exceed tent capacity or weather ratings
Environmental Safety
Leave No Trace principles:
- Minimize ground disturbance during stake placement
- Use established campsites when available
- Protect vegetation by avoiding setup on fragile plants
- Proper waste disposal of any packaging or damaged components
Maintenance for Continued Solo Success
Post-Trip Care
Essential maintenance routine:
- Complete drying before storage to prevent mold and mildew
- Inspection and cleaning of all components
- Stake and guy line organization for next trip readiness
- Repair documentation – note any issues that need attention
Seasonal Preparation
Pre-season checklist:
- Setup practice to refresh skills and check equipment condition
- Component replacement of any worn or damaged parts
- Waterproofing refresh for tent fabric and rainfly
- Gear organization and inventory update
Long-term Care
Extending tent lifespan:
- Proper storage in cool, dry conditions
- UV protection – minimize prolonged sun exposure
- Gentle cleaning with appropriate products
- Professional service for major repairs or reconditioning
Understanding proper maintenance helps ensure your tent remains reliable for solo setup throughout many camping adventures, whether you’re planning family camping activities or solo expeditions.
Building Confidence and Speed
Progressive Skill Development
Beginner phase (20+ minutes):
- Focus on correct technique over speed
- Practice in ideal conditions
- Use setup videos or guides as reference
- Don’t rush – build muscle memory first
Intermediate phase (15-20 minutes):
- Challenge yourself with varied conditions
- Practice in low light or wind
- Experiment with efficiency improvements
- Time yourself regularly to track progress
Advanced phase (10-15 minutes):
- Master setup in challenging conditions
- Develop personal shortcuts and techniques
- Help others learn (teaching reinforces your skills)
- Maintain equipment for optimal performance
Mental Preparation
Confidence-building strategies:
- Visualization – mentally rehearse the setup sequence
- Positive self-talk – focus on capabilities rather than challenges
- Backup planning – know you have alternatives if something goes wrong
- Experience building – gradually increase difficulty of setup conditions
Integration with Camp Setup
Efficient Camp Organization
Tent setup as part of larger camp establishment:
- Site survey – plan tent, kitchen, and activity areas simultaneously
- Gear staging – position other equipment while tent is going up
- Task sequencing – coordinate tent setup with other camp tasks
- Team coordination – if others arrive later, they can handle other setup tasks
Kitchen and Comfort Setup
Post-tent priorities:
- Sleeping system deployment – get sleeping bags and pads ready
- Kitchen establishment – set up cooking area and meal preparation space
- Water system setup – establish water purification and storage
- Safety equipment – position survival gear accessibly
Weather Adaptation
Adjusting camp layout for conditions:
- Wind protection – use tent placement to shelter other camp areas
- Drainage planning – ensure water flows away from all camp elements
- Access routes – plan pathways between tent, kitchen, and facilities
- Emergency procedures – establish protocols for rapid camp breakdown if needed
Conclusion
Mastering the art of setting up a 6-person tent solo in 10 minutes is more than just a camping party trick – it’s a valuable skill that provides independence, confidence, and practical advantages in countless outdoor situations. The key lies in understanding that modern tent design has evolved to support solo setup, combined with proper preparation, practice, and technique.
Your path to 10-minute solo setup success:
✅ Practice at home until the sequence becomes automatic
✅ Organize your gear for maximum efficiency and accessibility
✅ Master the fundamental techniques of body positioning and leverage
✅ Adapt your approach for different weather and site conditions
✅ Maintain your equipment to ensure reliable performance
Remember that achieving the 10-minute goal isn’t about rushing through the process – it’s about developing such familiarity with your equipment and technique that setup becomes smooth, efficient, and stress-free. Start with a focus on proper technique, and speed will naturally follow as your confidence and muscle memory develop.
The investment in mastering solo tent setup pays dividends beyond just camping convenience. You’ll find yourself more willing to explore new destinations, more confident in changing weather conditions, and more capable of helping fellow campers who struggle with their own setup challenges.
Next steps to implement your learning:
- Schedule practice sessions in your backyard or local park
- Create your personalized setup kit with all necessary tools and accessories
- Plan a solo camping trip to test your skills in real conditions
- Share your knowledge with other campers to reinforce your own learning
- Continue refining your technique with each camping experience
Whether you’re setting up camp before your family arrives, dealing with unexpected weather, or simply enjoying the satisfaction of self-reliance in the outdoors, your newly developed solo tent setup skills will serve you well on countless future adventures.