How to Pack Your Backpack: 9 Steps for Perfect Weight Distribution
Ever finished a long hike feeling like your shoulders had been in a vice grip the entire time? I’ve been there — hunched forward, neck aching, wondering why I ever thought backpacking was fun. The problem wasn’t my fitness level or the trail. It was how I packed my bag. Learning how to pack your backpack: 9 steps for perfect weight distribution completely changed my experience on the trail, and it can change yours too.

Poor packing isn’t just uncomfortable — research shows that an unevenly distributed load can increase energy expenditure by up to 15%, meaning you’re burning more calories and wearing out faster than you need to. The good news? With the right technique, your hips can carry 60–80% of your pack’s total weight, taking massive pressure off your shoulders and neck. This guide walks you through every step.
Key Takeaways
- 🎯 60–70% of your pack weight should sit in the upper-middle zone, close to your back and between your shoulder blades.
- 🏋️ Modern pack design can shift 60–80% of total load from your shoulders to your stronger hip muscles — but only if you pack correctly.
- ⚖️ Uneven weight distribution increases energy expenditure by up to 15%, making every mile harder than it needs to be.
- 📦 Pack in horizontal layers, not vertical columns, to spread weight evenly across the pack’s frame.
- 🎒 Total pack weight should ideally stay at 20–25% of your body weight for general backpacking trips.
Why Perfect Weight Distribution Matters More Than You Think
Before we dive into the steps, let’s talk about why this matters so much. Your body’s center of gravity sits roughly around your lower abdomen. When you carry a pack, the goal is to keep the pack’s center of gravity as close to your own as possible — both in terms of height on your back and distance from your spine.
When heavy items sit too low or too far from your back, your body compensates by leaning backward or forward. This puts enormous strain on your lumbar spine, shoulders, and neck. Over a multi-day trip, that strain adds up to real pain and fatigue.
💡 Pull Quote: “A well-packed backpack doesn’t just feel better — it literally makes you a more efficient hiker, reducing wasted energy with every step.”
Modern backpacks are engineering marvels designed to transfer load from your shoulder straps to your hip belt. But that transfer only works when you’ve placed the weight in the right zones. Let’s get into exactly how to do that.
Understanding the Three Weight Zones of Your Backpack
Every backpack — whether it’s a 20-liter daypack or a 75-liter expedition pack — can be divided into three functional zones:
| Zone | Location | Purpose |
|---|---|---|
| Bottom Zone | Lower third of pack | Bulky, lightweight items |
| Core Zone | Middle and upper-middle, against your back | Heavy, dense items |
| Top/Lid Zone | Top compartment and outer pockets | Quick-access, lightweight items |
Understanding these zones is the foundation of everything that follows. Keep this mental map in your head as you work through each step.
How to Pack Your Backpack: 9 Steps for Perfect Weight Distribution
Now let’s walk through the complete process, step by step. Whether you’re heading out for a weekend trip or a two-week thru-hike, these principles apply across the board.
1. Start With a Complete Gear Audit
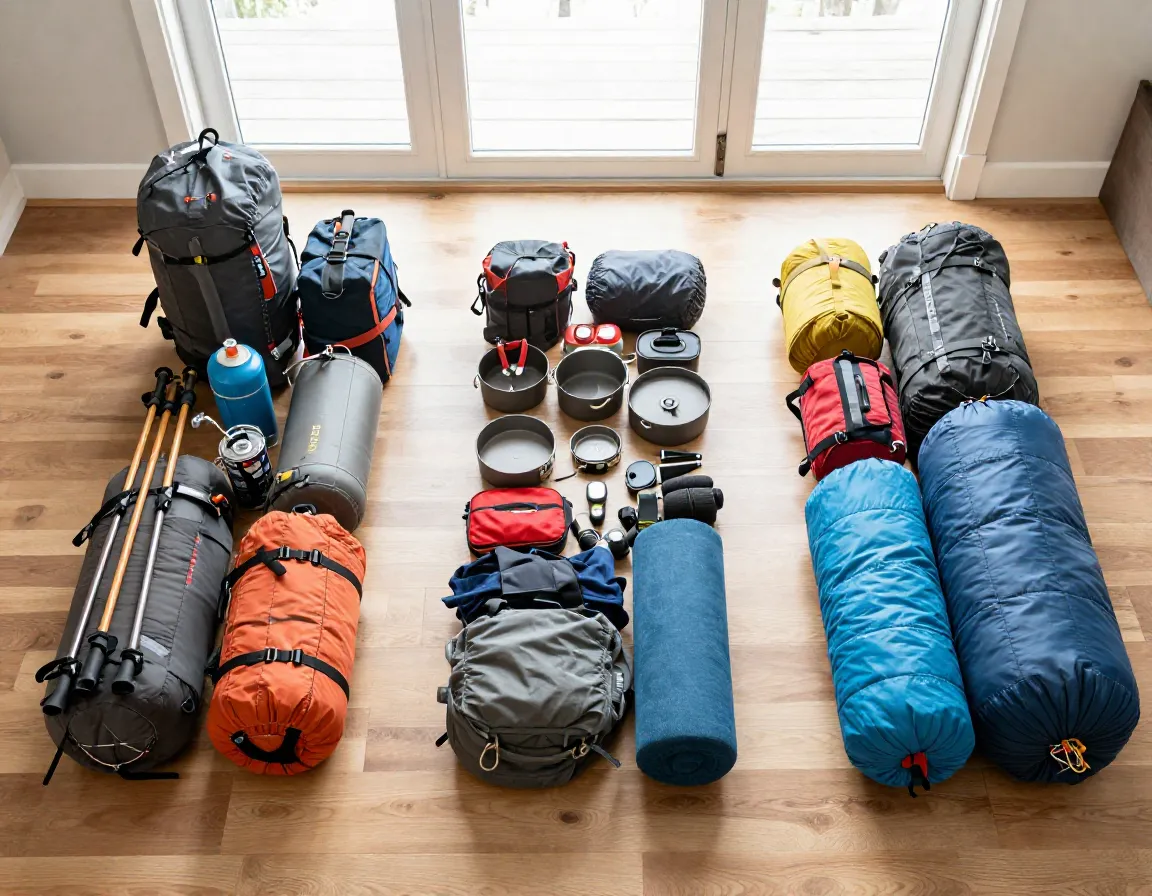
Before anything goes into your pack, lay everything out on the floor. Every. Single. Item. This step sounds obvious, but most hikers skip it — and that’s where packing mistakes begin.
Organize your gear into three piles:
- Heavy items: Water bladder, food, stove, fuel canisters, bear canister, tent body and poles
- Medium items: Cooking kit, first aid kit, electronics, extra layers
- Lightweight/bulky items: Sleeping bag, sleeping pad (if internal), puffy jacket, spare clothes
Doing this audit also forces you to confront unnecessary weight. In 2026, ultralight gear options are better than ever — use this moment to ask yourself whether each item truly earns its place in your pack.
Pro tip: Weigh your gear if you can. Your total loaded pack should aim for 20–25% of your body weight. For a 160-pound hiker, that’s roughly 32–40 pounds maximum.
2. Line Your Pack (If Conditions Require It)
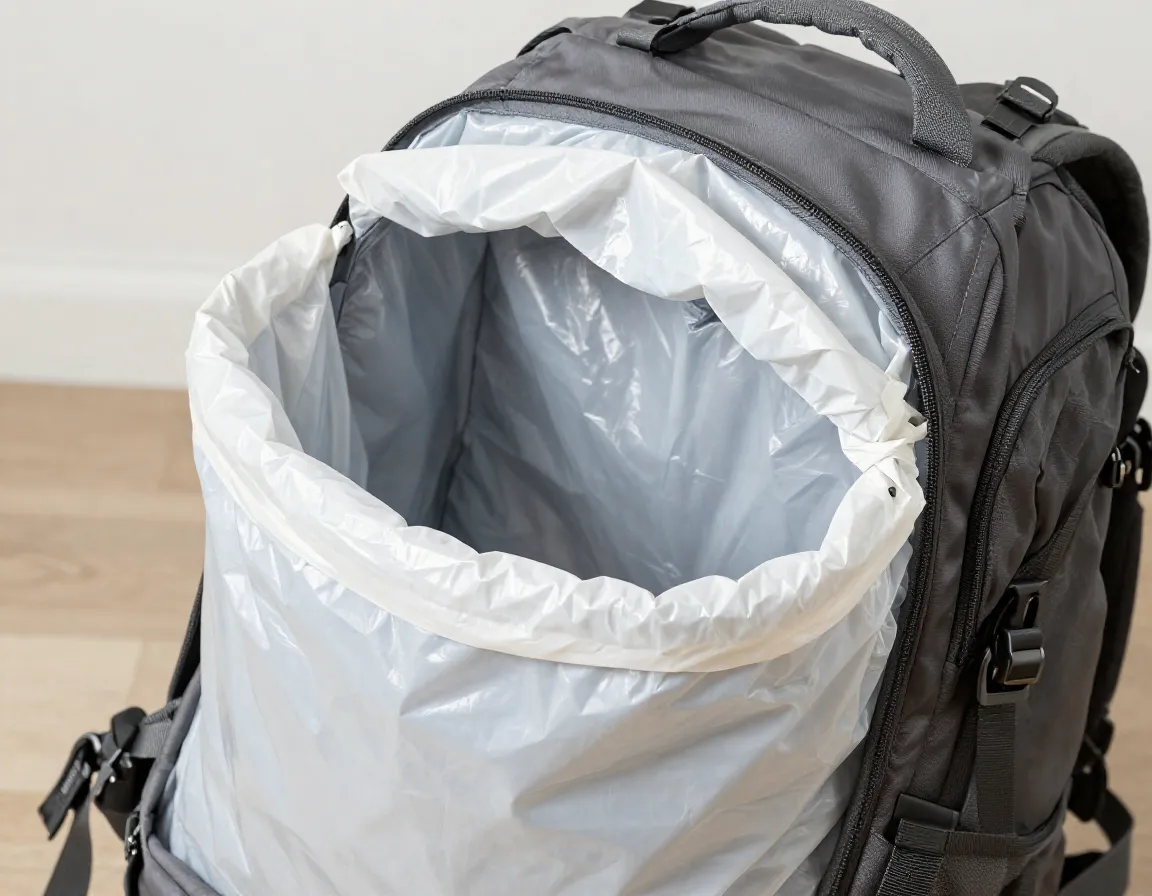
Before placing any gear, consider a pack liner or large garbage bag inside the main compartment. This creates a waterproof barrier that protects everything inside, especially important in wet conditions.
This step also gives you a clean, organized interior to work with. A pack liner:
- 🌧️ Keeps gear dry in rain or river crossings
- 📦 Groups items together, reducing internal shifting
- ⚖️ Adds almost no weight (a standard garbage bag weighs under an ounce)
If your pack has a built-in rain cover, a liner still adds valuable protection for your sleeping bag and electronics.
3. Place Bulky, Lightweight Items at the Bottom
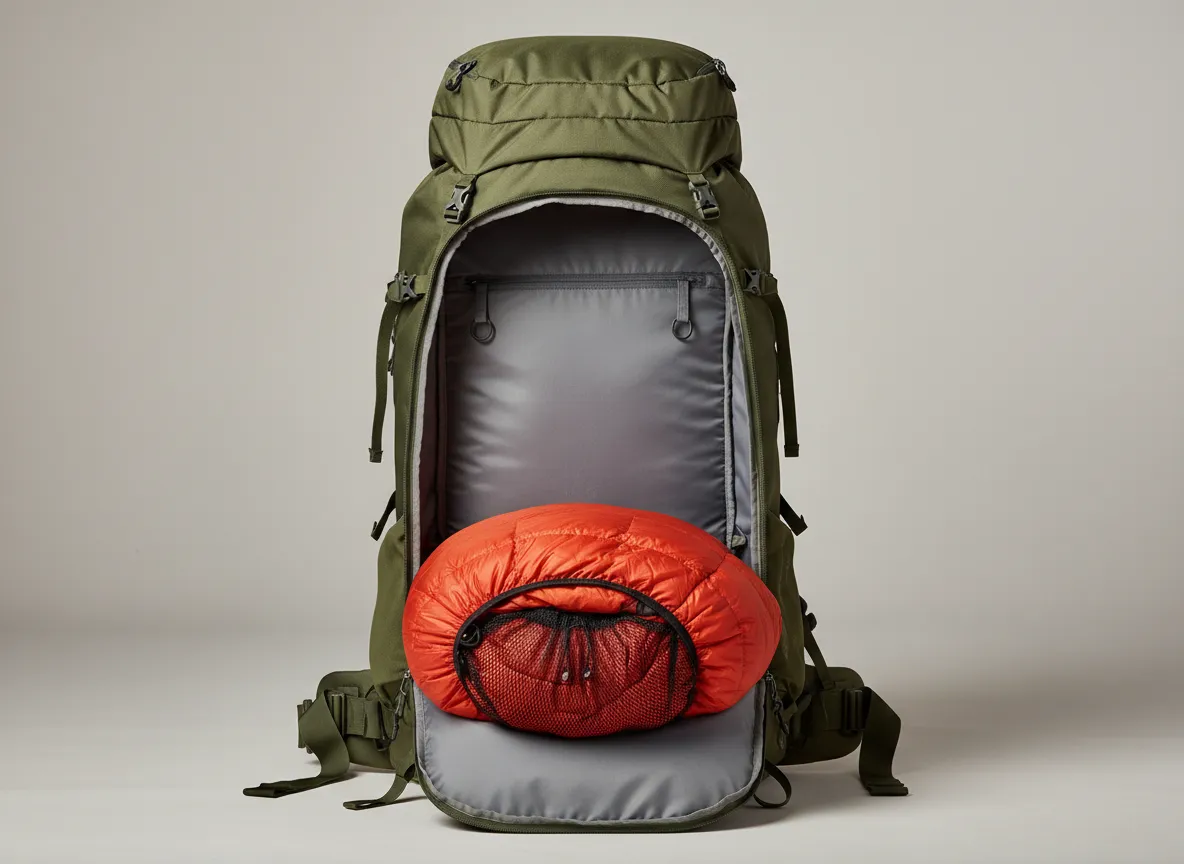
The bottom zone is home to your sleeping bag, lightweight puffy layers, and other compressible, low-density items. These create a soft, stable foundation without pulling your center of gravity downward.
This is one of the most counterintuitive steps for new hikers. Many people think heavy items should go at the bottom for “stability.” That’s actually backwards. Placing heavy items low drops your center of gravity below your own body’s center, forcing you to compensate with your posture and burning extra energy.
What goes at the bottom:
- Sleeping bag (in a compression sack)
- Puffy jacket or extra insulation layer
- Sleeping pad (if it fits internally)
- Spare base layers and socks
Pack these items tightly to eliminate dead air space. Use your fist to compress them as you go.
4. Load the Core Zone With Your Heaviest Items
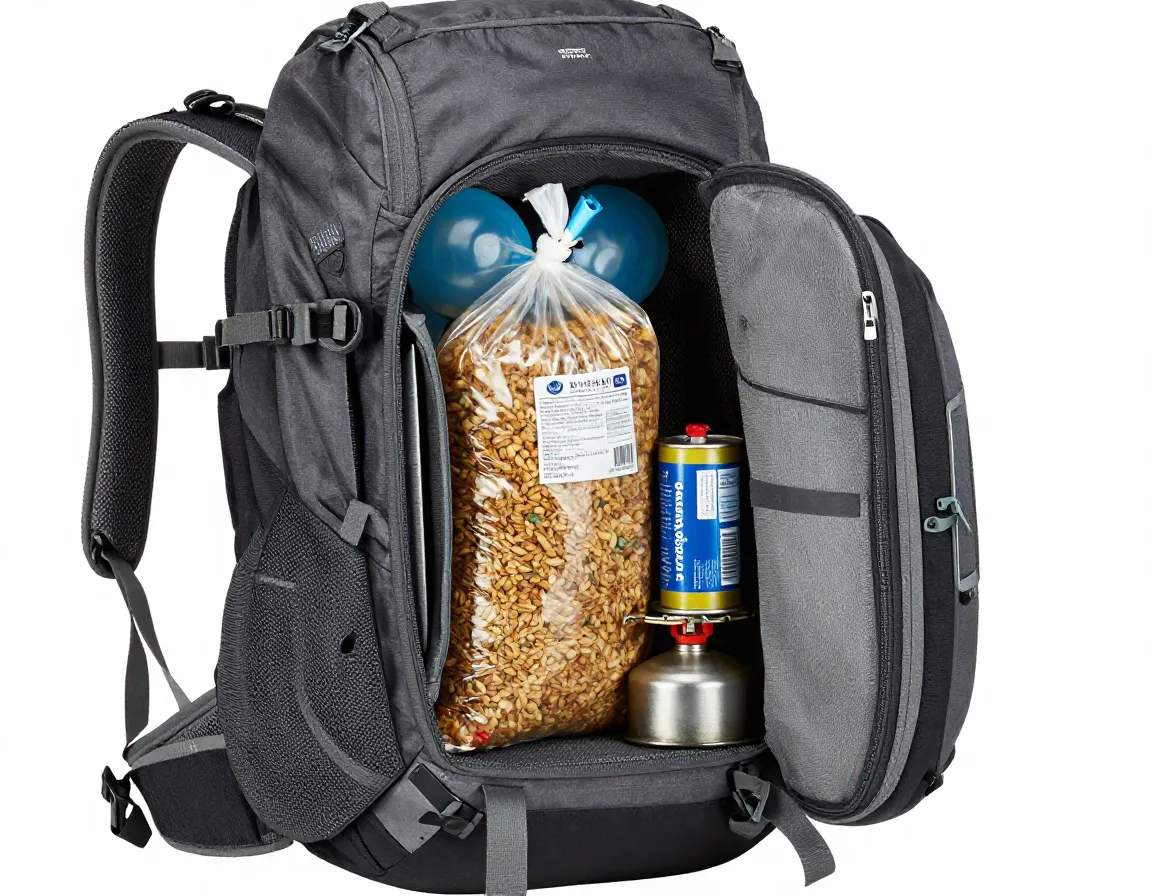
This is the most critical step in how to pack your backpack for perfect weight distribution. The core zone — the middle and upper-middle section of your pack, pressed directly against your back — is where your heaviest, densest items belong.
Why here? Because this position:
- Aligns the pack’s center of gravity with your body’s center of gravity
- Allows the hip belt to transfer 60–80% of the load to your hips
- Prevents the pack from pulling you backward
- Reduces shoulder and neck fatigue dramatically
What goes in the core zone:
- Water bladder or water bottles (heaviest single item for most hikers)
- Food supply (especially dense, calorie-rich foods)
- Stove and fuel canisters
- Bear canister
- Tent body and rain fly
Critical rule: These items must sit as close to your spine as possible. If they’re floating toward the back of the pack away from your body, you lose the weight-transfer benefit entirely.
5. Pack in Horizontal Layers, Not Vertical Columns
This step is a game-changer that most hikers never learn. Instead of stacking items in vertical columns (one item directly on top of another), pack in horizontal layers — spreading each item across the full width of the pack before adding the next layer.
Why does this matter? Vertical columns create uneven pressure points and allow items to shift sideways during movement. Horizontal layering:
- Distributes weight evenly across the pack’s frame
- Creates a more stable load that doesn’t sway
- Reduces the “lopsided” feeling that throws off your gait
Think of it like building a wall with bricks — you stagger the joints for strength. Apply the same logic to your pack.
💡 Pull Quote: “Packing in horizontal layers is the single technique that separates experienced backpackers from beginners — and it costs nothing to learn.”
6. Fill Every Gap With Soft Items
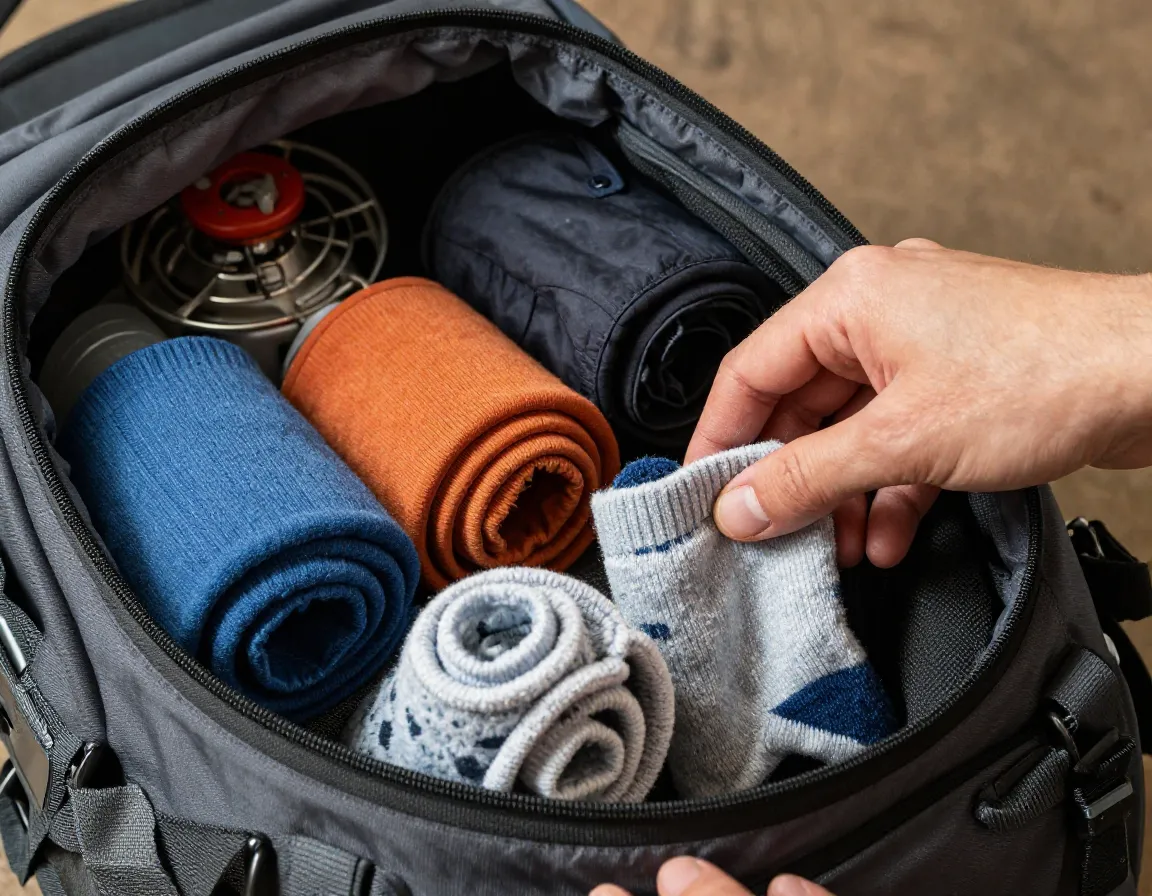
Air pockets inside your pack are the enemy of good weight distribution. Every gap between heavier items is an opportunity for those items to shift, poke, or create uncomfortable pressure points during your hike.
Use spare clothes, socks, and soft items to fill every void between heavier gear. This technique:
- 🚫 Prevents heavy items from shifting and poking your back
- 📦 Maximizes pack efficiency (no wasted space)
- ⚖️ Keeps the load stable and balanced throughout the day
Stuff a rolled-up fleece between your stove and your water bladder. Tuck socks around your fuel canister. Use your rain jacket to cushion the gap near your back panel. Every soft item serves double duty as both gear and packing material.
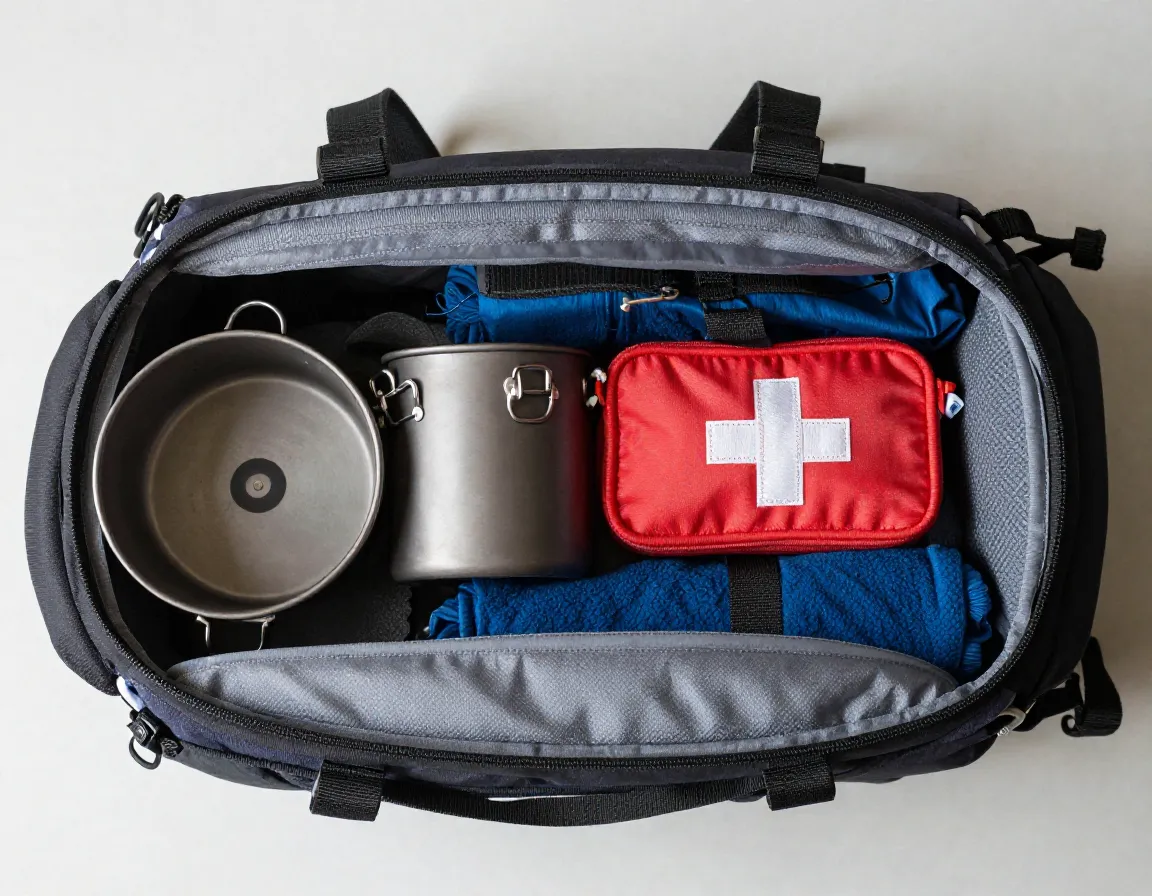
7. Place Medium-Weight Items in the Upper Zone
Once your core zone is packed and gaps are filled, medium-weight items go in the upper portion of the main compartment, above the heavy core items. This includes:
- Cooking pot and utensils
- First aid kit
- Headlamp and batteries
- Electronics (camera, satellite communicator)
- Extra layers you might need during the day
These items are heavier than your sleeping bag but lighter than your food and water. Placing them above the core zone keeps the overall center of gravity high and centered — exactly where you want it.
Balance check: After loading this layer, hold the packed section at arm’s length. It should feel balanced side to side. If it tips noticeably to one side, redistribute items before continuing.
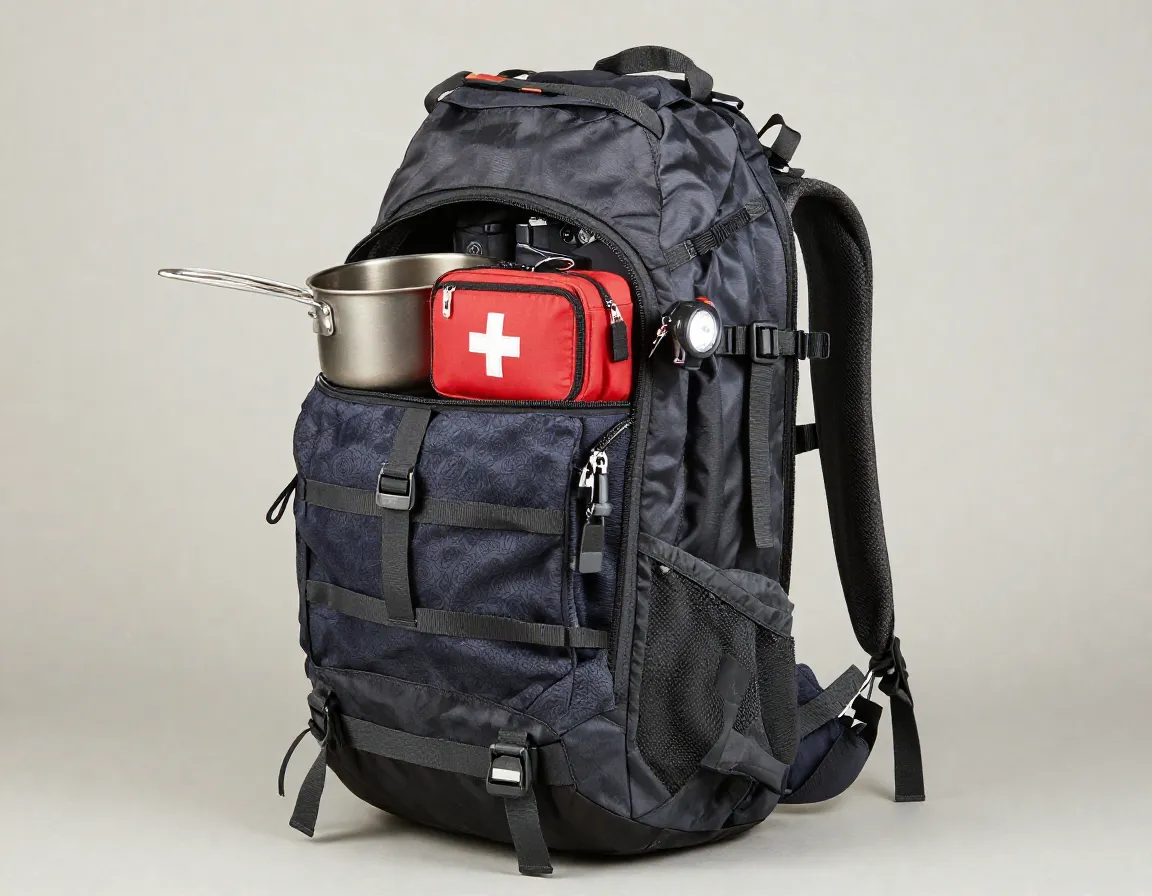
8. Use Exterior Pockets and Lid for Quick-Access Items
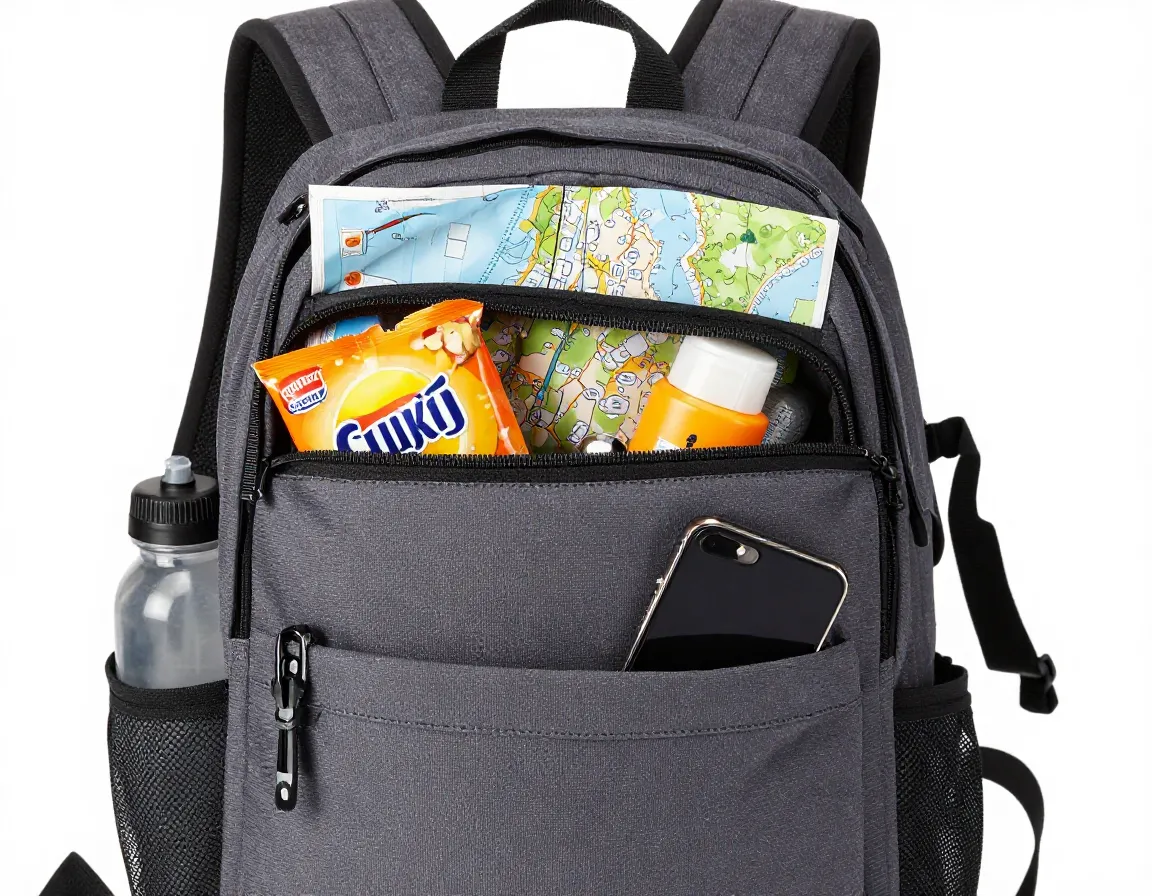
The lid compartment (top pocket) and exterior hip belt pockets are designed for lightweight, frequently accessed items. Never put heavy gear here — it raises your center of gravity too high and creates instability.
Top lid pocket:
- Snacks for the trail
- Sunscreen and lip balm
- Map and compass
- Toilet paper and trowel
- Permits and ID
Hip belt pockets:
- Energy gels or bars
- Phone (for photos and navigation)
- Small first aid items
- Lip balm and sunscreen
Side mesh pockets:
- Water bottles (keep them accessible without removing your pack)
- Trekking pole tips or collapsed poles
One important note: if you’re using side pockets for water bottles, try to keep both sides equally weighted. An asymmetrical load — one full bottle on one side, nothing on the other — creates lateral imbalance that affects your gait over long distances.
9. Adjust Your Pack’s Fit System Before You Hit the Trail
The final step in how to pack your backpack for perfect weight distribution isn’t about what goes inside — it’s about how the pack sits on your body. Even a perfectly packed bag will feel terrible if the fit system is wrong.
Follow this adjustment sequence every time you load your pack:
- Loosen all straps before putting the pack on
- Put the pack on and position the hip belt so the top of the belt wraps around your iliac crest (the bony top of your hip)
- Tighten the hip belt first — snug but not cutting off circulation
- Tighten the shoulder straps until they conform to your shoulders with no gaps, but most weight still on hips
- Clip and tighten the sternum strap at a comfortable chest height
- Pull the load lifter straps (the small straps connecting shoulder straps to the top of the pack) until they angle at roughly 45 degrees
💡 Pull Quote: “The hip belt is the most important strap on your pack. If it’s not doing the heavy lifting, your shoulders are — and that’s a recipe for a miserable hike.”
After adjusting, walk around for 2–3 minutes and readjust as needed. The pack should feel like it’s part of your body, not something hanging off your back.
Common Weight Distribution Mistakes to Avoid
Even experienced hikers make these errors. Watch out for:
| ❌ Mistake | ✅ Fix |
|---|---|
| Heavy items at the bottom | Move dense gear to the core zone (middle-upper) |
| Heavy items far from your back | Press dense items directly against the back panel |
| Ignoring side-to-side balance | Distribute weight evenly left and right |
| Overpacking the lid pocket | Keep the lid light; heavy items here raise CoG too high |
| Skipping hip belt adjustment | Always fit the hip belt first — it carries most of the load |
| Packing over 25% body weight | Audit and cut gear; excess weight compounds on every step |
How to Check Your Pack Balance Before Leaving Camp
Before you start each day’s hike, do a quick 30-second balance check:
- Hold the packed bag at arm’s length — does it hang level or tilt?
- Put it on and stand straight — do you feel pulled backward? That means heavy items are too far from your back.
- Take 10 steps — does the pack sway side to side? That means lateral imbalance.
- Check the hip belt — is it sitting on your hips, or has it ridden up to your waist?
Making small adjustments at camp is infinitely easier than suffering through 10 miles of discomfort.
Packing for Different Trip Types
The core principles of how to pack your backpack for perfect weight distribution stay the same, but the specifics shift depending on your trip:
🏕️ Weekend Backpacking (2–3 days)
- Lighter food load means water is your heaviest item — keep it high and close to your back
- Total pack weight target: 20–25 lbs for most hikers
🏔️ Multi-Day Thru-Hike (5+ days)
- Food weight is significant on day one — pack food in the core zone and let it deplete naturally
- Resupply planning matters; a heavy food carry changes your pack’s balance
🌧️ Winter or Wet-Weather Trips
- Extra insulation layers add bulk — use them to fill gaps in the core zone
- Keep emergency gear accessible in the lid pocket
🌞 Day Hiking
- Even a daypack benefits from these principles
- Water goes high and close to your back; snacks in hip belt pockets
Conclusion: Your Next Steps to a Better-Packed Pack
Mastering how to pack your backpack — 9 steps for perfect weight distribution — isn’t complicated, but it does require intention. The difference between a well-packed bag and a poorly packed one is the difference between enjoying your hike and merely surviving it.
Here’s what to do right now:
- Pull out your pack and all your gear and do a full audit before your next trip.
- Practice the three-zone system — bottom for light/bulky, core for heavy, top for quick-access.
- Pack in horizontal layers and fill every gap with soft items.
- Dial in your fit system every single time you load your pack — don’t skip this step.
- Weigh your loaded pack and aim for 20–25% of your body weight.
Once you feel the difference a properly packed bag makes — the way your hips take the load, the way your shoulders finally relax, the way your posture stays upright for miles — you’ll never go back to guessing. Pack smart, hike strong, and enjoy every step of the trail. 🏔️
References
- REI Co-op Staff. “How to Pack a Backpack.” REI Expert Advice. REI, 2023. https://www.rei.com/learn/expert-advice/loading-backpack.html
- Jardine, Ray. Trail Life: Ray Jardine’s Lightweight Backpacking. AdventureLore Press, 2009.
- Schöffl, Volker, et al. “Load Carriage and Energy Expenditure in Hiking: Implications for Pack Weight Recommendations.” Wilderness & Environmental Medicine, vol. 30, no. 2, 2019, pp. 145–152.