How to Layer Your Hiking Fits for Extreme Cold Weather: The Complete Guide
When temperatures plummet and winter winds howl across mountain peaks, the difference between a successful hiking adventure and a dangerous situation often comes down to one critical factor: proper layering. Every year, search and rescue teams respond to emergencies where inadequately dressed hikers face hypothermia, frostbite, or worse in extreme cold conditions.
Learning how to layer your hiking fits for extreme cold weather isn’t just about staying comfortable—it’s about staying alive. The right layering system creates a microclimate around your body, managing moisture, maintaining warmth, and providing protection against harsh elements while allowing you to adapt to changing conditions throughout your hike.
Key Takeaways
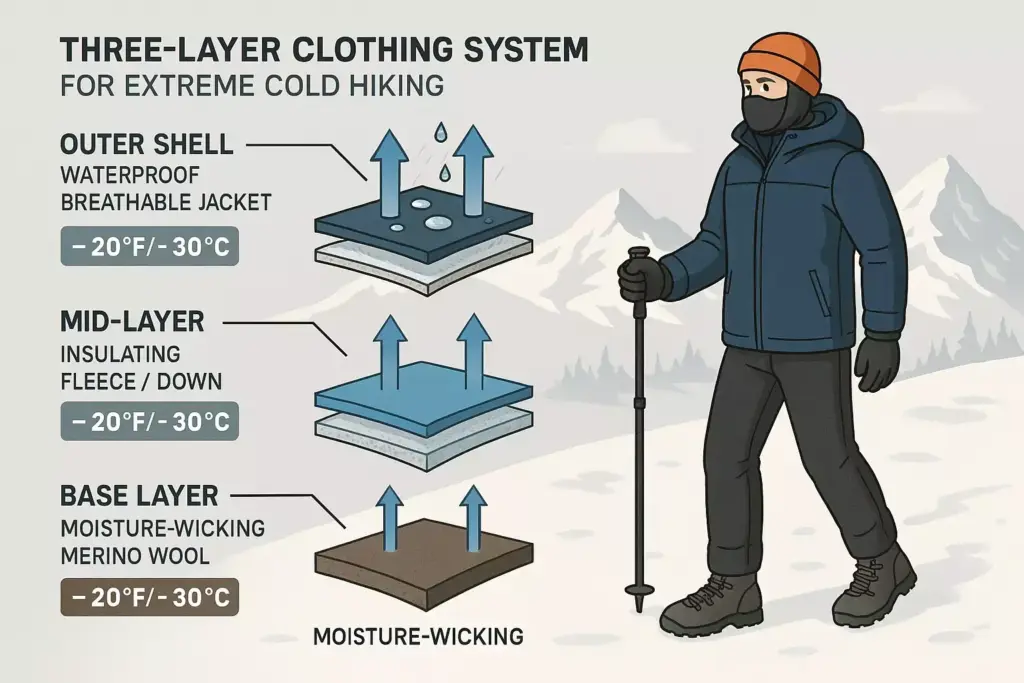
- The three-layer system (base, mid, outer) forms the foundation of effective cold weather hiking protection
- Moisture management is crucial—wet clothing loses insulation properties and can lead to hypothermia
- Proper fit and adjustability allow for temperature regulation without removing layers completely
- Material choice matters—synthetic and merino wool fabrics outperform cotton in cold, wet conditions
- Extremities require special attention—hands, feet, and head lose heat rapidly and need dedicated protection
Understanding the Science Behind Cold Weather Layering
How Your Body Loses Heat
The human body loses heat through four primary mechanisms: conduction, convection, radiation, and evaporation. When hiking in extreme cold, each of these heat loss pathways becomes a potential threat to your core temperature.
Conduction occurs when your body touches cold surfaces—like sitting on frozen rocks or wearing wet clothing against your skin. Convection happens when moving air strips away your body’s warm air layer, which is why wind chill feels so brutal. Radiation involves heat escaping directly from your body into the environment, while evaporation removes heat through moisture leaving your skin.
“The key to surviving extreme cold isn’t just adding more layers—it’s understanding how each layer works together to combat specific heat loss mechanisms.” – Mountain Safety Council
The Physics of Insulation
Effective insulation works by trapping warm air in small pockets near your body. This principle explains why down feathers, synthetic fills, and wool fibers excel at keeping you warm—they create thousands of tiny air spaces that resist heat transfer.
However, insulation only works when it stays dry and lofted. Compressed or wet insulation loses its ability to trap air, dramatically reducing its thermal efficiency. This is why understanding how to layer your hiking fits for extreme cold weather requires knowledge of both insulation and moisture management.
The Three-Layer System: Foundation of Cold Weather Protection
Base Layer: Your Moisture Management System
The base layer sits directly against your skin and serves as your first line of defense against moisture buildup. During cold weather hiking, your body continues producing sweat even when you feel cold, and this moisture must be moved away from your skin quickly.
Best Base Layer Materials:
- Merino Wool: Naturally odor-resistant, retains warmth when wet, excellent temperature regulation
- Synthetic Blends: Quick-drying, durable, often less expensive than wool
- Silk: Lightweight, smooth texture, good for less active pursuits
Base Layer Fit Guidelines:
- Should feel snug but not restrictive
- No bunching or loose fabric that creates cold spots
- Flat seams to prevent chafing during long hikes
- Long sleeves and full-length legs for maximum coverage
Mid-Layer: Your Insulation Powerhouse
The mid-layer provides the bulk of your warmth by trapping heated air around your body. This layer needs to balance insulation efficiency with breathability and packability for hiking applications.
Popular Mid-Layer Options:
| Material Type | Warmth-to-Weight | Packability | Wet Performance | Best Use |
|---|---|---|---|---|
| Down | Excellent | Excellent | Poor | Dry, very cold conditions |
| Synthetic Fill | Good | Good | Excellent | Variable weather |
| Fleece | Good | Fair | Good | Active pursuits |
| Wool Sweater | Good | Poor | Excellent | Casual hiking |
Outer Layer: Your Weather Shield
The outer shell protects you from wind, snow, and precipitation while allowing moisture vapor to escape from inner layers. When learning how to layer your hiking fits for extreme cold weather, the outer layer choice often determines overall system success.
Shell Types for Extreme Cold:
- Hardshells: Maximum weather protection, less breathable
- Softshells: Better breathability, moderate weather resistance
- Insulated Shells: Combined insulation and protection, less versatile
Advanced Layering Strategies for Extreme Conditions
Temperature-Based Layer Selection
Different temperature ranges require specific approaches to layering. Understanding these guidelines helps you prepare appropriate gear for your expected conditions.
Above 20°F (-6°C):
- Lightweight base layer
- Light fleece or thin synthetic mid-layer
- Breathable softshell outer layer
0°F to 20°F (-18°C to -6°C):
- Medium-weight base layer
- Insulated mid-layer (fleece + vest or light down)
- Waterproof hardshell
Below 0°F (-18°C):
- Heavy base layer system
- Multiple mid-layers or heavy down jacket
- Expedition-weight outer shell
- Consider adding emergency bivvy
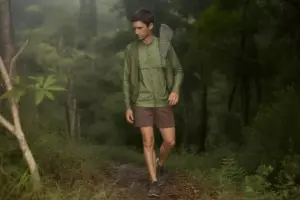
Activity Level Adjustments
Your exertion level dramatically affects how to layer your hiking fits for extreme cold weather. High-intensity activities generate significant body heat, requiring more breathable, less insulating layers. Low-intensity or stop-and-go activities need maximum insulation with easy adjustment options.
High Activity Layering:
- Focus on moisture-wicking base layers
- Minimal, highly breathable mid-layers
- Packable outer shell for weather protection only
Variable Activity Layering:
- Multiple thin mid-layers for fine-tuning
- Full-zip options for quick ventilation
- Packable puffy jacket for rest stops
Essential Extremity Protection
Hand and Finger Warmth
Hands lose heat rapidly due to high surface area and reduced blood flow in cold conditions. A layered approach works for hands just like your core body.
Hand Layering System:
- Liner gloves: Thin merino wool or synthetic
- Insulating gloves: Fleece or light insulation
- Shell mittens: Waterproof outer protection
Pro Tip: Mittens keep fingers warmer than gloves by allowing fingers to share heat, but gloves provide better dexterity for technical tasks.
Foot Warmth and Dryness
Cold feet can end a hiking trip quickly and lead to serious frostbite injuries. Proper foot layering involves both sock systems and appropriate footwear.
Sock Layering Strategy:
- Liner socks: Thin synthetic or silk to prevent blisters
- Hiking socks: Merino wool or synthetic blend for insulation
- Vapor barrier: Plastic bag between layers for extreme conditions
Boot Selection Criteria:
- Insulation rating appropriate for expected temperatures
- Waterproof/breathable membrane
- Room for thick sock layers without tight fit
- Compatibility with microspikes or crampons
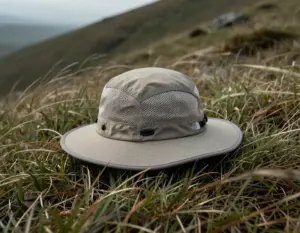
Head and Neck Protection
The head and neck contain major blood vessels close to the surface, making them critical areas for heat retention. Multiple hat options allow for temperature regulation throughout your hike.
Head Layering Options:
- Lightweight beanie: For moderate cold and high activity
- Insulated hat: For extreme cold and low activity
- Balaclava: For wind and snow protection
- Buff or neck gaiter: Versatile protection for neck and face
Material Technologies and Performance Features
Fabric Performance in Extreme Cold
Understanding fabric technologies helps you make informed decisions when selecting gear for cold weather hiking. Modern materials offer impressive performance improvements over traditional options.
Moisture-Wicking Technologies:
- Capillary action: Fabric structure pulls moisture away from skin
- Phase change materials: Absorb and release heat to regulate temperature
- Antimicrobial treatments: Prevent odor buildup during multi-day trips
Insulation Technologies:
- Down fill power: Higher numbers indicate better warmth-to-weight ratios
- Synthetic insulation: Maintains warmth when wet, dries quickly
- Hybrid constructions: Combine down and synthetic in strategic zones
Breathability vs. Weather Protection
The eternal challenge in cold weather layering involves balancing weather protection with breathability. More waterproof often means less breathable, leading to moisture buildup inside your layers.
Breathability Ratings:
- 20,000+ g/m²/24hr: Excellent for high-activity pursuits
- 10,000-20,000 g/m²/24hr: Good for moderate activity
- Below 10,000 g/m²/24hr: Best for low activity or emergency use
Practical Application: How to Layer Your Hiking Fits for Extreme Cold Weather
Pre-Hike Preparation
Successful cold weather layering begins before you hit the trail. Proper preparation includes gear selection, weather monitoring, and backup planning.
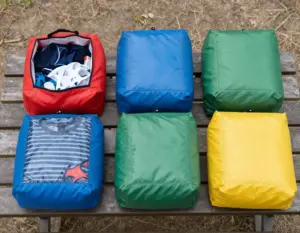
24 Hours Before Your Hike:
- Check detailed weather forecasts including wind speeds and precipitation
- Test all zippers, adjustments, and ventilation features
- Pack backup layers in waterproof stuff sacks
- Plan layer adjustments for different trail sections
Morning of Your Hike:
- Start slightly cool—you’ll warm up quickly once moving
- Carry extra layers in easily accessible pack locations
- Eat a substantial breakfast to fuel your internal heating system
- Check extremity warmth before leaving the trailhead
On-Trail Layer Management
Knowing when and how to adjust your layers prevents overheating, moisture buildup, and subsequent cooling when you stop moving.
Layer Adjustment Triggers:
- Too warm: Unzip ventilation before removing layers
- Starting to sweat: Remove or open mid-layer immediately
- Taking breaks: Add insulation layer before stopping
- Weather changes: Adjust outer layer protection as needed
Ventilation Strategies:
- Open pit zips and chest vents first
- Remove hat before unzipping jacket
- Roll up sleeves before removing mid-layer
- Use pack waist belt ventilation if available
Emergency Protocols
Even with perfect layering, extreme cold weather can present unexpected challenges. Having emergency protocols and backup gear can prevent minor issues from becoming serious problems.
Emergency Warmth Strategies:
- Buddy warming: Share body heat in emergency shelters
- Exercise protocols: Specific movements to restore circulation
- Emergency bivvy: Reflective emergency shelter as extra layer
- Chemical heat packs: Backup warmth for extremities
❄️ Cold Weather Hiking Layer Calculator
Your Recommended Layering System
Common Layering Mistakes to Avoid
Overdressing at the Start
One of the most frequent errors when learning how to layer your hiking fits for extreme cold weather involves starting too warm. Many hikers put on all their layers before beginning their hike, leading to immediate overheating and excessive sweating.
The 15-Minute Rule: You should feel slightly cool when you start hiking. Your body will generate significant heat within the first 15 minutes of activity, and starting too warm leads to moisture problems that can become dangerous later.
Cotton Clothing in Any Layer
Cotton kills in cold weather conditions. This fabric retains moisture, loses all insulating properties when wet, and takes extremely long to dry. Even cotton blend fabrics can be problematic in extreme conditions.
Cotton Alternatives:
- Base layers: Merino wool or synthetic materials
- Mid-layers: Fleece, down, or synthetic insulation
- Outer layers: Technical fabrics with DWR coatings
- Socks: Wool or synthetic hiking socks only
Ignoring Fit and Mobility
Proper fit ensures each layer can function effectively without restricting movement or blood circulation. Too tight clothing reduces insulation and circulation, while too loose clothing allows cold air infiltration.
Fit Testing Protocol:
- Layer all pieces together before your trip
- Test full range of motion with pack on
- Check for pressure points or restriction
- Ensure outer layer accommodates all inner layers
- Verify gloves work with jacket cuffs
Gear Maintenance and Care
Cleaning and Storage
Proper care extends the life and performance of your cold weather layering system. Down insulation and technical fabrics require specific maintenance protocols to maintain their effectiveness.
Down Care:
- Wash with down-specific detergent
- Use tennis balls in dryer to restore loft
- Store uncompressed in breathable bags
- Re-proof with DWR treatment annually
Synthetic Insulation Care:
- Machine wash on gentle cycle
- Avoid fabric softeners that reduce wicking
- Air dry or low heat tumble dry
- Check for delamination or wear points
Field Repairs
Knowing how to perform basic repairs in the field can save your trip when gear fails in extreme conditions.
Essential Repair Kit:
- Duct tape: For tears in outer shells
- Seam sealer: For waterproofing repairs
- Safety pins: For zipper failures
- Tenacious Tape: For down jacket repairs
Advanced Considerations for Extreme Conditions
Altitude Effects on Layering
High altitude hiking presents unique challenges for cold weather layering. Reduced air pressure affects insulation efficiency, while increased UV exposure and rapid weather changes require adaptable systems.
Altitude Adjustments:
- Pack additional mid-layer options for temperature swings
- Increase sun protection even in cold conditions
- Monitor for altitude sickness symptoms that affect temperature regulation
- Plan for faster cooling at rest stops due to thin air
Multi-Day Considerations
Extended trips in extreme cold require different layering strategies than day hikes. Moisture management becomes critical when you can’t return to warm, dry conditions each evening.
Multi-Day Strategies:
- Pack duplicate base layers for moisture management
- Include camp-specific insulation layers
- Plan for drying wet layers in tent or shelter
- Carry backup insulation in case of gear failure
Conclusion
Mastering how to layer your hiking fits for extreme cold weather requires understanding the science behind heat loss, selecting appropriate materials for each layer, and developing the skills to adjust your system based on changing conditions. The three-layer system—moisture-wicking base layer, insulating mid-layer, and protective outer shell—provides the foundation for safe and comfortable cold weather hiking.
Remember that proper layering is about more than just staying warm; it’s about maintaining the right body temperature while managing moisture and adapting to changing conditions throughout your hike. Practice your layering system in controlled conditions before heading into extreme cold, and always carry backup layers and emergency gear.
Your next steps:
- Assess your current gear against the guidelines in this article
- Test your layering system on shorter hikes in cold conditions
- Practice layer adjustments to develop efficient techniques
- Build a gear checklist specific to your local extreme cold conditions
- Take a wilderness first aid course to recognize and treat cold-related injuries
The mountains will always present challenges, but with proper preparation and the right layering system, you can safely enjoy hiking adventures even when winter shows its harshest face. Stay warm, stay safe, and keep exploring.