8 Brilliant Mini Camper DIY Projects You Can Tackle This Weekend
Picture this: Friday evening rolls around, and instead of binge-watching another series, you’re rolling up your sleeves to transform your mini camper into the ultimate adventure machine. Weekend warriors and DIY enthusiasts are discovering that 8 brilliant mini camper DIY projects you can tackle this weekend can completely revolutionize their camping experience without breaking the bank or requiring professional expertise.
The mini camper movement has exploded in 2025, with more people seeking affordable ways to explore the great outdoors. These compact vehicles offer the perfect canvas for creative modifications that maximize space, enhance comfort, and add personal flair to your mobile basecamp.
Key Takeaways
- Quick turnaround: All eight projects can be completed within 48 hours using basic tools and readily available materials
- Budget-friendly: Most modifications cost under $200 and deliver immediate value and functionality improvements
- Skill-appropriate: Projects range from beginner-friendly installations to intermediate builds suitable for weekend DIYers
- Maximum impact: Each project significantly enhances storage, comfort, or functionality in your mini camper setup
- Customizable: All projects can be adapted to fit different mini camper models and personal preferences
Essential Interior Mini Camper DIY Projects for Maximum Comfort
The interior of your mini camper represents your home away from home, and smart modifications can transform cramped quarters into a surprisingly comfortable living space. These brilliant mini camper DIY projects you can tackle this weekend focus on maximizing every square inch while maintaining the cozy atmosphere that makes camping special.
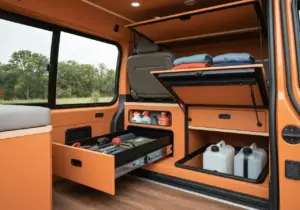
1. Custom Modular Storage System
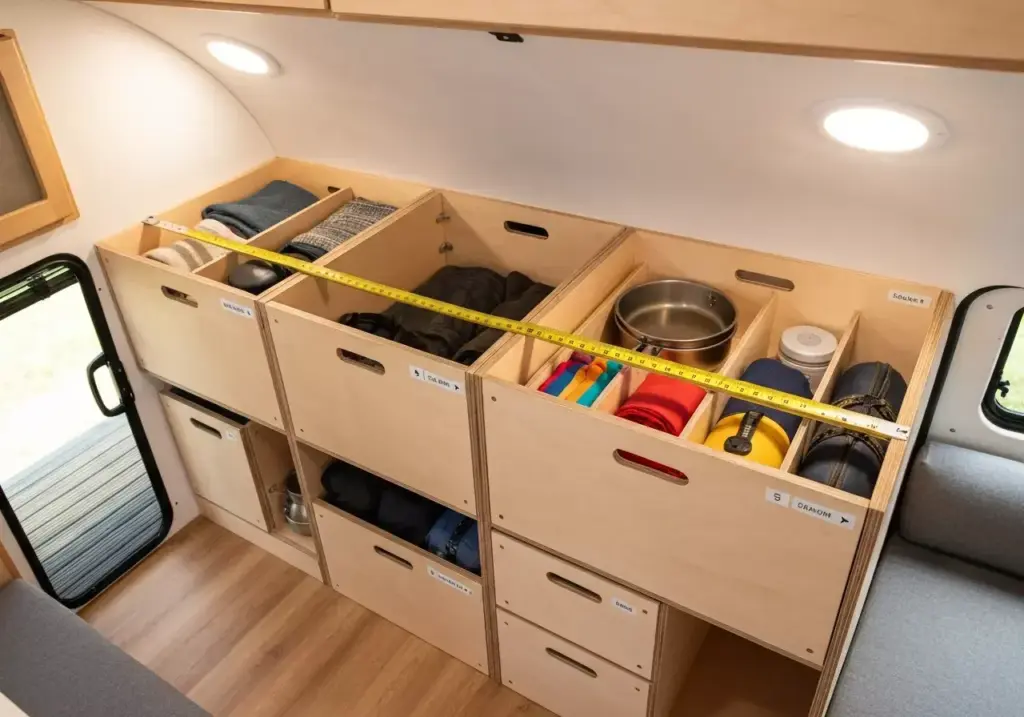
Time Required: 6-8 hours | Difficulty: Intermediate | Cost: $150-200
Creating a modular storage system revolutionizes how you organize gear in your mini camper. This project involves building stackable, removable storage boxes that fit perfectly into your vehicle’s unique dimensions.
Materials needed:
- 3/4-inch plywood sheets
- Wood screws and hinges
- Drawer slides
- Measuring tape and saw
- Sandpaper and wood stain
Step-by-step approach:
Start by measuring every available storage space in your camper. Design boxes that can serve multiple functions – some with dividers for small items, others sized for clothing or cooking equipment. The key is creating a system where each box fits snugly but removes easily for cleaning or reconfiguration.
Pro tip: 💡 Add labels and color-coding to make finding items effortless, even in low-light conditions.
2. Fold-Down Dinette Table with Hidden Storage
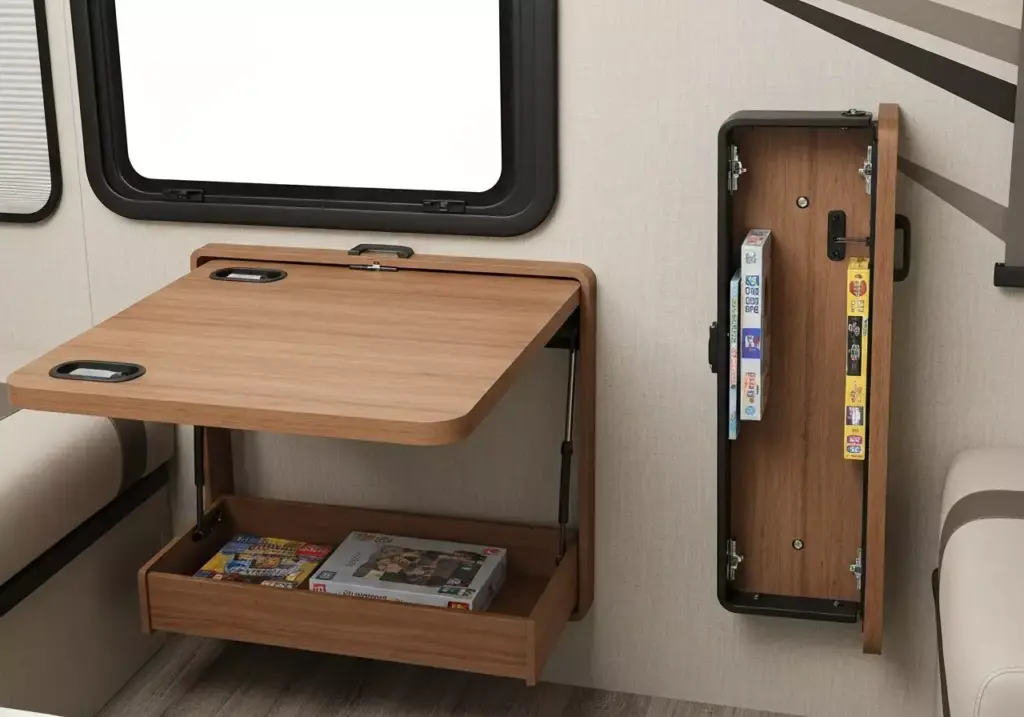
Time Required: 4-6 hours | Difficulty: Beginner-Intermediate | Cost: $80-120
A fold-down dinette table serves triple duty as dining surface, workspace, and storage compartment. This clever design mounts to the wall and folds completely flat when not in use.
Key features to include:
- Hydraulic hinges for smooth operation
- Internal compartments for games, electronics, or paperwork
- Adjustable height to accommodate different seating options
- Rounded corners for safety in tight spaces
The beauty of this project lies in its versatility. During travel, it stores flat against the wall. At camp, it becomes your command center for meal prep, laptop work, or evening card games.
3. LED Lighting Upgrade with Dimmer Controls
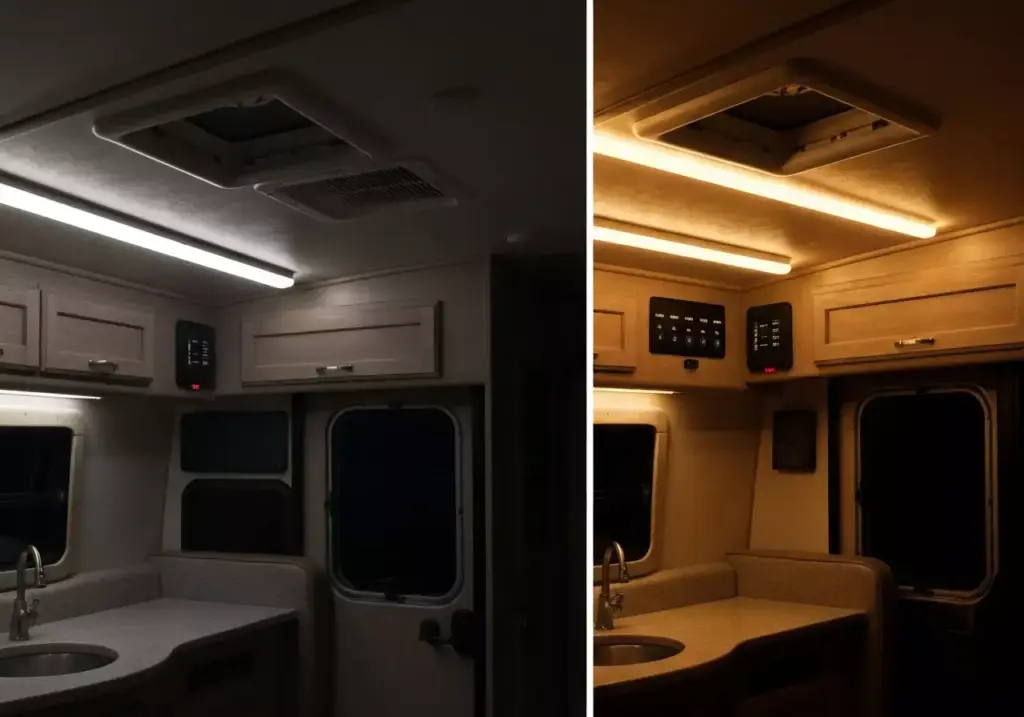
Time Required: 3-4 hours | Difficulty: Beginner | Cost: $60-100
Proper lighting transforms the ambiance of your mini camper from utilitarian to welcoming. This project replaces harsh overhead lights with a multi-zone LED system featuring warm and cool temperature options.
Installation highlights:
- Under-cabinet strips for task lighting
- Reading lights with individual switches
- Ambient lighting for evening relaxation
- Red light options to preserve night vision
Wire everything through a central control panel with dimmer switches. This allows you to create the perfect atmosphere for any activity while conserving battery power.
4. Compact Murphy Bed with Daytime Seating
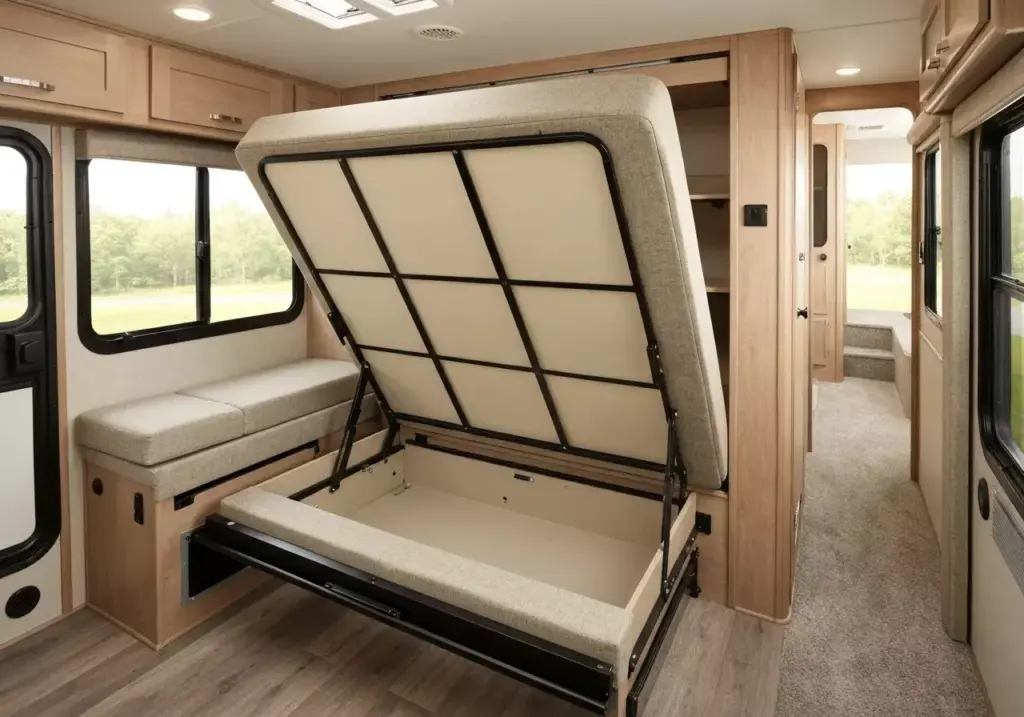
Time Required: 8-10 hours | Difficulty: Advanced | Cost: $200-300
The Murphy bed conversion represents the ultimate space-saving solution for mini campers. This project creates a comfortable sleeping area that completely disappears during daytime hours.
Design considerations:
- Gas struts for easy lifting and lowering
- Safety latches to prevent accidental deployment
- Integrated storage behind the bed frame
- Cushioned seating when bed is stored
When executed properly, this modification can increase your usable living space by 40-50% during waking hours while providing a genuinely comfortable sleeping surface.
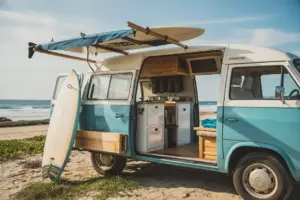
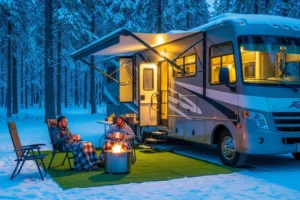
Game-Changing Exterior Mini Camper Modifications
The exterior of your mini camper offers tremendous opportunities for functional upgrades that enhance your camping experience. These weekend DIY projects focus on expanding your living space beyond the vehicle’s walls and improving self-sufficiency during extended adventures.
5. Solar Panel Installation with Battery Management
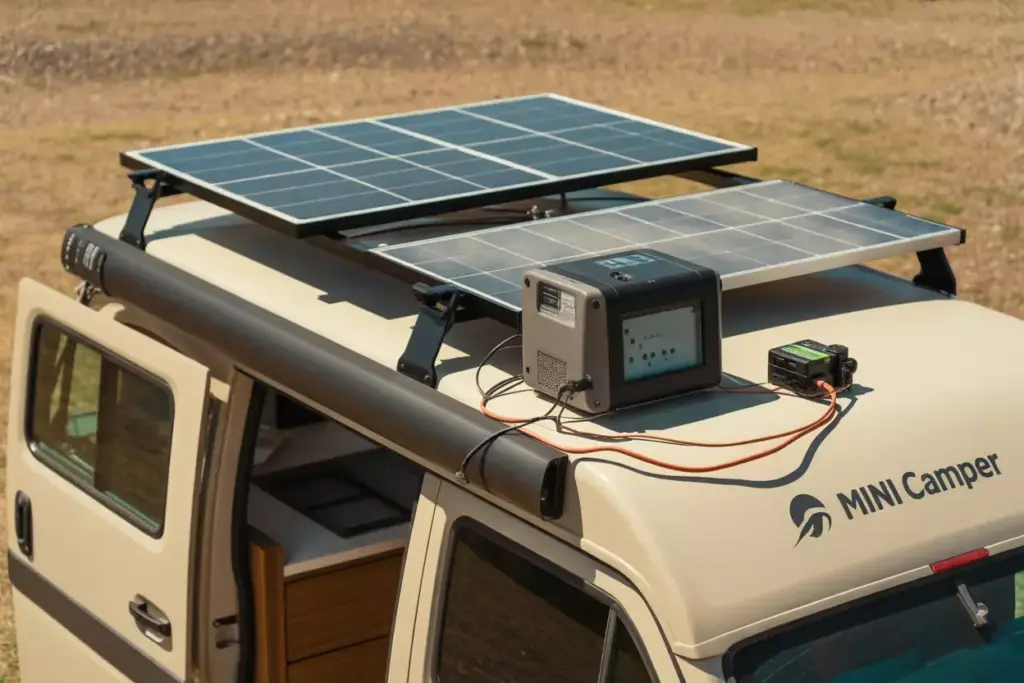
Time Required: 6-8 hours | Difficulty: Intermediate | Cost: $300-500
Solar power represents the holy grail of off-grid camping, and modern panels make installation surprisingly straightforward. This project provides energy independence for lighting, devices, and small appliances.
System components:
- 100-200 watt solar panels (flexible or rigid)
- Charge controller with LCD display
- Deep cycle battery (lithium preferred)
- Inverter for AC power needs
- Monitoring system for power management
Mount panels to the roof using appropriate brackets and sealants. Route wiring through existing entry points to avoid compromising the vehicle’s weather seal. Install the control system in an easily accessible interior location.
Energy calculation tip: 📊 A 200-watt system typically generates 800-1000 watt-hours daily in good conditions, sufficient for LED lighting, phone charging, and laptop use.
6. Retractable Awning with Side Panels
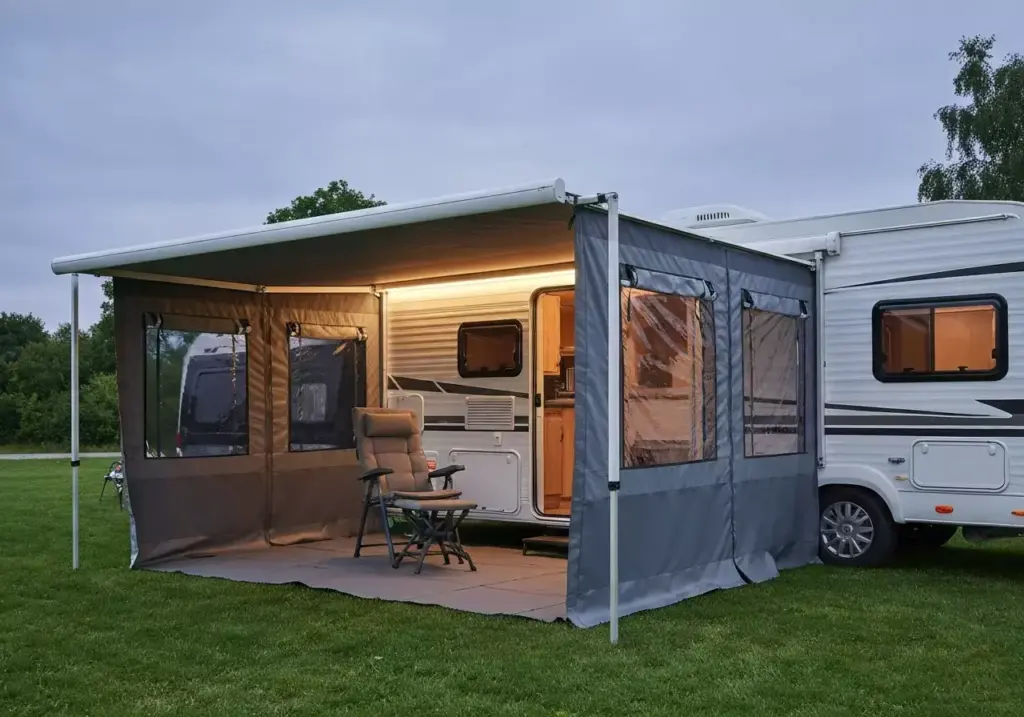
Time Required: 4-5 hours | Difficulty: Intermediate | Cost: $200-350
An awning system effectively doubles your living space by creating a comfortable outdoor room. Modern retractable awnings deploy in minutes and withstand moderate weather conditions.
Installation process:
- Mounting brackets must attach to structural roof rails
- Support arms require proper tensioning for stability
- Side panels add privacy and wind protection
- LED strip integration extends usability into evening hours
Choose awnings with quick-release mechanisms for rapid deployment in changing weather. Side panels with clear windows maintain views while providing weather protection.
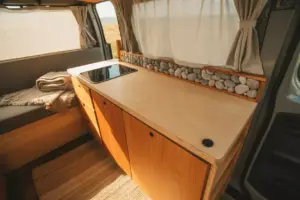
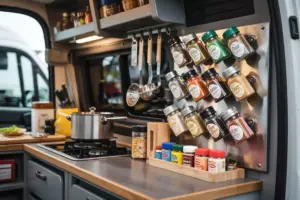
7. External Kitchen Galley with Slide-Out Design
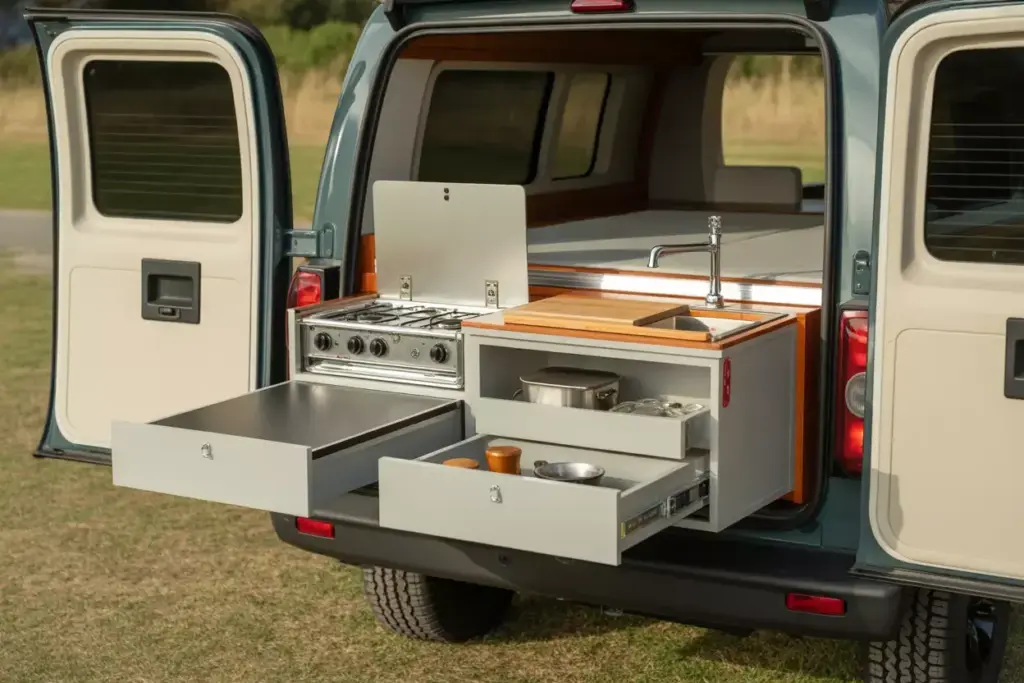
Time Required: 5-7 hours | Difficulty: Intermediate | Cost: $250-400
An external kitchen transforms meal preparation from cramped indoor cooking to spacious outdoor culinary adventures. This project creates a slide-out galley accessible from the rear doors.
Essential features:
- Slide-out drawer system on heavy-duty rails
- Portable stove mounting with wind shields
- Water system with pump and storage
- Prep surface with cutting board integration
- Storage compartments for cookware and supplies
Design the system to slide completely back into the vehicle for travel. Include tie-down points and weather sealing to protect contents during transit.
8. Bike Rack and Gear Storage Platform
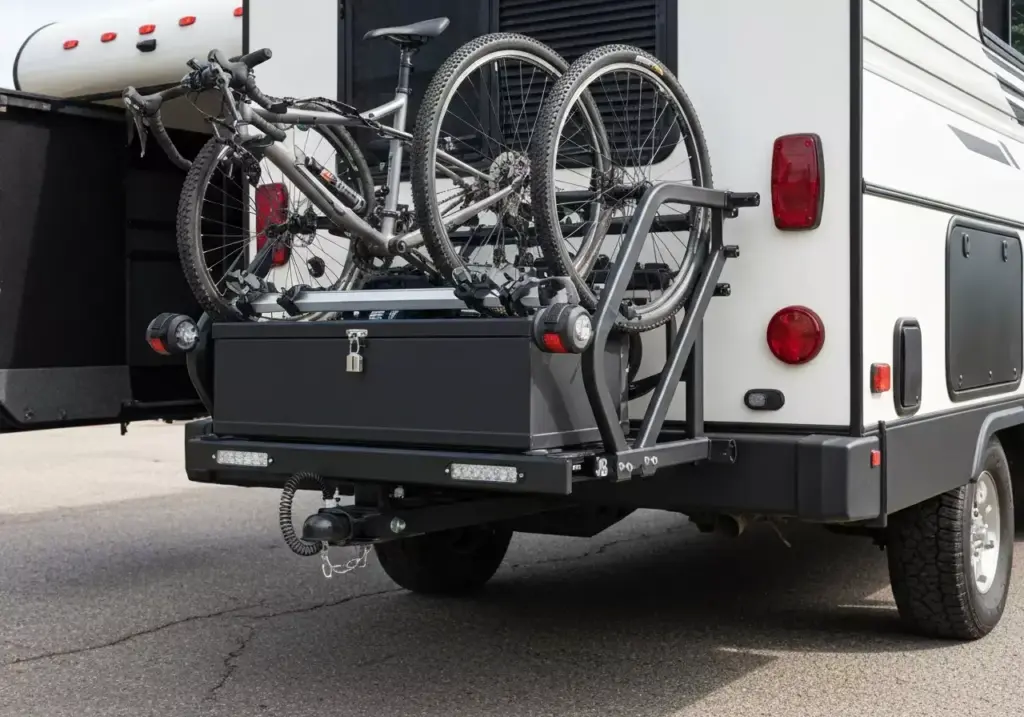
Time Required: 3-4 hours | Difficulty: Beginner-Intermediate | Cost: $150-250
A rear platform system provides secure storage for bikes, kayaks, or bulky gear while maintaining easy access to the vehicle’s interior. This project maximizes your adventure gear capacity without compromising interior space.
Platform specifications:
- Heavy-duty steel construction rated for 200+ pounds
- Quick-release bike mounts for easy loading
- Lockable storage box for valuable items
- Integrated lighting for visibility and safety
- Swing-away design for rear door access
Mount the platform to the vehicle’s hitch receiver or rear attachment points. Include rubber padding to prevent scratches and vibration noise during travel.
Tools and Materials for Your Mini Camper DIY Weekend
Successfully completing these brilliant mini camper DIY projects requires having the right tools and materials readily available. Smart preparation prevents mid-project trips to the hardware store and ensures professional-quality results.
Essential Tool Kit
Power Tools:
- Cordless drill/driver with various bits
- Circular saw or jigsaw for cutting materials
- Oscillating multi-tool for precision cuts
- Angle grinder for metal work
Hand Tools:
- Measuring tape and level
- Socket set and screwdrivers
- Wire strippers and electrical tester
- Clamps and safety equipment
Material Shopping List
| Category | Items | Estimated Cost |
|---|---|---|
| Lumber | Plywood, 2x4s, trim pieces | $100-150 |
| Hardware | Screws, hinges, slides, brackets | $75-100 |
| Electrical | LED strips, switches, wire, connectors | $80-120 |
| Finishing | Stain, paint, sealants, adhesives | $50-75 |
Safety Considerations
Electrical work requires understanding your camper’s power systems and local codes. Structural modifications should never compromise the vehicle’s integrity or safety systems. When in doubt, consult professionals for guidance on complex installations.
Important: 🔧 Always disconnect battery power before beginning electrical work and use appropriate personal protective equipment throughout all projects.
Maximizing Your Weekend Project Success
The difference between a frustrating DIY experience and a rewarding weekend lies in proper planning and realistic expectations. These strategies ensure your mini camper DIY projects proceed smoothly and deliver professional-quality results.
Project Planning Strategy
Friday evening preparation:
- Inventory all materials and tools
- Review instruction videos and tutorials
- Prepare workspace with adequate lighting
- Check weather forecast for outdoor work
Saturday execution:
- Start early to maximize daylight hours
- Complete one project before beginning another
- Document progress with photos for reference
- Test all systems before calling projects complete
Sunday finishing:
- Apply final touches and cleanup
- Conduct thorough testing of all modifications
- Create maintenance schedule for new installations
- Plan next weekend’s projects
Common Pitfalls to Avoid
Measurement errors account for most DIY project failures. Measure twice, cut once remains the golden rule for successful modifications. Rushing installations often leads to poor-quality results that require expensive corrections later.
Electrical mistakes can damage expensive components or create safety hazards. Use proper fuses and circuit protection for all new electrical installations. Test circuits with a multimeter before connecting expensive devices.
Budget Management Tips
Prioritize projects by impact and difficulty level. Start with simple modifications that build confidence before tackling complex installations. Buy quality materials for structural components but consider budget options for decorative elements.
Shop sales and clearance sections for significant savings on materials. Consider used or surplus materials for practice projects before working on your actual camper.
Maintenance and Long-Term Care
Your weekend DIY projects require ongoing maintenance to ensure longevity and continued performance. Developing a maintenance routine prevents small issues from becoming expensive problems down the road.
Monthly Inspection Checklist
Electrical systems:
- ✅ Test all lights and switches
- ✅ Check battery connections for corrosion
- ✅ Monitor solar panel output and cleanliness
- ✅ Inspect wiring for damage or wear
Mechanical components:
- ✅ Lubricate hinges and moving parts
- ✅ Tighten loose fasteners from road vibration
- ✅ Check weatherseals for gaps or damage
- ✅ Test slide-out mechanisms for smooth operation
Seasonal Maintenance Tasks
Spring preparation:
- Deep clean all storage compartments
- Test water systems after winter storage
- Inspect roof mounts for winter damage
- Update emergency supplies and first aid kits
Fall winterization:
- Protect water systems from freezing
- Clean and store seasonal equipment
- Apply protective coatings to exposed metal
- Document lessons learned for next season’s improvements
Conclusion
These 8 brilliant mini camper DIY projects you can tackle this weekend represent just the beginning of your customization journey. Each modification enhances your camping experience while building valuable skills and confidence for future projects. The satisfaction of creating custom solutions perfectly tailored to your needs far exceeds the monetary savings, though those are substantial too.
Start small with projects matching your current skill level, then gradually tackle more complex modifications as your abilities grow. Document your successes and learn from any setbacks – both contribute to your development as a capable DIY enthusiast.
Take action this weekend: Choose one project that excites you most and gather the necessary materials. Your future camping self will thank you for the comfort, convenience, and capability these modifications provide. Remember, every expert was once a beginner, and every complex project started with a single cut, connection, or installation.
The open road awaits, and your newly enhanced mini camper will make every mile more enjoyable. Happy building, and even happier camping! 🏕️