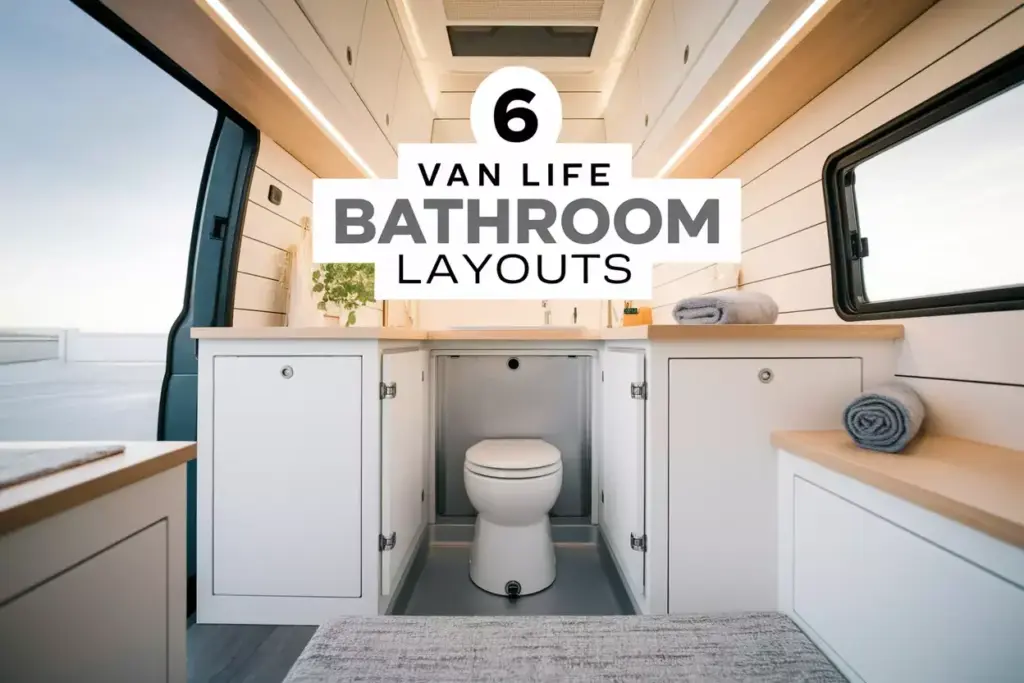
6 Van Life Interior Layouts With a Bathroom (Yes, It’s Possible!)
Picture this: you’re parked beside a pristine mountain lake, watching the sunrise paint the sky in brilliant oranges and pinks. The difference between your van life experience and camping? You can brush your teeth, take a hot shower, and use a real toilet without hiking to a distant campground facility. 6 Van Life Interior Layouts With a Bathroom (Yes, It’s Possible!) proves that comfort and adventure can coexist in even the most compact mobile homes.
Many aspiring van lifers assume that bathroom facilities are impossible to include in their build due to space constraints. This misconception keeps countless people from pursuing their nomadic dreams. The reality is that clever design, smart product choices, and strategic layout planning can create functional bathroom spaces in vans ranging from compact cargo models to spacious Class B motorhomes.
Key Takeaways
- Wet baths maximize space efficiency by combining shower and toilet areas in as little as 15 square feet
- Cassette toilets and composting systems eliminate the need for complex plumbing and black water tanks
- Fold-down fixtures and multi-purpose elements can double bathroom space functionality when not in use
- Proper ventilation and waterproofing are critical for preventing moisture damage and maintaining air quality
- Budget ranges vary dramatically from $2,000 DIY builds to $15,000+ luxury bathroom installations
Understanding Van Bathroom Basics
Space Requirements and Dimensions
Van bathrooms typically require between 15-35 square feet depending on the layout style and van size. The minimum functional bathroom measures approximately 24 inches wide by 30 inches deep, while more spacious designs can accommodate 36 inches by 48 inches or larger.
Standard Van Interior Dimensions:
- Cargo Van (Transit 150): 72″ width x 72″ height
- Extended Van (Sprinter 170): 70″ width x 76″ height
- High-Top Van (ProMaster 159): 74″ width x 76″ height
Essential Bathroom Components
Every van bathroom requires four core elements:
- Toilet System – Cassette, composting, or traditional flush
- Water Supply – Fresh water tank and pump system
- Waste Management – Gray water tank and ventilation
- Shower Solution – Wet bath, separate stall, or external setup
Plumbing and Electrical Considerations
Van bathroom installations require careful planning for:
- 12V water pumps and pressure systems
- Gray water tank placement and drainage
- Ventilation fans for moisture control
- GFCI electrical outlets for safety
- Hot water systems (tankless or small tank heaters)
6 Van Life Interior Layouts With a Bathroom: Detailed Breakdown
1. The Compact Wet Bath Layout
Best for: Solo travelers or couples prioritizing simplicity
Space Required: 15-20 square feet
Budget Range: $2,000-$4,500
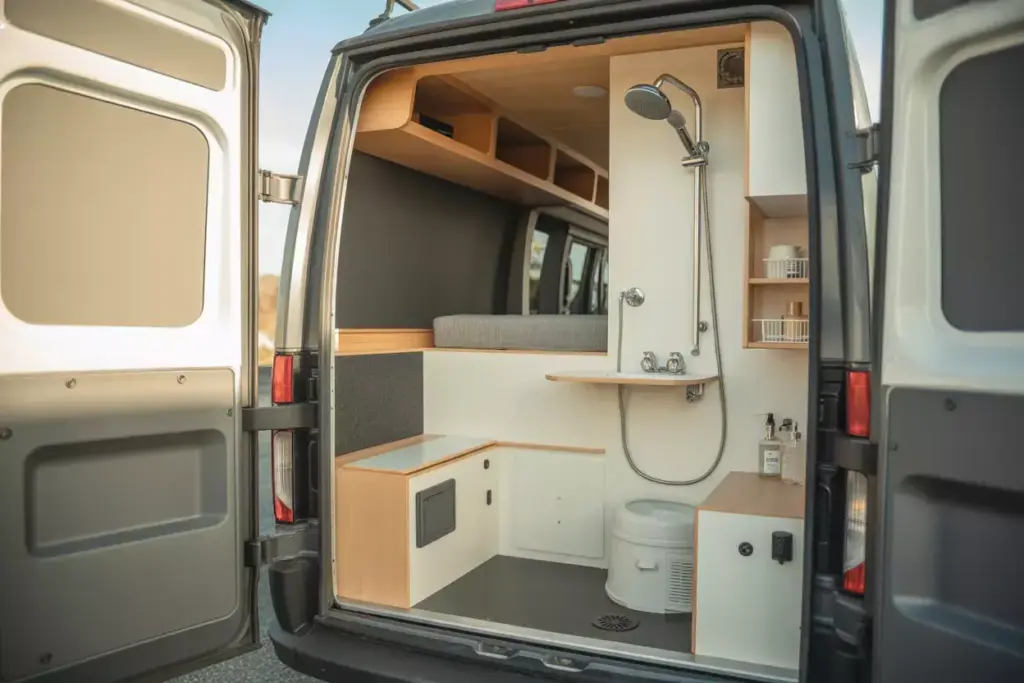
The wet bath design combines the toilet and shower into one waterproof compartment. This European-inspired approach maximizes every inch of available space by eliminating the need for separate shower walls or doors.
Key Features:
- Cassette toilet mounted against the back wall
- Overhead shower head with handheld attachment
- Fold-down sink that stores against the wall
- Full waterproof walls with marine-grade materials
- Floor drain connected to gray water system
The wet bath layout works exceptionally well in Sprinter 144″ wheelbase vans where rear space is limited. Installation involves creating a completely sealed environment using FRP (Fiberglass Reinforced Plastic) panels or marine-grade vinyl walls.
Pros:
✅ Maximum space efficiency
✅ Lower installation costs
✅ Easy to clean and maintain
✅ Suitable for most van sizes
Cons:
❌ Everything gets wet during showers
❌ Limited storage space
❌ Requires good ventilation
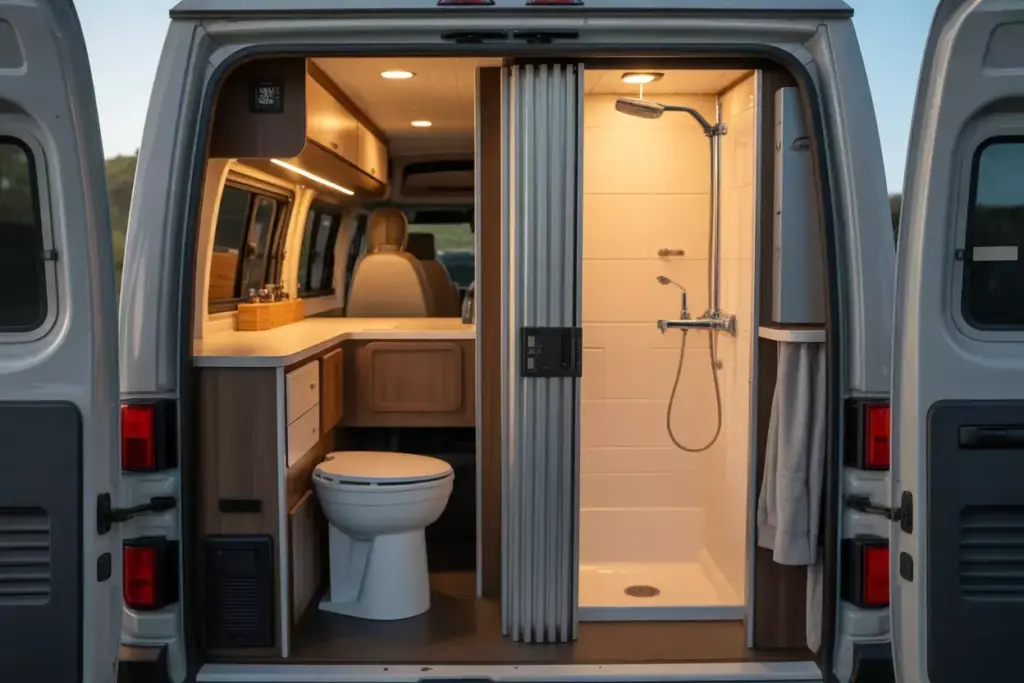
2. The Split Bathroom Layout
Best for: Full-time van lifers wanting separate facilities
Space Required: 25-30 square feet
Budget Range: $4,000-$7,500
This layout divides bathroom functions into two distinct areas: a toilet room and a separate shower stall. The design provides privacy and prevents the entire bathroom from getting wet during shower use.
Configuration Options:
- Toilet compartment: 24″ x 30″ with pocket door
- Shower stall: 30″ x 30″ with bi-fold door
- Shared sink area between both spaces
- Storage cabinet above toilet area
The split layout requires careful planning to ensure adequate headroom and ventilation in both compartments. Pocket doors or accordion-style dividers help maximize usable floor space.
Installation Highlights:
- Separate ventilation fans for each area
- Individual lighting systems with LED fixtures
- Dedicated storage for toiletries and cleaning supplies
- Non-slip flooring throughout both sections
Pros:
✅ Separate wet and dry areas
✅ Increased privacy
✅ Better organization
✅ Higher resale value
Cons:
❌ Requires larger van
❌ Higher installation costs
❌ More complex plumbing
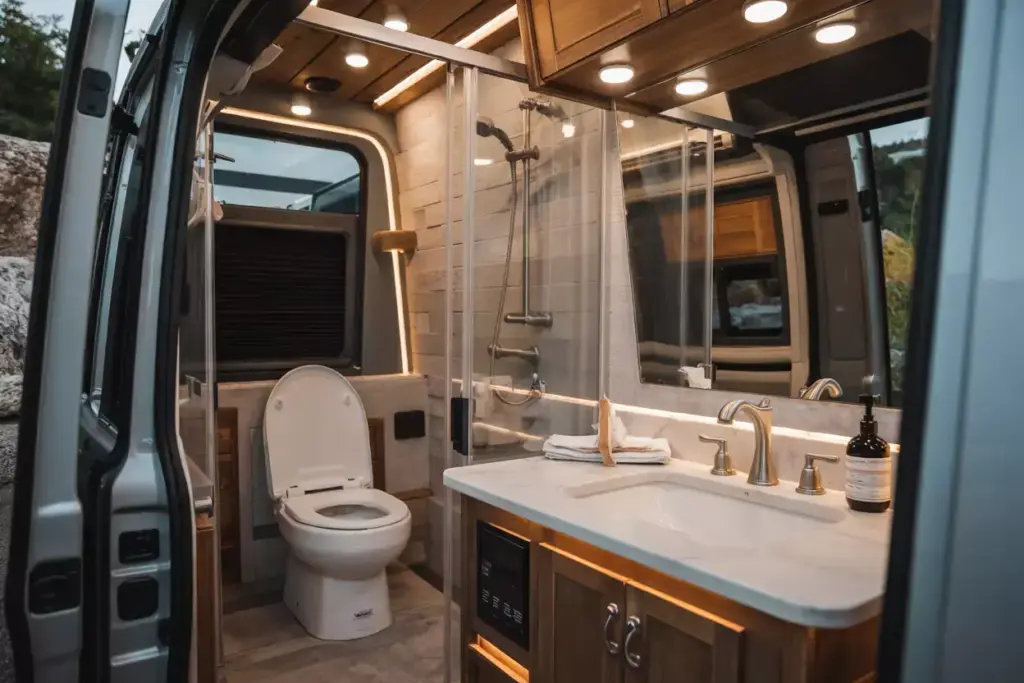
3. The Luxury Spa Layout
Best for: Van lifers prioritizing comfort and aesthetics
Space Required: 30-40 square feet
Budget Range: $8,000-$15,000+
The luxury spa layout transforms van bathrooms into resort-quality spaces with premium fixtures, materials, and amenities. This design works best in Class B motorhomes or extended wheelbase vans with ample interior height.
Premium Features:
- Porcelain toilet with residential-style seat
- Glass shower enclosure with rainfall shower head
- Solid surface countertops (Corian or quartz)
- Undermount sink with brushed nickel fixtures
- Heated flooring systems for cold weather comfort
Material Upgrades:
- Natural stone tiles or luxury vinyl plank flooring
- Recessed LED lighting with dimmer controls
- Exhaust fan with humidity sensor
- Built-in storage niches with waterproof backing
The luxury approach requires professional installation to ensure proper waterproofing and electrical work meets safety standards.
Pros:
✅ Residential-quality experience
✅ Impressive aesthetics
✅ High-end materials
✅ Excellent resale value
Cons:
❌ Significant investment required
❌ Professional installation needed
❌ Limited to larger vans
❌ Higher maintenance requirements
4. The Modular Flex Layout

Best for: Multi-purpose van users and weekend warriors
Space Required: 20-25 square feet
Budget Range: $3,000-$6,000
The modular flex layout uses convertible components that serve multiple functions throughout the day. This innovative approach allows the bathroom space to transform into storage, workspace, or additional living area when not in use.
Convertible Elements:
- Flip-up toilet that stores in wall cavity
- Removable shower pan that doubles as floor space
- Fold-down sink and counter for workspace use
- Modular storage cubes that reconfigure as needed
Smart Design Solutions:
- Magnetic shower curtain system for quick setup/breakdown
- Portable gray water collection with easy dump access
- LED strip lighting that adjusts for different uses
- Ventilation system with variable speed controls
This layout appeals to van users who prioritize flexibility over permanent fixtures. The system works particularly well for people who frequently camp in areas with existing bathroom facilities.
Pros:
✅ Maximum space flexibility
✅ Lower weight impact
✅ Customizable configuration
✅ Cost-effective solution
Cons:
❌ Setup/breakdown time required
❌ Less convenient for daily use
❌ Potential for component wear
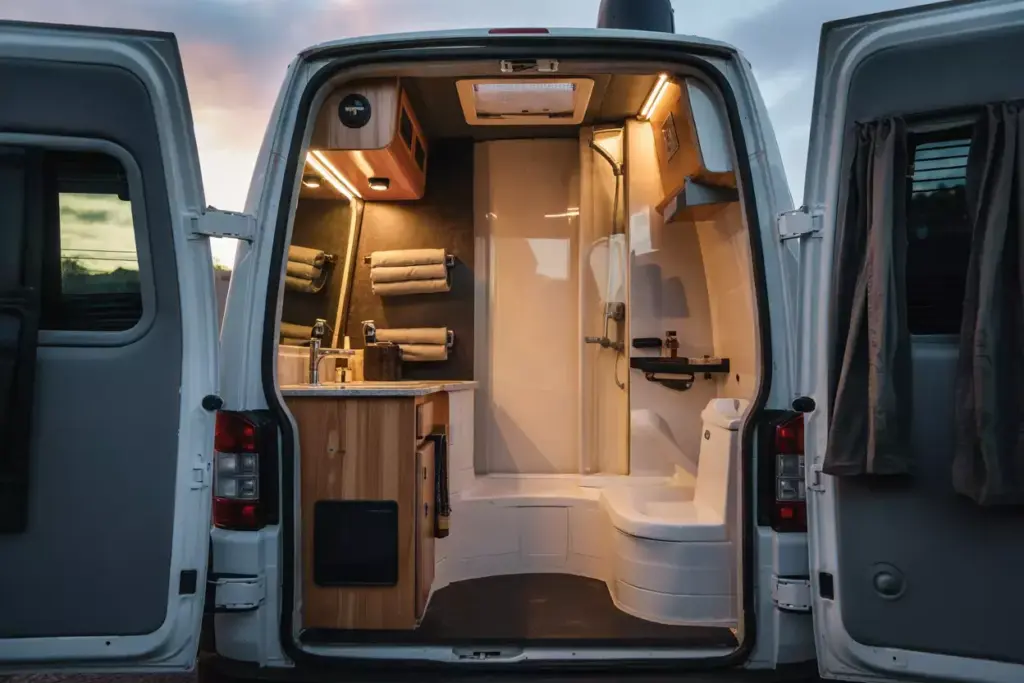
5. The Rear Corner Layout
Best for: Couples wanting privacy and efficient use of van corners
Space Required: 22-28 square feet
Budget Range: $3,500-$6,500
The rear corner layout maximizes awkward corner spaces that often go unused in van conversions. By positioning the bathroom in the back corner, this design creates a private retreat while maintaining open living areas.
Layout Characteristics:
- Diagonal entry door to maximize interior space
- Corner-mounted toilet for efficient placement
- Curved shower walls following van contours
- Overhead storage utilizing full height potential
Space Optimization:
- Triangular floor plan fits naturally in van corners
- Custom-built fixtures designed for angled walls
- Skylight or roof vent for natural light and ventilation
- Under-floor storage for bathroom supplies
The corner approach requires custom fabrication for most components but results in a unique, space-efficient bathroom that doesn’t interfere with main living areas.
Pros:
✅ Utilizes otherwise wasted space
✅ Maintains open living area
✅ Private location
✅ Custom design possibilities
Cons:
❌ Requires custom fabrication
❌ Limited to specific van layouts
❌ Potential access challenges
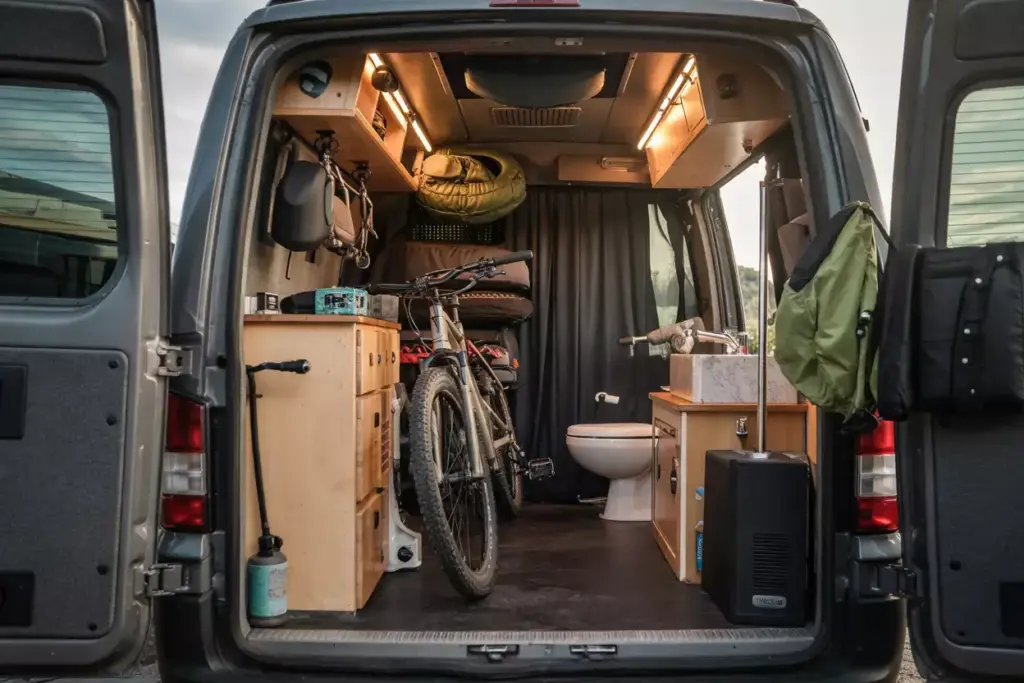
6. The Garage Combo Layout
Best for: Adventure enthusiasts with gear storage needs
Space Required: 35-45 square feet
Budget Range: $4,500-$8,500
The garage combo layout integrates bathroom facilities with gear storage areas, creating a multi-functional space perfect for outdoor enthusiasts who need to store bikes, kayaks, or climbing equipment.
Dual-Purpose Design:
- Bathroom area with full facilities
- Gear storage with tie-down points
- Wash station for cleaning equipment
- Ventilation system for drying wet gear
Practical Features:
- Waterproof flooring throughout entire area
- Drainage system for washing bikes or gear
- Adjustable storage racks that accommodate different equipment
- Exterior access door for easy loading/unloading
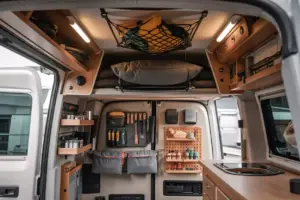
Organization Systems:
- Ceiling-mounted storage for lightweight items
- Wall-mounted hooks for hanging gear
- Removable floor mats for easy cleaning
- Separate ventilation zones for bathroom and storage
This layout works best in extended wheelbase vans with rear door access and sufficient interior height for both bathroom use and gear storage.
Pros:
✅ Combines essential functions
✅ Excellent for outdoor activities
✅ Efficient use of rear space
✅ Easy gear cleaning/maintenance
Cons:
❌ Requires larger van
❌ Potential odor mixing
❌ Complex ventilation needs
Choosing the Right Van Bathroom Layout for Your Needs
Lifestyle Assessment Questions
Before selecting from these 6 Van Life Interior Layouts With a Bathroom, consider these critical factors:
Travel Style:
- How many people will regularly use the van?
- Do you plan weekend trips or full-time living?
- What’s your tolerance for setup/breakdown routines?
- How important is privacy versus space efficiency?
Budget Considerations:
- What’s your total conversion budget?
- Are you comfortable with DIY installation?
- Do you need professional plumbing work?
- What ongoing maintenance costs are acceptable?
Van Size Limitations:
- What’s your maximum vehicle length for parking?
- Do you need stealth camping capabilities?
- How important is driving maneuverability?
- What interior height do you require?
Decision Matrix
| Layout Type | Space Needed | Budget Range | Skill Level | Best For |
|---|---|---|---|---|
| Compact Wet Bath | 15-20 sq ft | $2,000-$4,500 | Beginner | Solo travelers |
| Split Bathroom | 25-30 sq ft | $4,000-$7,500 | Intermediate | Full-timers |
| Luxury Spa | 30-40 sq ft | $8,000-$15,000+ | Professional | Comfort seekers |
| Modular Flex | 20-25 sq ft | $3,000-$6,000 | Intermediate | Weekend warriors |
| Rear Corner | 22-28 sq ft | $3,500-$6,500 | Advanced | Privacy lovers |
| Garage Combo | 35-45 sq ft | $4,500-$8,500 | Intermediate | Gear haulers |
Installation Tips and Best Practices
Ventilation Requirements
Proper ventilation prevents moisture buildup, odor accumulation, and structural damage to your van. Every bathroom layout requires:
Exhaust Fans:
- Minimum 50 CFM capacity for small bathrooms
- Variable speed controls for noise management
- Humidity sensors for automatic operation
- Rain covers for weather protection
Air Intake:
- Passive vents near floor level
- Louvered doors for air circulation
- Gap under bathroom door (minimum 1/2 inch)
Waterproofing Essentials
Wall Protection:
- FRP panels or marine-grade vinyl
- Sealed seams with marine sealant
- Vapor barriers behind wall coverings
- Mold-resistant materials throughout
Floor Systems:
- Sloped flooring toward drain (minimum 1/4″ per foot)
- Waterproof membrane under finish flooring
- Sealed penetrations for plumbing
- Non-slip surface treatments
Common Installation Mistakes
❌ Inadequate ventilation planning
❌ Poor waterproofing at seams
❌ Insufficient floor slope for drainage
❌ Undersized gray water tanks
❌ Improper electrical outlet placement
❌ Inadequate structural support for fixtures
Cost Breakdown and Budget Planning
DIY vs Professional Installation
DIY Installation Savings:
- Labor costs: $2,000-$5,000 saved
- Timeline flexibility: Work at your own pace
- Learning experience: Valuable skills development
- Customization freedom: Unlimited design changes
Professional Installation Benefits:
- Warranty coverage: 1-2 years typical
- Code compliance: Meets safety standards
- Faster completion: 1-2 weeks vs months
- Quality assurance: Experienced craftsmanship
Component Cost Ranges
Basic Components:
- Cassette toilet: $300-$800
- Composting toilet: $500-$1,200
- Water pump: $100-$300
- Gray water tank: $150-$400
- Ventilation fan: $200-$500
Premium Upgrades:
- Porcelain toilet: $400-$1,000
- Tankless water heater: $300-$800
- Solid surface counters: $200-$600
- Glass shower doors: $300-$800
- Heated flooring: $400-$1,000
Maintenance and Long-term Considerations
Regular Maintenance Tasks
Weekly:
- Empty cassette toilet or composting chamber
- Clean shower walls and fixtures
- Check ventilation fan operation
- Inspect seals and gaskets
Monthly:
- Deep clean gray water tank
- Test water pump pressure
- Inspect plumbing connections
- Clean exhaust fan blades
Seasonally:
- Winterize plumbing systems
- Replace water filters
- Service toilet mechanisms
- Check structural integrity
Troubleshooting Common Issues
Water Pressure Problems:
- Check pump connections
- Inspect accumulator tank
- Clean filter screens
- Test electrical connections
Drainage Issues:
- Clear gray water tank sensors
- Check drain line slopes
- Inspect tank vent operation
- Clean drain screens
Ventilation Problems:
- Replace fan motor if noisy
- Clean vent covers
- Check electrical connections
- Inspect ductwork for obstructions
Conclusion
The 6 Van Life Interior Layouts With a Bathroom (Yes, It’s Possible!) prove that mobile living doesn’t require sacrificing basic comfort and hygiene. From compact wet baths perfect for solo adventurers to luxury spa layouts rivaling high-end hotels, there’s a bathroom solution for every van life style and budget.
Success with van bathroom installations depends on honest assessment of your needs, realistic budget planning, and attention to critical details like ventilation and waterproofing. Whether you choose a simple $2,000 wet bath or invest in a $15,000 luxury setup, proper planning and quality installation ensure years of reliable service.
Your Next Steps:
- Measure your available space and determine maximum bathroom dimensions
- Calculate your total budget including installation, materials, and contingency funds
- Research local codes and requirements for your intended travel areas
- Connect with other van lifers who have similar layouts for real-world feedback
- Start with basic components and plan upgrade paths for future improvements
The freedom to travel anywhere while maintaining personal comfort and hygiene makes van bathroom installations one of the most valuable investments in any conversion project. With careful planning and quality execution, your mobile bathroom will provide years of reliable service and significantly enhance your van life experience.